> For the complete documentation index, see [llms.txt](https://docs.umbraco.com/llms.txt). Markdown versions of documentation pages are available by appending `.md` to page URLs; this page is available as [Markdown](https://docs.umbraco.com/umbraco-cms/extend-your-project/tutorials/creating-a-property-editor.md).
# Creating a Property Editor
A guide to creating a property editor in Umbraco.
## Overview
This guide covers setting up a Property Editor and registering it as a Data Type in Umbraco.
The steps covered in part one are:
* [Setting up a Plugin](#setting-up-a-plugin)
* [Creating a Web Component](#creating-a-web-component)
* [Registering the Data Type in Umbraco](#registering-the-data-type-in-umbraco)
* [Adding styling and setting up events in Web Components](#adding-styling-and-setting-up-events-in-the-web-components)
* [Set up Event Logic](#set-up-event-logic)
This tutorial uses TypeScript and Lit. Make sure your package is already [set up before continuing](/umbraco-cms/extend-your-project/backoffice-extensions/development-flow/vite-package-setup.md).
To set up an extension using TypeScript and Lit, see the [Creating your first extension](/umbraco-cms/extend-your-project/tutorials/creating-your-first-extension.md) article.
### Resources
This tutorial will not go in-depth on how TypeScript and Lit work. To learn about TypeScript and Lit, you can find their documentation below:
* [TypeScript documentation](https://www.typescriptlang.org/docs/)
* [Lit documentation](https://lit.dev/docs/)
### The End Result
By the end of this tutorial, you will have a Suggestions Data Type, registered in the backoffice, and assigned to a Document Type. This Data Type can create and suggest values.
{% hint style="info" %}
At the end of the final step, a dropdown displaying the entire `suggestions-property-editor-ui.element.ts` file is available.
{% endhint %}
## Setting up a plugin
1. Follow the [Vite Package Setup](/umbraco-cms/extend-your-project/backoffice-extensions/development-flow/vite-package-setup.md) and use `suggestions` as the project name instead of `client`. Create the project in the root of your Umbraco project, next to the `App_Plugins` folder.
2. Create a manifest file to define and configure the property editor using either JSON or TypeScript.
{% tabs %}
{% tab title="JSON Manifest" %}
Create a manifest file named `umbraco-package.json` in the `public` folder of the `suggestions` project. Vite copies it to `App_Plugins/suggestions` when building.
{% code title="umbraco-package.json" %}
```json
{
"$schema": "../../umbraco-package-schema.json",
"name": "My.AwesomePackage",
"version": "0.1.0",
"extensions": [
{
"type": "propertyEditorUi",
"alias": "My.PropertyEditorUi.Suggestions",
"name": "My Suggestions Property Editor UI",
"element": "/App_Plugins/suggestions/suggestions.js",
"elementName": "my-suggestions-property-editor-ui",
"meta": {
"label": "Suggestions",
"icon": "icon-list",
"group": "common",
"propertyEditorSchemaAlias": "Umbraco.Plain.String"
}
}
]
}
```
{% endcode %}
{% endtab %}
{% tab title="TypeScript Manifest" %}
Extension authors define the property editor UI manifest, then register it dynamically during runtime using a [Backoffice Entry Point](/umbraco-cms/extend-your-project/backoffice-extensions/extending-overview/extension-types/backoffice-entry-point.md) extension.
Create a manifest file named `manifests.ts` in the `src` folder and add the following code:
{% code title="manifests.ts" %}
```typescript
import type { ManifestPropertyEditorUi } from '@umbraco-cms/backoffice/property-editor';
export const propertyEditorUiManifest: ManifestPropertyEditorUi[] = [
{
type: 'propertyEditorUi',
alias: 'My.PropertyEditorUi.Suggestions',
name: 'My Suggestions Property Editor UI',
element: () => import('./suggestions-property-editor-ui.element.js'),
elementName: 'my-suggestions-property-editor-ui',
meta: {
label: 'Suggestions',
icon: 'icon-list',
group: 'common',
propertyEditorSchemaAlias: 'Umbraco.Plain.String'
}
}
];
```
{% endcode %}
Create an entry point file named `entrypoint.ts` in the `src` folder to register the manifest:
{% code title="entrypoint.ts" %}
```typescript
import type { UmbEntryPointOnInit } from '@umbraco-cms/backoffice/extension-api';
import { propertyEditorUiManifest } from './manifests.js';
export const onInit: UmbEntryPointOnInit = (_host, extensionRegistry) => {
extensionRegistry.registerMany(propertyEditorUiManifest);
};
```
{% endcode %}
Umbraco still needs an `umbraco-package.json` file to load the entry point. Create it in the `public` folder:
{% code title="umbraco-package.json" %}
```json
{
"$schema": "../../umbraco-package-schema.json",
"name": "My.AwesomePackage",
"version": "0.1.0",
"extensions": [
{
"type": "backofficeEntryPoint",
"alias": "My.EntryPoint.Suggestions",
"name": "My Suggestions Entry Point",
"js": "/App_Plugins/suggestions/suggestions.js"
}
]
}
```
{% endcode %}
{% endtab %}
{% endtabs %}
{% hint style="info" %}
The `umbraco-package.json` files are cached by the server. When creating new `umbraco-package.json` files, it might take a few seconds before those are loaded into the server cache.
{% endhint %}
{% hint style="info" %}
It is important to select the right `propertyEditorSchemaAlias` as it affects how the Property Editor data is made available when rendering the website.
In this example, `Umbraco.Plain.String` is selected because a string value is expected. For more options, see the [default Property Editor Schema aliases](/umbraco-cms/extend-your-project/tutorials/creating-a-property-editor/adding-server-side-validation/default-property-editor-schema-aliases.md) article.
{% endhint %}
## Creating a Web Component
Create the web component for the property editor.
1. Create a file in the `src` folder with the name `suggestions-property-editor-ui.element.ts`
2. In this new file, add the following code:
{% code title="suggestions-property-editor-ui.element.ts" lineNumbers="true" %}
```typescript
import { LitElement, html, customElement, property } from '@umbraco-cms/backoffice/external/lit';
import type { UmbPropertyEditorUiElement } from '@umbraco-cms/backoffice/property-editor';
@customElement('my-suggestions-property-editor-ui')
export default class MySuggestionsPropertyEditorUIElement extends LitElement implements UmbPropertyEditorUiElement {
@property({ type: String })
public value = '';
override render() {
return html`I'm a property editor!`;
}
}
declare global {
interface HTMLElementTagNameMap {
'my-suggestions-property-editor-ui': MySuggestionsPropertyEditorUIElement;
}
}
```
{% endcode %}
3. Replace the contents of the `vite.config.ts` file with the following code:
{% code title="vite.config.ts" lineNumbers="true" %}
```typescript
import { defineConfig } from "vite";
export default defineConfig({
build: {
lib: {
entry: "src/suggestions-property-editor-ui.element.ts", // your web component source file
formats: ["es"],
fileName: "suggestions",
},
outDir: "../App_Plugins/suggestions", // the compiled files land in the site's `App_Plugins` folder.
emptyOutDir: true,
sourcemap: true,
rollupOptions: {
external: [/^@umbraco-cms\/.*/], // ignore the Umbraco Backoffice package in the build
},
},
base: "/App_Plugins/suggestions/", // the base path of the app in the browser (used for assets)
});
```
{% endcode %}
{% hint style="info" %}
If you used the TypeScript manifest, set `entry` to `src/entrypoint.ts` instead. Vite bundles the element automatically because the manifest imports it.
{% endhint %}
The basic parts of the editor are now in place:
* The package manifest, telling Umbraco what to load
* The web component for the editor
4. Run the build. In your terminal, go to the `suggestions` folder and run:
```bash
npm run build
```
5. Reload the backoffice.
## Registering the Data Type in Umbraco
1. Add the newly added property editor "Suggestions" in the Document Type and save it.

The property can now be edited using the new Property Editor.
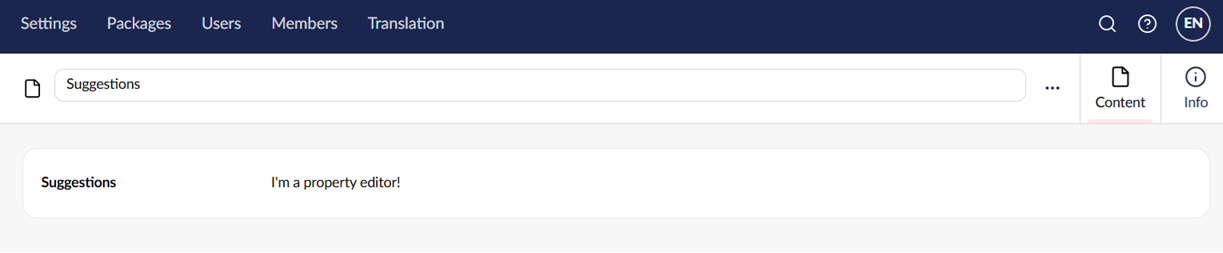
2. Check out the content where you will see the property editor that looks like this:
The Suggestions property editor in the content editor.
## Adding styling and setting up events in the Web Components
Start by creating an input field and some buttons to style and hook up to events.
1. Update the render method to include some input fields and buttons in the `suggestions-property-editor-ui.element.ts` file:
{% code title="suggestions-property-editor-ui.element.ts" %}
```typescript
override render() {
return html`
Give me suggestions!
Trim text
`;
}
```
{% endcode %}
{% hint style="info" %}
The Umbraco UI library is already a part of the backoffice, which means it can be used immediately.
{% endhint %}
2. Add some styling. Update the import from lit to include `css` and `UmbTextStyles`:
{% code title="suggestions-property-editor-ui.element.ts" %}
```typescript
import { LitElement, html, css, customElement, property } from '@umbraco-cms/backoffice/external/lit';
import { UmbTextStyles } from '@umbraco-cms/backoffice/style';
```
{% endcode %}
3. Add the CSS:
{% code title="suggestions-property-editor-ui.element.ts" %}
```typescript
render() {
...
}
static override readonly styles = [
UmbTextStyles,
css`
#wrapper {
margin-top: 10px;
display: flex;
gap: 10px;
}
.element {
width: 100%;
}
`,
];
```
{% endcode %}
See the entire `suggestions-property-editor-ui.element.ts` file
{% code title="suggestions-property-editor-ui.element.ts" lineNumbers="true" %}
```typescript
import { LitElement, html, css, customElement, property } from '@umbraco-cms/backoffice/external/lit';
import type { UmbPropertyEditorUiElement } from '@umbraco-cms/backoffice/property-editor';
import { UmbTextStyles } from '@umbraco-cms/backoffice/style';
@customElement('my-suggestions-property-editor-ui')
export default class MySuggestionsPropertyEditorUIElement extends LitElement implements UmbPropertyEditorUiElement {
@property({ type: String })
public value = '';
override render() {
return html`
Give me suggestions!
Trim text
`;
}
static override readonly styles = [
UmbTextStyles,
css`
#wrapper {
margin-top: 10px;
display: flex;
gap: 10px;
}
.element {
width: 100%;
}
`,
];
}
declare global {
interface HTMLElementTagNameMap {
'my-suggestions-property-editor-ui': MySuggestionsPropertyEditorUIElement;
}
}
```
{% endcode %}
4. Run the build. In your terminal, go to the `suggestions` folder and run:
```bash
npm run build
```
5. Reload the backoffice.
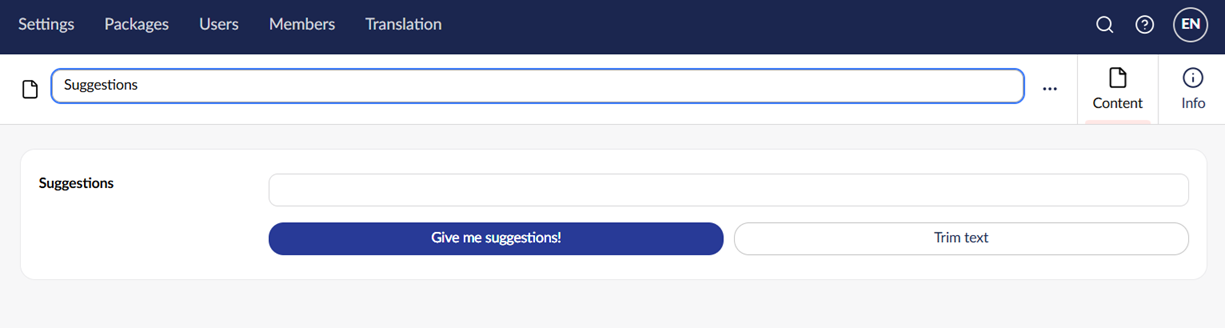
It should now look something like this:
The property editor after adding the input field and buttons.
Next, set up the event logic.
## Set up Event Logic
### Set up Input Field
Start with the input field. When typing something in the input field, the property editor's value should change to the input field's current value.
Dispatch a `change` event using one of two approaches:
* Using `new CustomEvent('change')` or
* Using `new UmbChangeEvent()` which is recommended as you can leverage the core class
1. Add the import so the event can be used:
{% code title="suggestions-property-editor-ui.element.ts" %}
```typescript
import { UmbChangeEvent } from '@umbraco-cms/backoffice/event';
```
{% endcode %}
2. Add the event to the property editor:
{% code title="suggestions-property-editor-ui.element.ts" %}
```typescript
#onInput(e: InputEvent) {
this.value = (e.target as HTMLInputElement).value;
this.#dispatchChangeEvent();
}
#dispatchChangeEvent() {
this.dispatchEvent(new UmbChangeEvent());
}
override render() {
return html`
....
}
```
{% endcode %}
Look at the suggestions button next.
### Setup Suggestions Button
* When pressing the suggestion button, the text should update to the suggestion received. Similar to how the value of the property editor changes when writing in the input field.
* The value should also change when pressing the suggestion button.
1. Update the import for Lit:
{% code title="suggestions-property-editor-ui.element.ts" %}
```typescript
import { LitElement, html, css, customElement, property, state } from '@umbraco-cms/backoffice/external/lit';
```
{% endcode %}
2. Add suggestions to the property editor:
{% code title="suggestions-property-editor-ui.element.ts" %}
```typescript
@state()
private _suggestions = [
'You should take a break',
'I suggest that you visit the Eiffel Tower',
'How about starting a book club today or this week?',
'Are you hungry?',
];
override render() {...}
```
{% endcode %}
3. Update the suggestion button in the render method to call a `onSuggestion` method when pressing the button:
{% code title="suggestions-property-editor-ui.element.ts" %}
```typescript
#onSuggestion() {
const randomIndex = (this._suggestions.length * Math.random()) | 0;
this.value = this._suggestions[randomIndex];
this.#dispatchChangeEvent();
}
override render() {
return html`
...
Give me suggestions!
...
`;
}
```
{% endcode %}
See the entire file: suggestions-property-editor-ui.element.ts
{% code title="suggestions-property-editor-ui.element.ts" overflow="wrap" lineNumbers="true" %}
```typescript
import { UmbChangeEvent } from '@umbraco-cms/backoffice/event';
import { css, customElement, html, LitElement, property, state } from '@umbraco-cms/backoffice/external/lit';
import type { UmbPropertyEditorUiElement } from '@umbraco-cms/backoffice/property-editor';
import { UmbTextStyles } from '@umbraco-cms/backoffice/style';
@customElement('my-suggestions-property-editor-ui')
export default class MySuggestionsPropertyEditorUIElement extends LitElement implements UmbPropertyEditorUiElement {
@property({ type: String })
public value = '';
@state()
private _suggestions = [
'You should take a break',
'I suggest that you visit the Eiffel Tower',
'How about starting a book club today or this week?',
'Are you hungry?',
];
#onInput(e: InputEvent) {
this.value = (e.target as HTMLInputElement).value;
this.#dispatchChangeEvent();
}
#onSuggestion() {
const randomIndex = (this._suggestions.length * Math.random()) | 0;
this.value = this._suggestions[randomIndex];
this.#dispatchChangeEvent();
}
#dispatchChangeEvent() {
this.dispatchEvent(new UmbChangeEvent());
}
override render() {
return html`
Give me suggestions!
Trim text
`;
}
static override readonly styles = [
UmbTextStyles,
css`
#wrapper {
margin-top: 10px;
display: flex;
gap: 10px;
}
.element {
width: 100%;
}
`,
];
}
declare global {
interface HTMLElementTagNameMap {
'my-suggestions-property-editor-ui': MySuggestionsPropertyEditorUIElement;
}
}
```
{% endcode %}
4. Run the build. In your terminal, go to the `suggestions` folder and run:
```bash
npm run build
```
5. Clear your cache and reload the backoffice.
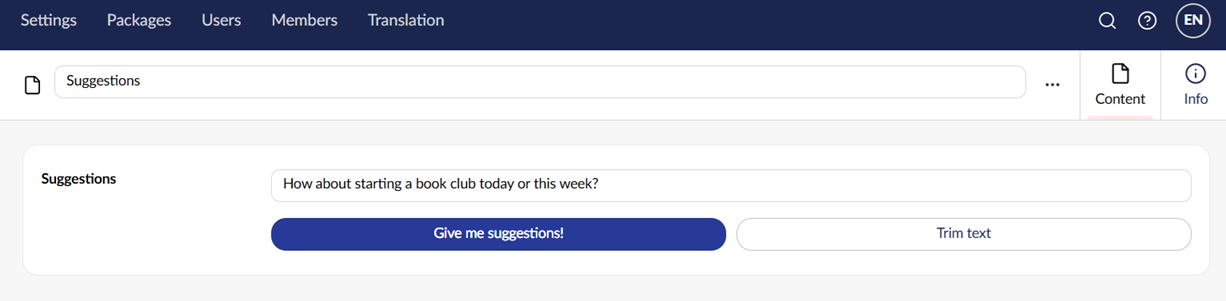
6. Click on the **Give me suggestions** button to see the Suggestions Data Type in action.
The completed Suggestions property editor with event logic in place.
When saving or publishing, the value of the Data Type is automatically synced to the current content object and sent to the server.
To learn more, visit the [Property Editors](/umbraco-cms/extend-your-project/backoffice-extensions/property-editors/composition.md) page.
## Going further
The Suggestions Data Type is now set up and running. The next part covers adding configurations to the property editor.
---
# Agent Instructions
This documentation is published with GitBook. GitBook is the documentation platform designed so that both humans and AI agents can read, navigate, and reason over technical content effectively. Learn more at gitbook.com.
## Querying This Documentation
If you need additional information that is not directly available in this page, you can query the documentation by asking a question.
Perform an HTTP GET request on the following URL with the `ask` and `goal` query parameters:
```
GET https://docs.umbraco.com/umbraco-cms/extend-your-project/tutorials/creating-a-property-editor.md?ask=&goal=
```
`ask` is the immediate question: it should be specific, self-contained, and written in natural language.
`goal` is what the user is ultimately trying to achieve, the reason they need the answer. Sharing it helps GitBook give you a better, more relevant answer. A goal is most helpful when it describes the outcome the user wants rather than restating the question. For example, with `ask=how do I create an API token`, a goal like `automate deployments from our CI pipeline` lets GitBook tailor the answer to that use case.
The response will contain a direct answer to the question and relevant excerpts and sources from the documentation.
Use this mechanism when the answer is not explicitly present in the current page, you need clarification or additional context, or you want to retrieve related documentation sections.