# Umbraco Documentation

Examples, tutorials, references, and best practices—everything you need to build future-proof applications with Umbraco and it's available add-on products.

Whether you're using Umbraco CMS, Umbraco Cloud, or Umbraco Heartcore, the documentation has you covered for all your needs.

<table data-card-size="large" data-view="cards"><thead><tr><th></th><th></th><th></th><th data-hidden data-card-cover data-type="image">Cover image</th><th data-hidden data-card-target data-type="content-ref"></th></tr></thead><tbody><tr><td><strong>Umbraco CMS</strong></td><td>Everything you need to know when building your Umbraco website.</td><td></td><td><a href="/files/kZfWkwQCL2KT51S1cJw2">/files/kZfWkwQCL2KT51S1cJw2</a></td><td><a href="https://docs.umbraco.com/umbraco-cms">https://docs.umbraco.com/umbraco-cms</a></td></tr><tr><td><strong>Umbraco Cloud</strong></td><td>Learn how to get started with your Umbraco Cloud project.</td><td></td><td data-object-fit="contain"><a href="/files/NOgJItm4sx6nyuKadQda">/files/NOgJItm4sx6nyuKadQda</a></td><td><a href="https://docs.umbraco.com/umbraco-cloud">https://docs.umbraco.com/umbraco-cloud</a></td></tr></tbody></table>

{% hint style="info" %}
**Are you looking to get started?**

In the [Getting Started](/getting-started/managing-an-umbraco-project) section, you will find links to articles based on what you want to achieve with Umbraco.

Whether you're creating a website, setting up hosting, or customizing your Umbraco project, the **Getting Started** section has you covered. [Head over to the Getting Started section](/getting-started/managing-an-umbraco-project).

**Not sure which product is right for you?**

If you're unsure which product suits your needs, check out the [Exploring the Umbraco Products](/getting-started/exploring-the-umbraco-products) article.
{% endhint %}

## Composable & Headless

<table data-card-size="large" data-view="cards"><thead><tr><th></th><th></th><th data-hidden data-card-cover data-type="image">Cover image</th><th data-hidden data-card-target data-type="content-ref"></th></tr></thead><tbody><tr><td><strong>Umbraco Compose</strong></td><td>Explore how a scalable content orchestration layer unifies data across systems and delivers it through a headless API.</td><td><a href="/files/6lfN45K5iJxc3ekfnqEq">/files/6lfN45K5iJxc3ekfnqEq</a></td><td><a href="/spaces/trzaKUEixDATtGQPGwXB">/spaces/trzaKUEixDATtGQPGwXB</a></td></tr><tr><td><strong>Umbraco Heartcore</strong></td><td>Learn how to get the most out of your headless Umbraco solution.</td><td><a href="/files/mXbKieoE5nqLjPWILZ2f">/files/mXbKieoE5nqLjPWILZ2f</a></td><td><a href="/spaces/ad8WDpzCbd6plrNqe51p">/spaces/ad8WDpzCbd6plrNqe51p</a></td></tr></tbody></table>

## Digital Experience (DXP) Products

<table data-view="cards"><thead><tr><th></th><th></th><th data-hidden data-card-cover data-type="image">Cover image</th><th data-hidden data-card-target data-type="content-ref"></th></tr></thead><tbody><tr><td><strong>Umbraco Commerce</strong></td><td>Extend your Umbraco CMS website with shop features available through Umbraco Commerce.</td><td><a href="/files/Q5yFcyDQrUhNepdP0UhT">/files/Q5yFcyDQrUhNepdP0UhT</a></td><td><a href="https://docs.umbraco.com/umbraco-commerce/">https://docs.umbraco.com/umbraco-commerce/</a></td></tr><tr><td><strong>Umbraco Deploy</strong></td><td>Ensure smooth code and content deployments in your Umbraco projects.</td><td><a href="/files/1QznpOdCkixSrTT5NufF">/files/1QznpOdCkixSrTT5NufF</a></td><td><a href="https://docs.umbraco.com/umbraco-deploy">https://docs.umbraco.com/umbraco-deploy</a></td></tr><tr><td><strong>Umbraco Engage</strong></td><td>Make every interaction on your website count with this 3-in-1 marketing tool.</td><td><a href="/files/dgA1Lt9cQcydQEUomTLr">/files/dgA1Lt9cQcydQEUomTLr</a></td><td><a href="https://docs.umbraco.com/umbraco-engage">https://docs.umbraco.com/umbraco-engage</a></td></tr><tr><td><strong>Umbraco Forms</strong></td><td>Build and add forms to your Umbraco websites with Umbraco Forms.</td><td><a href="/files/QWfRSX1kHxDIrVZDWGW2">/files/QWfRSX1kHxDIrVZDWGW2</a></td><td><a href="https://docs.umbraco.com/umbraco-forms">https://docs.umbraco.com/umbraco-forms</a></td></tr><tr><td><strong>Umbraco UI Builder</strong></td><td>Generate a management user interface for your custom data sources.</td><td><a href="/files/TelY8VLlHzWHmdzmBXOf">/files/TelY8VLlHzWHmdzmBXOf</a></td><td><a href="https://docs.umbraco.com/umbraco-ui-builder">https://docs.umbraco.com/umbraco-ui-builder</a></td></tr><tr><td><strong>Umbraco Workflow</strong></td><td>Setup custom workflows for managing content on your Umbraco website.</td><td><a href="/files/ezunDckGv2tLOC5GDK8c">/files/ezunDckGv2tLOC5GDK8c</a></td><td><a href="https://docs.umbraco.com/umbraco-workflow">https://docs.umbraco.com/umbraco-workflow</a></td></tr><tr><td><strong>Umbraco Automate</strong></td><td>Automate customer journeys, connect your tech stack, and plug in AI directly inside the Umbraco backoffice.</td><td><a href="/files/kaxnU4ksFcCLE784LfN8">/files/kaxnU4ksFcCLE784LfN8</a></td><td><a href="/spaces/FSbD4KYvchggw3e6MKZh">/spaces/FSbD4KYvchggw3e6MKZh</a></td></tr></tbody></table>

### Integrations & Extensions

{% content-ref url="/spaces/CHKT9bQhbR3swAdBvil4" %}
[18.latest](https://docs.umbraco.com/ai-in-umbraco/)
{% endcontent-ref %}

{% content-ref url="/spaces/mlRZp8gL4dvE9MukxCip" %}
[18.latest](https://docs.umbraco.com/umbraco-in-ai/)
{% endcontent-ref %}

{% content-ref url="/spaces/eCauR3aomRsx2gdckuDO" %}
[Umbraco DXP](https://docs.umbraco.com/umbraco-dxp/)
{% endcontent-ref %}

{% content-ref url="/spaces/4kB9Trqs7XbQsP80vWVA" %}
[Commerce Packages](https://docs.umbraco.com/umbraco-commerce-packages/)
{% endcontent-ref %}

{% content-ref url="/spaces/O8zV7PYqNxSkuGGGYa3P" %}
[Commerce Payment Providers](https://docs.umbraco.com/umbraco-commerce-payment-providers/)
{% endcontent-ref %}

{% content-ref url="/spaces/HKthAwBJOkU2Xzt1IHX4" %}
[Sales Tax Providers](https://docs.umbraco.com/umbraco-commerce-sales-tax-providers/)
{% endcontent-ref %}

{% content-ref url="/spaces/FW5BR4euWkgLSfJs4O4r" %}
[Commerce Shipping providers](https://docs.umbraco.com/umbraco-commerce-shipping-providers/)
{% endcontent-ref %}

{% content-ref url="/spaces/ZOU4fHcVxqYnC8V1dry6" %}
[Sustainability Best Practices](https://docs.umbraco.com/sustainability-best-practices/)
{% endcontent-ref %}

## Contributing

The documentation project is open source and hosted on GitHub. If you spot something that can be improved or have additions to share, feel free to suggest a change.

Visit the [Contribute section](https://docs.umbraco.com/contributing/documentation) to get started with contributing to Umbraco Documentation.

***


# Where can I get Help?

This section will guide you on where to find the answers for any questions you may have.

If you haven't been able to find a topic that suits your needs, there are different ways to get help.

Connect with developers around the world through the Umbraco Forum, report documentation issues to the Documentation team, or explore the available training options.

Learning videos are available on the Umbraco Learning Base YouTube channel. In addition, a team of friendly supporters is available at Umbraco HQ to assist with any questions.

## Training and Learning

* [Umbraco Learning Base YouTube Channel](https://www.youtube.com/c/UmbracoLearningBase)
* [Umbraco Training](https://umbraco.com/training/)
* [Umbraco Events and Webinars](https://umbraco.com/events/)

## Community Resources

* [Umbraco Forum](https://forum.umbraco.com/)
* [Umbraco Discord](https://discord.gg/umbraco)
* [Community Events and Meetups](https://community.umbraco.com/events/)
* [Community Teams](https://community.umbraco.com/community-teams/)
* [Most Valuable People (MVP) Program](https://community.umbraco.com/mvp-program/)
* [Umbracians in Action](https://community.umbraco.com/umbracians-in-action/)
* [Umbraco Community's Blog](https://umbraco.com/blog/category/community)

## Support and Contact

* [Contact Umbraco HQ](https://umbraco.com/contact-us/)
* [Umbraco Support](https://umbraco.com/products/umbraco-support/what-is-umbraco-support/)
* [Umbraco Blogs](https://umbraco.com/blog/)

## Report an Issue or Improvement

* [Found an issue in Umbraco? Report it on our CMS Issue Tracker](https://github.com/umbraco/Umbraco-CMS/issues)
* [Found an issue with the Umbraco Documentation? Report it on our Documentation Issue Tracker](https://github.com/umbraco/UmbracoDocs/issues)
* [Find out how to suggest an improvement to the Umbraco Documentation](https://docs.umbraco.com/contributing)


# Versioning Strategy

The Umbraco Documentation is versioned based on major versions of the Umbraco CMS. Learn more about how that works in this article.

The Umbraco Documentation covers multiple versions across different Umbraco products. This article explains how the documentation is versioned and how to use it effectively.

The major version of Umbraco CMS is used to version the documentation for the following Umbraco products:

* The Umbraco CMS
* Umbraco Commerce
* Umbraco Deploy
* Umbraco Engage
* Umbraco Forms
* Umbraco UI Builder
* Umbraco Workflow

Documentation for Umbraco Cloud, Umbraco Heartcore, and Umbraco Compose does not follow CMS versioning, as these are all Software as a Service (SaaS) products.

## Major vs Minor Versions

The Umbraco Documentation covers all supported versions of the Umbraco CMS and its official add-on products. For each supported major version of Umbraco CMS, a corresponding version of the documentation exists for both the CMS and the add-on products.

Each documentation version reflects the latest minor release within the current major version.

When a Release Candidate (RC) for a new major version of an Umbraco product is released, a new documentation version will be available. Once the major version is officially released, its documentation becomes the default version on the documentation site.

## Long Term Support (LTS) and End of Life (EOL)

The Umbraco Documentation follows the [LTS and EOL strategies outlined for the Umbraco CMS](https://umbraco.com/products/knowledge-center/long-term-support-and-end-of-life/).

Documentation for each major version remains available until that version reaches End of Life. After EOL:

* Documentation for standard releases is unpublished after 1 month.
* Documentation for LTS versions is unpublished after 3 months.

Unpublished documentation versions remain accessible in the [GitHub](https://github.com/umbraco/UmbracoDocs/tree/umbraco-eol-versions) repository.

{% hint style="info" %}
We reserve the right to change the strategy for EOL versions. This is due to the fact that we want to thoroughly test the process before making a decision.
{% endhint %}

## Contributing to a Specific Version

The Umbraco Documentation is synchronized with the open-source [UmbracoDocs](https://github.com/umbraco/UmbracoDocs) repository on GitHub. Read the [Contribution documentation](https://docs.umbraco.com/contributing) to learn more about contributions and how to get started.

The `main` branch of the `UmbracoDocs` repository contains all active documentation versions for all Umbraco products. A dedicated directory exists for each published major version of Umbraco CMS, containing the relevant documentation for that version and its associated products.

{% hint style="info" %}
Documentation for Umbraco 8 and earlier versions is maintained in the `legacy-docs` branch. These legacy versions are published separately on [Our Umbraco website](https://our.umbraco.com/documentation).
{% endhint %}


# Digital Experience (DXP) Products

Find documentation for all official Umbraco add-on packages.

<table data-view="cards"><thead><tr><th></th><th></th><th data-hidden data-card-cover data-type="image">Cover image</th><th data-hidden data-card-target data-type="content-ref"></th></tr></thead><tbody><tr><td><strong>Umbraco Commerce</strong></td><td>Extend your Umbraco CMS website with shop features available through Umbraco Commerce.</td><td><a href="/files/Q5yFcyDQrUhNepdP0UhT">/files/Q5yFcyDQrUhNepdP0UhT</a></td><td><a href="https://docs.umbraco.com/umbraco-commerce/">https://docs.umbraco.com/umbraco-commerce/</a></td></tr><tr><td><strong>Umbraco Deploy</strong></td><td>Ensure smooth code and content deployments in your Umbraco projects.</td><td><a href="/files/1QznpOdCkixSrTT5NufF">/files/1QznpOdCkixSrTT5NufF</a></td><td><a href="https://docs.umbraco.com/umbraco-deploy">https://docs.umbraco.com/umbraco-deploy</a></td></tr><tr><td><strong>Umbraco Engage</strong></td><td>Make every interaction on your website count with this 3-in-1 marketing tool.</td><td><a href="/files/dgA1Lt9cQcydQEUomTLr">/files/dgA1Lt9cQcydQEUomTLr</a></td><td><a href="https://docs.umbraco.com/umbraco-engage">https://docs.umbraco.com/umbraco-engage</a></td></tr><tr><td><strong>Umbraco Forms</strong></td><td>Build and add forms to your Umbraco websites with Umbraco Forms.</td><td><a href="/files/QWfRSX1kHxDIrVZDWGW2">/files/QWfRSX1kHxDIrVZDWGW2</a></td><td><a href="https://docs.umbraco.com/umbraco-forms">https://docs.umbraco.com/umbraco-forms</a></td></tr><tr><td><strong>Umbraco UI Builder</strong></td><td>Generate a management user interface for your custom data sources.</td><td><a href="/files/TelY8VLlHzWHmdzmBXOf">/files/TelY8VLlHzWHmdzmBXOf</a></td><td><a href="https://docs.umbraco.com/umbraco-ui-builder">https://docs.umbraco.com/umbraco-ui-builder</a></td></tr><tr><td><strong>Umbraco Workflow</strong></td><td>Setup custom workflows for managing content on your Umbraco website.</td><td><a href="/files/ezunDckGv2tLOC5GDK8c">/files/ezunDckGv2tLOC5GDK8c</a></td><td><a href="https://docs.umbraco.com/umbraco-workflow">https://docs.umbraco.com/umbraco-workflow</a></td></tr><tr><td><strong>Umbraco Automate</strong></td><td>Automate customer journeys, connect your tech stack, and plug in AI directly inside the Umbraco backoffice.</td><td><a href="/files/kaxnU4ksFcCLE784LfN8">/files/kaxnU4ksFcCLE784LfN8</a></td><td><a href="/spaces/FSbD4KYvchggw3e6MKZh">/spaces/FSbD4KYvchggw3e6MKZh</a></td></tr></tbody></table>


# Choosing Umbraco

Find the resources needed to successfully plan, build, and manage an Umbraco project.

Considering Umbraco for your next project? This section helps you explore what Umbraco offers and whether it’s the right fit for your needs.

An Umbraco project involves building a website, application, or digital solution using Umbraco CMS. From planning and development to launch and long-term management, understanding the foundations will help you make informed decisions early on.

## Start Exploring:

* [What is Umbraco?](https://umbraco.com/products/umbraco-cms)
* [Is Umbraco right for me?](https://umbraco.com/why-choose-umbraco/)
* [What commercial options are available from Umbraco?](https://umbraco.com/products/)
* [Information on planning an Umbraco project](/umbraco-cms/13.latest/fundamentals/setup/requirements)
* [How do I manage users with Umbraco?](/umbraco-cms/13.latest/fundamentals/data/users)
* [What is the deployment process for Umbraco?](/umbraco-cloud/build-and-customize-your-solution/handle-deployments-and-environments/deployment)
* [What is the Umbraco Community?](https://community.umbraco.com)


# Exploring the Umbraco Products

Explore the unique features and use cases of Umbraco products to find the perfect fit for your project.

Embarking on a journey with Umbraco can be an exciting process. With a variety of products available, it can sometimes feel overwhelming to choose the best tool for your needs. This guide will help you navigate the options and understand what each product offers.

## 1. Getting Started with Umbraco CMS

Begin by familiarizing yourself with the Umbraco content management system (CMS), its features, and its capabilities. Umbraco CMS is an open-source **.NET** CMS designed to build websites and web applications. Read more about [Umbraco CMS](https://umbraco.com/products/umbraco-cms/), or if you want to try it out, head on to the [Umbraco CMS Documentation](https://docs.umbraco.com/umbraco-cms).

All Umbraco products are built on top of the CMS core. A short introduction video is available to help you dive into the Umbraco CMS world.

{% embed url="<https://www.youtube.com/watch?v=3bSHnMZF9xI>" %}
Umbraco CMS Video
{% endembed %}

### Subscription

Umbraco CMS is an open-source software released under the MIT License. It is free to install, set up, and host for yourself. For more information, see the [Umbraco Source Code License](https://umbraco.com/products/umbraco-cms/source-code-license/) site.

### Case Study

The Council of the European Union wanted to replace its outdated CMS with one that would streamline content publishing and translation across multiple languages.

Using Umbraco CMS, they developed a solution that facilitated rapid content creation and multilingual translation, meeting the Council's requirements while minimizing time and effort.

[Read the Case Study](https://umbraco.com/case-studies-testimonials/the-council-of-the-european-union/) to know how the Council of the European Union successfully utilized Umbraco CMS to modernize its content management system.

## 2. Choosing Hosting: Umbraco Cloud vs. On-Premise

Once you have installed Umbraco locally, it's time to start building websites. Let's talk about where your Umbraco masterpiece will live. You've got options:

* [Umbraco Cloud](#umbraco-cloud)
* [On-Premise Hosting](#on-premise-hosting)

### Umbraco Cloud

You can opt for Umbraco Cloud for a managed hosting solution. Umbraco Cloud is a hosting and development platform designed to streamline the process of building and managing Umbraco CMS projects.

Read more about [Umbraco Cloud](https://umbraco.com/products/umbraco-cloud/), or if you want to try it out, head on to the [Umbraco Cloud Documentation](https://docs.umbraco.com/umbraco-cloud).

#### Subscription

You can take a [14-day free trial of Umbraco Cloud](https://try.umbraco.com/cloud) with no obligation to purchase a subscription.

For more information on the details and features of each pricing plan, see the [Umbraco Cloud Pricing](https://umbraco.com/products/umbraco-cloud/pricing/) site.

#### Case Study

Cab Engine leverages Umbraco Cloud's Baseline feature to empower clients, facilitating quicker launches, seamless user experiences, and effortless updates through their Cab Chassis product.

[Read the Case Study](https://umbraco.com/case-studies-testimonials/how-cab-engine-empowers-clients-with-umbraco-cloud/) to know how Umbraco Cloud's Baseline feature offered a centralized solution and integrated development environment for seamless project evolution.

### On-Premise Hosting

You can host your Umbraco CMS website on your own servers. For more information, see the [Hosting an Umbraco project](https://docs.umbraco.com/welcome/getting-started/hosting-an-umbraco-infrastructure) and [Get a good grip on the best Umbraco hosting options!](https://umbraco.com/knowledge-base/umbraco-hosting/) articles.

## 3. Discover Headless Possibilities

Ready to deliver content beyond a traditional website? Umbraco offers flexible *headless* capabilities, decoupling your content management from the frontend presentation. This allows you to manage content once and deliver it to mobile apps, smart devices, or modern frameworks.

### The Content Delivery API (Built-in)

For most headless needs, you can use the native Content Delivery API included in Umbraco CMS. It allows you to serve your content as high-performance JSON without leaving the Umbraco ecosystem. It is best for Hybrid projects (website and apps) or developers who want to stay on the standard Umbraco platform while using modern frontend technology.

### Umbraco Heartcore (Pure SaaS Headless)

If you require a specialized, fully managed Headless-as-a-Service solution, Umbraco Heartcore is the answer. It is a SaaS-only version of Umbraco that removes the frontend entirely, providing managed REST and GraphQL APIs, an integrated CDN (Cloudflare), and automatic updates. It is best for projects that are completely headless and require a managed infrastructure without the need for .NET development.

## 4. Enhance your site with DXP (Digital Experience Platform)

Whether you're creating a website, launching an e-commerce store, or building a custom application, Umbraco has you covered every step of the way.

Below, you can find the available Umbraco Add-On Products for digital experience:

{% tabs %}
{% tab title="Commerce" %}

#### Overview

Umbraco Commerce is an e-commerce solution built on top of the Umbraco CMS platform. It provides businesses with the tools they need to create and manage online stores, sell products or services, and deliver seamless shopping experiences to customers.

Read more about [Umbraco Commerce](https://umbraco.com/products/add-ons/commerce/), or if you want to try it out, head on to the [Umbraco Commerce Documentation](https://docs.umbraco.com/umbraco-commerce).

***

#### Subscription

Umbraco Commerce is free to try out on your local machine without the need for a license. For information on the license, raise a request on the [Umbraco Commerce Product](https://umbraco.com/products/add-ons/commerce/) page. A member of the sales team will manage this process.

***

#### Case Study

TCMM aimed for market dominance with a focus on brand positioning and leveraging its new technology platform for improved conversion rates.

true implemented the solution headlessly using the Umbraco Content Delivery API and the Umbraco Commerce Storefront API, which fits seamlessly into their project's architecture.

[Read about the Case Study](https://umbraco.com/case-studies-testimonials/tcmm-shutter-group/) to know how Umbraco's ability to handle multiple sites with a focus on conversion and content aligned with TCMM's growth ambitions without compromising existing site components.
{% endtab %}

{% tab title="Deploy" %}

#### Overview

Umbraco Deploy is designed to streamline the process of deploying Umbraco CMS websites across different environments and managing content synchronization between instances. It provides developers with a reliable and efficient solution for deploying website changes and ensuring content consistency across development, staging, and production environments.

Read more about [Umbraco Deploy](https://umbraco.com/products/add-ons/deploy/), or if you want to try it out, head on to the [Umbraco Deploy Documentation](https://docs.umbraco.com/umbraco-deploy).

***

#### Subscription

Umbraco Deploy is free to try out on your local machine with limitations on some features. You can read more about what is included in a license on the [Licensing](https://docs.umbraco.com/umbraco-deploy/installation/the-licensing-model) page.

Umbraco Deploy is included in the Umbraco Cloud subscription. If you are using Umbraco Cloud, you do not need to pay for an Umbraco Deploy license.

***

#### Use-Case Example

Large enterprises managing complex Umbraco CMS websites with multiple contributors and environments can benefit from Umbraco Deploy to maintain content consistency and streamline deployment workflows. This ensures seamless website updates and content changes across the organization.
{% endtab %}

{% tab title="Engage" %}

#### Overview

Umbraco Engage is designed to enhance digital marketing efforts directly within the Umbraco CMS. Users can engage, track, and analyze customer behavior, enabling personalized content and improving conversion rates—all without needing advanced technical knowledge.

Read more about [Umbraco Engage](https://umbraco.com/products/add-ons/engage/), or if you want to try it out, head on to the [Umbraco Engage Documentation](https://docs.umbraco.com/umbraco-engage).

***

#### Subscription

Umbraco Engage is free to try out on your local machine without the need for a license. For information on the license, raise a request on the [Umbraco Engage Product page](https://umbraco.com/products/add-ons/engage/#license). A member of the sales team will manage this process.

Umbraco Engage is fully compatible with Umbraco Cloud.

***

#### Use-Case Example

Travel agencies can leverage Umbraco Engage to enhance user engagement by showing personalized travel recommendations. By analyzing visitor interactions, such as viewed destinations and trip types, the suite can suggest relevant holiday packages, special deals, and travel guides. This approach improves the user experience and increases booking conversions.
{% endtab %}

{% tab title="Forms" %}

#### Overview

Umbraco Forms is designed to simplify the process of creating and managing web forms within the Umbraco CMS environment. It empowers users to build interactive forms without the need for coding knowledge, enhancing user engagement and data collection capabilities.

Read more about [Umbraco Forms](https://umbraco.com/products/add-ons/forms/), or if you want to try it out, head on to the [Umbraco Forms Documentation](https://docs.umbraco.com/umbraco-forms).

***

#### Subscription

Umbraco Forms is free to try out on your local machine, with limitations on some features. You can read more about what is included in a license on the [Licensing ](https://docs.umbraco.com/umbraco-forms/installation/the-licensing-model)page.

Umbraco Forms is included in Umbraco Cloud and Umbraco Heartcore (standard plan and above) subscriptions. If you are using Umbraco Cloud or Umbraco Heartcore, you do not need to pay for an Umbraco Forms license.

***

#### Case Study

The Legal Ombudsman needed a complete overhaul of their website as well as an online complaints form. The organization had to ensure that its online forms comply with the UK Government Design System (GDS).

[Read the Case Study](https://umbraco.com/case-studies-testimonials/digital-transformation-for-the-legal-ombudsman/) to know how Umbraco Forms, hosted on Umbraco Cloud, maintains GDS compliance while securely storing forms data in a Cosmos database on Azure within a UK data centre, meeting storage requirements.
{% endtab %}

{% tab title="UI Builder" %}

#### Overview

Umbraco UI Builder is designed to simplify the process of creating custom user interfaces (UIs) within the Umbraco CMS environment. It empowers developers and designers to build interactive and responsive UI components for Umbraco-based websites and applications with ease.

Read more about [Umbraco UI Builder](https://umbraco.com/products/add-ons/ui-builder/), or if you want to try it out, head on to the [Umbraco UI Builder Documentation](https://docs.umbraco.com/umbraco-ui-builder).

***

#### Subscription

Umbraco UI Builder is free to try out on your local machine without the need for a license. For information on the license, raise a request on the [Umbraco UI Builder Product](https://umbraco.com/products/add-ons/ui-builder/) page. A member of the sales team will manage this process.

Umbraco UI Builder is included in the Umbraco Cloud (Standard plan and above) subscription. If you are using Umbraco Cloud, you do not need to pay for an Umbraco UI Builder license.

***

#### Use-Case Example

E-commerce retailers offering customizable products can use Umbraco UI Builder to create product configurator tools. This allows customers to customize product attributes, such as color, size, and features, in real-time, visualizing the changes dynamically before making a purchase decision, thereby enhancing the shopping experience and driving sales.
{% endtab %}

{% tab title="Workflow" %}

#### Overview

Umbraco Workflow is a comprehensive workflow management tool integrated into the Umbraco CMS platform. It enables you to streamline content creation, review, and approval processes, ensuring efficient collaboration within your digital projects.

Read more about [Umbraco Workflow](https://umbraco.com/products/add-ons/workflow/), or if you want to try it out, head on to the [Umbraco Workflow Documentation](https://docs.umbraco.com/umbraco-workflow).

***

#### Subscription

You can try out Umbraco Workflow on your local machine with a trial license. The trial license introduces some restrictions around advanced features, but is otherwise a full-featured workflow platform.

You can find which features are included in the trial versus the paid license on the [Umbraco Workflow Product](https://umbraco.com/products/add-ons/workflow/) page.

***

#### Use-Case Example

Organizations managing websites, such as news portals or corporate blogs, can implement Umbraco Workflow to establish content publication workflows. Content creators can submit articles or blog posts for review, and editors can review, edit, and approve the content before publication, ensuring quality control and adherence to editorial standards.
{% endtab %}
{% endtabs %}

## 5. Orchestrate Content from Multiple Sources with Umbraco Compose

As your digital ecosystem grows, you may find yourself pulling data from many different places. Umbraco Compose is a SaaS orchestration layer that simplifies this complexity. It connects data from various sources, such as product information management (PIM) systems, customer relationship management (CRM) platforms, enterprise resource planning (ERP) systems, and more, into a unified, high-performance GraphQL API.

### How Compose Enhances the Experience

While Umbraco CMS handles your website content, Compose handles the integration layer between your various business systems. It enables a clean, composable architecture without building custom integrations for every external tool.

* **For Content Editors:** Use the Umbraco Content Picker to reference data from any connected system (such as product specifications or customer data) directly within the Umbraco backoffice, creating a seamless editorial experience.
* **For Developers:** Deliver unified content to any frontend, websites, mobile apps, digital kiosks, or other channels using standardized GraphQL endpoints. This reduces technical debt and eliminates complex integration logic in frontend code.

Watch this video for a high-level overview of how Umbraco Compose functions as a content orchestration layer to simplify complex architectures:

{% embed url="<https://youtu.be/fgc8w85hbP0?si=GCwJtzKO3h01uTeO>" %}

### Subscription

Compose is a subscription-based SaaS product. Pricing is based on your specific needs, including ingestion volume and architectural complexity. This allows organizations to scale their content orchestration as their technology stack grows. Contact the Umbraco sales team for pricing information.

### Use Case Example

Consider a retail organization with product data in a PIM system, marketing content in Umbraco CMS, and customer profiles in a CRM. Using Umbraco Compose, they can:

* Map and normalize product catalogs, marketing content, and CRM data into a unified schema.
* Enable editors to build rich product pages by selecting PIM data directly in the CMS.
* Deliver consistent, real-time information through GraphQL APIs to their e-commerce site, mobile app, and in-store displays.
* Maintain data consistency across all channels without building and maintaining dozens of point-to-point integrations.

By leveraging Compose, organizations reduce integration complexity, accelerate development, and deliver consistent experiences across all digital touchpoints.

## 6. Example Use Case Scenario

In this section, we will build an online presence with some of Umbraco's products and add-on products. Let's assume:

* **Company Profile**: John Doe Enterprises is a growing e-commerce company specializing in handmade jewelry. They aim to expand their online presence, enhance customer engagement, and streamline their business operations across a website and a mobile app.
* **Solution Overview**: The company leverages the Umbraco ecosystem to create a scalable, unified digital presence.

Below you can find a journey on how John Doe Enterprises can use the different Umbraco Products and add-on products:

<table data-card-size="large" data-view="cards"><thead><tr><th></th><th></th><th data-hidden></th><th data-hidden data-card-cover data-type="image">Cover image</th><th data-hidden data-card-target data-type="content-ref"></th></tr></thead><tbody><tr><td><a href="https://docs.umbraco.com/umbraco-cms"><strong>Umbraco CMS</strong></a></td><td>With Umbraco's flexible architecture, John Doe can customize his website's design and functionality according to his specific requirements, ensuring a unique and engaging user experience.</td><td></td><td></td><td></td></tr><tr><td><a href="https://docs.umbraco.com/umbraco-cloud"><strong>Umbraco Cloud - CMS Hosting</strong></a></td><td>John Doe hosts their entire setup on Umbraco Cloud. This ensures their team doesn't have to worry about manual upgrades or server maintenance, allowing them to focus entirely on designing jewelry and creating content.</td><td></td><td></td><td></td></tr><tr><td><a href="https://docs.umbraco.com/umbraco-cms/reference/content-delivery-api"><strong>Headless Content Delivery API</strong></a></td><td>To reach younger customers, John Doe launched a mobile app. Instead of re-typing blog posts for the app, the developers use the Content Delivery API to fetch the exact same content from Umbraco Cloud and display it natively on iOS and Android.</td><td></td><td></td><td><a href="https://docs.umbraco.com/umbraco-cms/reference/content-delivery-api">https://docs.umbraco.com/umbraco-cms/reference/content-delivery-api</a></td></tr><tr><td><a href="https://docs.umbraco.com/umbraco-commerce"><strong>Umbraco Commerce</strong></a></td><td>John Doe can integrate Umbraco Commerce to leverage its robust features, including product catalog management, order processing, and payment gateways, to create a seamless online shopping experience for their customers.</td><td></td><td></td><td></td></tr><tr><td><a href="https://docs.umbraco.com/umbraco-forms"><strong>Umbraco Forms</strong></a></td><td>John Doe can utilize Umbraco Forms to create and manage interactive and dynamic forms on his website. He can use forms for collecting customer inquiries, feedback, and orders, streamlining the communication and order processing workflows.</td><td></td><td></td><td></td></tr></tbody></table>

By using Umbraco Cloud and the native headless features of the CMS, John Doe Enterprises maintains a "create once, publish everywhere" workflow. They saved significant time by not building a separate backend for their mobile app, while Umbraco Commerce and Forms handled the complex operational tasks of a growing retail business.

## 7. Testimonials and Resources

Below you can find a list of Testimonials and other resources to see how Umbraco and its products are used in real life:

* [Umbraco Case Studies & Testimonials](https://umbraco.com/case-studies-testimonials/)
* Videos of [Umbraco Cloud Testimonials](https://www.youtube.com/watch?v=RAplz1bG4J4\&list=PLG_nqaT-rbpwXLRm6HJGxJcPmhycaHXi9)
* Videos of [Umbraco Testimonials](https://www.youtube.com/watch?v=poEQG8vShFE\&list=PLG_nqaT-rbpxNBkm0S3oJQCHjA61aeNjD)
* Videos of [Umbraco Case Webinar](https://www.youtube.com/watch?v=tuMRhffC9qQ\&list=PLG_nqaT-rbpxATT-dC21tpgoYxBG7i6AU)
* [Other resources](https://umbraco.com/resources/): Book a live Demo, Training, Video Tutorials, Blog, Documentation, and so on.


# Hosting an Umbraco project

Here you will find details on Azure, Umbraco Cloud, upgrading Umbraco, server configuration and system requirements.

You can find resources to guide you through the process of installing and hosting different types of Umbraco projects. Here you will find details on Azure setups, our [Umbraco Cloud](/umbraco-cloud/explore-umbraco-cloud/what-is-umbraco-cloud) hosting service, how to upgrade Umbraco, and much more.

In this section, you will also find information on areas such as load balancing, deployment,s and user management.

## Installing and Configuring Umbraco

Learn how to set up and configure your Umbraco project locally or on your server.

* [Set up Umbraco](https://docs.umbraco.com/umbraco-cms/fundamentals/setup): Step-by-step guidance for starting a new project.
* [Install Umbraco](https://docs.umbraco.com/umbraco-cms/fundamentals/setup/install)**:** Instructions for installation via NuGet or manual setup.
* [Upgrading Umbraco](https://docs.umbraco.com/umbraco-cms/fundamentals/setup/upgrading): How to safely update to newer versions of Umbraco CMS.

## Server Requirements and Configuration

Ensure your server environment meets the technical needs for hosting Umbraco projects.

* [Server Setup](https://docs.umbraco.com/umbraco-cms/fundamentals/setup/server-setup): Different ways of setting up servers for use with Umbraco.
* [Running on Azure Web Apps](https://docs.umbraco.com/umbraco-cms/fundamentals/setup/server-setup/azure-web-apps): Guidance for hosting Umbraco projects on Microsoft Azure.
* [Load Balancing & Scaling:](https://docs.umbraco.com/umbraco-cms/fundamentals/setup/server-setup/load-balancing) Tips for multi-server setups to handle traffic efficiently.

## Related Resources

* [External Login Providers](https://docs.umbraco.com/umbraco-cms/reference/security/external-login-providers): Configure external authentication for users.
* [User Management](https://docs.umbraco.com/umbraco-cms/fundamentals/data/users): Guide to creating and managing user accounts and permissions.
* [Deployment Guidance](https://docs.umbraco.com/umbraco-cloud/build-and-customize-your-solution/handle-deployments-and-environments/deployment/cloud-to-cloud): Best practices for deploying changes between environments.


# Creating websites

This section provides beginner-friendly tools and guidance to get started with Umbraco

In this section, you will find information about which frameworks, languages, and platforms work best with Umbraco to create user-friendly, responsive websites.

Before diving in, it’s helpful to familiarize yourself with some key concepts. This section introduces these concepts and explains how they are used in the Umbraco backoffice.

## How Umbraco Works

Your website’s content is structured using **Document Types**, which define the types of content you can create. Each Document Type is composed of Properties, which utilize **Data Types** to define the type of data that can be entered. Every Data Type relies on a **Property Editor**, which determines how content is edited in the backoffice.

Once content is created using Document Types, it is displayed on your website through **Templates**.

### Key Terminology

There are a lot of terminologies here. Let's look at breaking these terms down:

* [**Document Types**](https://docs.umbraco.com/umbraco-cms/fundamentals/data/defining-content)**:** Define the structure and type of content on your website.
* [**Data Types**](https://docs.umbraco.com/umbraco-cms/fundamentals/data/data-types)**:** Specify the kind of data a Property can store (for example, text, number, date).
* [**Property Editors**](https://docs.umbraco.com/umbraco-cms/13.latest/fundamentals/backoffice/property-editors/built-in-umbraco-property-editors)**:** Control how content is entered and displayed in the backoffice.
* [**Templates**](https://docs.umbraco.com/umbraco-cms/fundamentals/design/templates)**:** Determine how content is rendered on the front end of your website.

## Try it out

* [Creating a basic website Tutorial](/umbraco-cms/13.latest/tutorials/creating-a-basic-website): Learn how to create a basic website and start exploring Umbraco CMS hands-on.
* [Video: Create an Umbraco website](https://www.youtube.com/watch?v=_Is_bk2xnKg): Watch a step-by-step guide to creating your first website with Umbraco.

## Other Resources

* [How can translations be used with content?](/umbraco-cms/13.latest/fundamentals/backoffice/variants)
* [Customize the Backoffice](https://docs.umbraco.com/umbraco-cms/customizing/overview)
* [Extending Umbraco](https://docs.umbraco.com/umbraco-cms/extending/build-on-umbraco-functionality)


# Editing websites

This section introduces the tools and information needed to start editing content in Umbraco.

Creating, editing, and publishing content doesn’t require prior technical knowledge; anyone can get started.

This guide will help you navigate the Umbraco backoffice, understand key terminology, and point you to further resources.

You’ll also learn how to use features like translations, forms, and other personalization tools to enhance your website.

## Get to Know the Umbraco Backoffice

The backoffice is where content editors manage websites in Umbraco. Here, you can create pages, add media, manage forms, and configure content settings.

* [**Backoffice Essentials**](https://docs.umbraco.com/umbraco-cms/get-started/backoffice-essentials)**:** Guidance for navigating and using the backoffice.
* [**Managing Content:**](https://docs.umbraco.com/umbraco-cms/get-started/backoffice-essentials/creating-saving-and-publishing-content) Learn the options for creating, saving, and publishing content.
* [**Managing Media:**](https://docs.umbraco.com/umbraco-cms/manage-and-publish-content/media-and-assets/working-with-images-and-files) Discover how to upload, organize, and use images, videos, and documents.
* [**Managing Forms:**](https://docs.umbraco.com/umbraco-cms/develop-with-umbraco/templating-and-rendering/templating/mvc/forms) Explore how to create and manage forms for collecting data from users.


# Developing websites

Find the resources needed to develop and customize an Umbraco website, whether working with backend functionality or extending the backoffice.

Umbraco CMS is built on the Microsoft ASP.NET MVC framework. You can build upon this technology to work alongside and extend the functionality in Umbraco. The platform is designed to be flexible and pluggable, meaning key components can be replaced with custom implementations when needed.

{% hint style="info" %}
It is possible to build an Umbraco site without advanced development tools. For more information, see the [Creating websites with Umbraco](/getting-started/creating-websites-with-umbraco) article.
{% endhint %}

You’ll learn how to:

* Structure and develop an Umbraco project
* Extend and customize the Umbraco backoffice
* Work with Umbraco-specific APIs and helpers
* Use dependency injection within Umbraco

This section is divided into two main areas:

* [Extending the Umbraco Backoffice](#extending-the-umbraco-backoffice)
* [Customizing Umbraco Sites](#customizing-umbraco-sites)

## [Extending the Umbraco backoffice](/getting-started/developing-websites-with-umbraco/extending-the-umbraco-backoffice)

The Umbraco backoffice can be extended using AngularJS and C#. Customizing the Umbraco backoffice and editing experience includes:

* Creating custom Property Editors
* Building Dashboards
* Developing Packages.
* Customizing Health Checks
* Extending built-in search functionality

See [the Extending section](https://docs.umbraco.com/welcome/getting-started/developing-websites-with-umbraco/extending-the-umbraco-backoffice) in the CMS docs for a good place to start.

{% hint style="info" %}
From a frontend perspective, Umbraco does not dictate HTML, CSS, or JS in your website build. There is nothing Umbraco-specific about it.
{% endhint %}

## [Customizing Umbraco sites](/getting-started/developing-websites-with-umbraco/customizing-umbraco-sites)

Umbraco is highly customizable, which means you can integrate it with anything and make it behave as you want. With Umbraco, you start with a clean slate.

Umbraco uses ASP.NET and MVC patterns. Developers can:

* Create custom controllers
* Work with SurfaceControllers
* Integrate management service APIs
* Extend routing and rendering logic

## Development Tools and IDE Recommendations

When developing or extending an Umbraco project using C#, using an Integrated Development Environment (IDE) is recommended.

* **Recommended:** [Microsoft Visual Studio](https://visualstudio.microsoft.com/vs/community/)
* **Alternative:** [Visual Studio Code](https://visualstudio.microsoft.com/free-developer-offers/) or another preferred text editor

While it is technically possible to make changes using a simple text editor and compile on startup, an IDE provides:

* IntelliSense and code completion
* Debugging tools
* Project management support
* Strong integration with ASP.NET and MVC frameworks

Using an IDE significantly improves productivity and reduces the likelihood of errors when working with C# and .NET-based projects.


# Customizing Umbraco

This section shows you some beginner tools and information to get your started with Umbraco. From making a local installation to extending the backoffice.

Looking to create a website with custom styling and tools? As a backend developer, you can follow our instructions to create a fully customizable website. You will learn things like how to set up your environments and how to implement your custom templates. You will find all the tools that you're going to need to install Umbraco and start developing immediately.

There are tutorials on how to inject dependencies, information about how the Umbraco pipeline works, and how you can customize it to fit your needs.

## Using MVC with Umbraco

You can implement your own MVC controllers to work alongside Umbraco.

* [Working with generated Models](https://docs.umbraco.com/umbraco-cms/reference/templating/modelsbuilder)
* [Concerns when working with Views](https://docs.umbraco.com/umbraco-cms/reference/templating/mvc)
* [Different types of Controllers](https://docs.umbraco.com/umbraco-cms/implementation/controllers)

## Umbraco-specific MVC concepts

There are two concepts that are Umbraco-specific, which might prove useful to learn about:

* [Surface Controllers](https://docs.umbraco.com/umbraco-cms/reference/routing/surface-controllers)
* [Default routing](https://docs.umbraco.com/umbraco-cms/implementation/default-routing/controller-selection)

## Dependency Injection and Umbraco's Composition

Umbraco is composed of components. Programmatically, you can add your own components and customize Umbraco at application startup.

Learn more about composing and components in the [Composing](https://docs.umbraco.com/umbraco-cms/implementation/composing) article.

## Debugging

When you're developing with Umbraco, you might sometimes run into some errors and issues. Here are some guides to help you with the debugging:

* [General debugging](https://docs.umbraco.com/umbraco-cms/fundamentals/code/debugging)
* [Debugging with SourceLink](https://docs.umbraco.com/umbraco-cms/reference/debugging)


# Extending the Umbraco Backoffice

The Umbraco backoffice itself can be customised and extended, this section is dedicated to getting started with these extension points.

The Umbraco backoffice itself can be customized and extended to fit the experience you want your editors to have when working with your website. This section is dedicated to getting started with these extension points.

Umbraco allows you to create and customize packages, Property Editors, and content applications, and even create your own Dashboard. You can also extend things like the search functionality, Health Checks, and configurations.

In this section, you will find some routes on how to do so and some tutorials to create your own personal packages and content applications.

It is recommended that you have some knowledge and prior experience working with AngularJS to follow the tutorials presented in this section.

## Resources for extending

* [Extension Manifest](https://docs.umbraco.com/umbraco-cms/customizing/extending-overview/extension-registry/extension-manifest)
* [UI Library](https://docs.umbraco.com/umbraco-cms/customizing/ui-library)
* [API Documentation](https://docs.umbraco.com/umbraco-cms/reference/api-documentation)

## What can be extended?

To get you started, here are some examples of what you can extend in Umbraco:

* [Property Editors](https://docs.umbraco.com/umbraco-cms/customizing/property-editors)
* [Dashboards](https://docs.umbraco.com/umbraco-cms/customizing/extending-overview/extension-types/dashboard)
* [Sections](https://docs.umbraco.com/umbraco-cms/customizing/extending-overview/extension-types/sections/section)
* [Trees](https://docs.umbraco.com/umbraco-cms/customizing/extending-overview/extension-types/tree)
* [Workspace Views](https://docs.umbraco.com/umbraco-cms/customizing/extending-overview/extension-types/workspaces/workspace-views)
* [Backoffice Search](https://docs.umbraco.com/umbraco-cms/extending/backoffice-search)
* [Health Check](https://docs.umbraco.com/umbraco-cms/extending/health-check)
* [Custom File Systems (IFileSystem)](https://docs.umbraco.com/umbraco-cms/extending/filesystemproviders)

## Tutorials

If you're in a creative mood, then why not experiment with some of our tutorials:

* [Creating a Property Editor](https://docs.umbraco.com/umbraco-cms/tutorials/creating-a-property-editor)
* [Creating your first Extension](https://docs.umbraco.com/umbraco-cms/tutorials/creating-your-first-extension)
* [Creating a Custom Dashboard](https://docs.umbraco.com/umbraco-cms/tutorials/creating-a-custom-dashboard)
* [Creating a Package](https://docs.umbraco.com/umbraco-cms/extending/packages/creating-a-package)


# Contribute to Documentation

Whether you've found a broken link or want to add a new article to the Umbraco documentation, this article will guide you on your way.

{% hint style="info" %}
All documentation on contributing to Umbraco has been collected and added to the [Contributing documentation site](https://docs.umbraco.com/contributing).
{% endhint %}


# Umbraco CMS Documentation

Documentation for Umbraco CMS. Install, build, extend, and run Umbraco in production.

Umbraco CMS is a flexible and editor-friendly Content Management System (CMS) that allows you to create beautiful and modern websites. Use the latest version of .NET, integrate with your favorite services, and help your customers launch a website tailored to their specific needs.

Learn more about Umbraco CMS and get an overview of the top features on [Umbraco.com](https://umbraco.com/products/umbraco-cms/).

<table data-view="cards"><thead><tr><th></th><th></th><th data-hidden data-card-target data-type="content-ref"></th><th data-hidden data-card-cover data-type="image">Cover image</th></tr></thead><tbody><tr><td><strong>Get Started</strong></td><td>Install Umbraco, upgrade existing projects, and start your first build.</td><td><a href="/pages/A554k35smlsAQftBvswW">/pages/A554k35smlsAQftBvswW</a></td><td><a href="/files/0EXFz6TkyCey2USNYQHI">/files/0EXFz6TkyCey2USNYQHI</a></td></tr><tr><td><strong>Model Your Content</strong></td><td>Define schema, configure property editors, and set up localization.</td><td><a href="/pages/HImJz0nL8KY9uqoRU9qK">/pages/HImJz0nL8KY9uqoRU9qK</a></td><td><a href="/files/62idACHWfEtzHNPtqCOM">/files/62idACHWfEtzHNPtqCOM</a></td></tr><tr><td><strong>Manage and Publish Content</strong></td><td>Learn editor workflows, publishing, media handling, and user management.</td><td><a href="/pages/wRftrJFdSiSUF9wZRei6">/pages/wRftrJFdSiSUF9wZRei6</a></td><td><a href="/files/veCHIHvGH4D5NYGAoRkF">/files/veCHIHvGH4D5NYGAoRkF</a></td></tr><tr><td><strong>Develop With Umbraco</strong></td><td>Create the frontend, work with APIs, and implement application logic.</td><td><a href="/pages/3oUQvC6uYutDl3j1zUJp">/pages/3oUQvC6uYutDl3j1zUJp</a></td><td><a href="/files/lflrgrFa4rXUvgmdW7Kp">/files/lflrgrFa4rXUvgmdW7Kp</a></td></tr><tr><td><strong>Extend Your Project</strong></td><td>Customize the backoffice, add server-side features, and build packages.</td><td><a href="/pages/A5SREtSbmnkbwN544A44">/pages/A5SREtSbmnkbwN544A44</a></td><td><a href="/files/2DKluzIqFo4cpNBFk9vS">/files/2DKluzIqFo4cpNBFk9vS</a></td></tr><tr><td><strong>Run in Production</strong></td><td>Secure, configure, scale, and operate Umbraco in production.</td><td><a href="/pages/i1aKZlKh47bpBTxlmmK9">/pages/i1aKZlKh47bpBTxlmmK9</a></td><td><a href="/files/WcZzrGnSrlrkOOcYL8Tr">/files/WcZzrGnSrlrkOOcYL8Tr</a></td></tr></tbody></table>

## New to Umbraco?

Start with the installation guide, then follow one of the tutorials to build your first project.

{% content-ref url="/pages/A554k35smlsAQftBvswW" %}
[Installation](/umbraco-cms/get-started/installation)
{% endcontent-ref %}

{% content-ref url="/pages/yjWdkAURUoUmMf0A4p1L" %}
[Creating a Basic Website](/umbraco-cms/develop-with-umbraco/tutorials/creating-a-basic-website)
{% endcontent-ref %}

{% content-ref url="/pages/iSSitBbJoYPlY35lByeu" %}
[Creating a Custom Dashboard](/umbraco-cms/extend-your-project/tutorials/creating-a-custom-dashboard)
{% endcontent-ref %}

{% content-ref url="/pages/pGd05aNdDVC2vFCSaUGx" %}
[Creating a Property Editor](/umbraco-cms/extend-your-project/tutorials/creating-a-property-editor)
{% endcontent-ref %}

***

## Umbraco Training

Umbraco HQ offers a training course covering the basic concepts and features needed for building an Umbraco CMS website. The course targets frontend and backend developers, designers, and technical users who want to build a website from scratch in Umbraco,

[Explore the Fundamentals Training Course](https://umbraco.com/training/course-details/fundamentals-details/) to learn more about the topics covered and how they can enhance your Umbraco development skills.


# Product and Releases

Track current releases, test upcoming versions, and find resources for older versions.

Use this section to follow Umbraco releases and plan your next step.

Find the latest release information, test upcoming versions, or browse older documentation.

<table data-view="cards"><thead><tr><th></th><th data-hidden data-card-target data-type="content-ref"></th></tr></thead><tbody><tr><td>Release Notes</td><td><a href="https://releases.umbraco.com/all-releases/">https://releases.umbraco.com/all-releases/</a></td></tr><tr><td>Legacy Documentation</td><td><a href="/pages/mqLlYetG59vCDI2jIdNd">/pages/mqLlYetG59vCDI2jIdNd</a></td></tr></tbody></table>

## In this section

* Current release information and release history.
* Guidance for testing the latest release candidate.
* Links to documentation for versions outside active support.

{% hint style="info" %}
This documentation covers supported Umbraco CMS versions. Use the legacy documentation for older versions.
{% endhint %}


# Pre-Release Guide

Learn how to start testing a pre-release for the latest version of Umbraco CMS, and find information about new and updated documentation.

The pre-release can be used to test your website and projects against the next major version of Umbraco CMS.

The first phase is a beta version, which is then followed by a Release Candidate.

This article contains all the resources needed for you to start testing.

* [How to Test the Pre-Release version](#test-the-pre-release-version)
* [New and Updated Documentation](#new-and-updated-documentation)

{% hint style="info" %}
This document will be updated and expanded as more and more documentation is added throughout the beta and release candidate phases.
{% endhint %}

## Test the Pre-Release version

Ensure you meet the prerequisites and move on to the installation steps outlined below.

### Prerequisites

* The latest [.NET SDK 10.0](https://dotnet.microsoft.com/en-us/download/dotnet/10.0).

### Install a Pre-Release Version

The [beta version is available on NuGet](https://www.nuget.org/packages/Umbraco.Templates/18.0.0-beta).

1. Install the Umbraco dotnet template for the beta.

```cmd
dotnet new install Umbraco.Templates::18.0.0-rc3
```

2. Create a new Umbraco project.

```cmd
dotnet new umbraco -n MyCustomUmbracoProject
```

3. Navigate to the newly created folder.

```cmd
cd MyCustomUmbracoProject
```

4. Build and run the project.

```cmd
dotnet build
dotnet run
```

This will boot the project and write the log to the console. The website is now running on your local machine and will be available on the ports written in the console.

{% hint style="info" %}
Alternatively, you can install and run the Umbraco project using your favorite IDE (Integrated Development Environment).
{% endhint %}

## New and updated documentation

Here is a list of all the new or updated articles in this version.

* [Version Specific Updates: Breaking Changes](/umbraco-cms/get-started/upgrading-and-migrating/version-specific)
* [Elements](/umbraco-cms/model-your-content/content-types-and-structure/data/defining-content/elements)
* [Element Picker](/umbraco-cms/model-your-content/property-editors/built-in-umbraco-property-editors/element-picker)

### Removed articles

* ILocalizationServices

### Updated articles

* Coming soon


# Legacy Documentation

Resources and links for older versions of Umbraco CMS.

This documentation covers currently supported versions of Umbraco CMS. For older or End-of-Life versions, use the resources below.

[Learn more about Umbraco's Long-Term Support and End-of-Life policy.](https://umbraco.com/products/knowledge-center/long-term-support-and-end-of-life/)

## [End-of-Life versions on GitHub](https://github.com/umbraco/UmbracoDocs/tree/umbraco-eol-versions)

When a major version of Umbraco CMS reaches End of Life, its documentation is unpublished three months later.

Documentation for all End-of-Life versions remains available on the [UmbracoDocs GitHub repository](https://github.com/umbraco/UmbracoDocs/tree/umbraco-eol-versions).

## Umbraco versions 7 and 8

The documentation for Umbraco version 7 and 8 is available on [our.umbraco.com](https://our.umbraco.com/documentation/).

<table data-card-size="large" data-view="cards"><thead><tr><th align="center"></th><th data-hidden></th><th data-hidden></th><th data-hidden data-card-cover data-type="files"></th><th data-hidden data-card-target data-type="content-ref"></th></tr></thead><tbody><tr><td align="center"><strong>Umbraco 7 Documentation</strong></td><td></td><td></td><td></td><td><a href="https://our.umbraco.com/documentation/">https://our.umbraco.com/documentation/</a></td></tr><tr><td align="center"><strong>Umbraco 8 Documentation</strong></td><td></td><td></td><td></td><td><a href="https://our.umbraco.com/documentation/">https://our.umbraco.com/documentation/</a></td></tr></tbody></table>


# Community and Contribution

Connect with the Umbraco community and find ways to contribute to the project and documentation.

Use this section to get involved with the Umbraco ecosystem.

Find contribution guidelines and practical resources for responsible delivery.

<table data-view="cards"><thead><tr><th></th><th data-hidden data-card-target data-type="content-ref"></th></tr></thead><tbody><tr><td>Contribute</td><td><a href="https://docs.umbraco.com/contributing">https://docs.umbraco.com/contributing</a></td></tr><tr><td>Sustainability Best Practices</td><td><a href="https://docs.umbraco.com/sustainability-best-practices">https://docs.umbraco.com/sustainability-best-practices</a></td></tr></tbody></table>

## In this section

* Ways to contribute to Umbraco documentation and community work.
* Guidance for building and maintaining more sustainable solutions.


# Installation

Instructions on installing Umbraco on various platforms using various tools.

{% hint style="warning" %}
**Before you begin**

Ensure your environment meets the [System Requirements](/umbraco-cms/get-started/installation/requirements). You must have the latest [.NET SDK](https://dotnet.microsoft.com/download) installed and a compatible database ready.
{% endhint %}

## Quick Start: Install using CLI

The fastest way to get the latest version of Umbraco up and running is by using the command line (CLI).

1. Open your command line.
2. Install the Umbraco templates:

```bash
dotnet new install Umbraco.Templates
```

3. Create a new project:

```bash
dotnet new umbraco --name MyProject
```

{% hint style="info" %}
New projects created with this template use [Central Package Management (CPM)](https://learn.microsoft.com/en-us/nuget/consume-packages/central-package-management) by default. NuGet package versions are managed centrally in a `Directory.Packages.props` file created at the project root, rather than in the individual `.csproj` file. If you later add additional projects, you can move the `Directory.Packages.props` file to the solution root and version all dependencies in one place.
{% endhint %}

4. Navigate to the newly created project folder. It will be the folder containing the `.csproj` file:

```bash
cd MyProject
```

5. Build and run the newly created Umbraco site:

```bash
dotnet run
```

6. The console will output a message similar to: `[10:57:39 INF] Now listening on: https://localhost:44388`

{% hint style="info" %}
It is recommended to set up a developer certificate and run the website under HTTPS. If that has not yet been configured, run the following command:

```console
dotnet dev-certs https --trust
```

{% endhint %}

7. Open your browser and navigate to that URL.
8. Follow the instructions to finish up the installation of Umbraco.

{% hint style="info" %}
Members of the Umbraco Community have created a website that makes the installation of Umbraco a lot easier for you. You can find the website at <https://psw.codeshare.co.uk>. On the website, you can configure your options to generate the required script to run. Click on the Install Script tab to get the commands you need to paste into the terminal. This tab also includes the commands for adding a starter kit or unattended install which creates the database for you.
{% endhint %}

## Alternative Installation Methods

Choose the path that best fits your development environment and workflow.

| Method                                                                                            | Best For                     | Description                                                                                             |
| ------------------------------------------------------------------------------------------------- | ---------------------------- | ------------------------------------------------------------------------------------------------------- |
| [**.NET CLI installation**](/umbraco-cms/get-started/installation/install-umbraco-with-templates) | All Platforms / Power Users  | Detailed CLI commands for managing templates, custom project bootstrapping, and advanced NuGet options. |
| [**Visual Studio**](/umbraco-cms/get-started/installation/visual-studio)                          | Windows / Full IDE           | The standard wizard-based setup for developers who prefer a full IDE experience on Windows.             |
| [**Visual Studio Code**](/umbraco-cms/get-started/installation/install-umbraco-with-vs-code)      | Lightweight / Cross-platform | A streamlined setup for developers using Visual Studio Code on macOS, Linux, or Windows.                |
| [**Docker Compose**](/umbraco-cms/get-started/installation/running-umbraco-on-docker-locally)     | Containerization             | Spin up Umbraco and its database dependencies quickly in a consistent, isolated environment.            |
| [**IIS & Local Hosting**](/umbraco-cms/get-started/installation/iis)                              | Windows Server               | Guidance for hosting and running your local installation on Internet Information Services.              |
| [**Linux / macOS**](/umbraco-cms/get-started/installation/running-umbraco-on-linux-macos)         | Unix-based Native            | Specific environment configurations and steps for running Umbraco natively on non-Windows systems.      |
| [**Unattended Install**](/umbraco-cms/get-started/installation/unattended-install)                | Automation & CI/CD           | An automation-friendly setup—ideal for Azure Web Apps, build pipelines, and rapid deployments.          |
| [**Nightly Builds**](/umbraco-cms/get-started/installation/installing-nightly-builds)             | Early Adopters               | Get early access to the latest "bleeding edge" features and fixes before the official release.          |


# Requirements

## Browsers

The Umbraco UI works in all modern browsers:

* Chrome (Latest)
* Edge (Chromium)
* Firefox (Latest)
* Safari (Latest)

## Local Development

Below you can find the minimum requirements to run Umbraco on your machine:

* [.NET 10.0 and higher](https://dotnet.microsoft.com/en-us/download/dotnet/10.0)
* One of the [.NET 10 - Supported OS versions](https://github.com/dotnet/core/blob/main/release-notes/10.0/supported-os.md)
* One of the following .NET Tools or Editors:
  * [Visual Studio Code](https://code.visualstudio.com/) with the [IISExpress extension](https://marketplace.visualstudio.com/items?itemName=warren-buckley.iis-express)
  * [Microsoft Visual Studio](https://www.visualstudio.com/) 2022 version 17.14 or higher.
    * Optional: [JetBrains Rider](https://www.jetbrains.com/rider) version 2025.3.0.1 and higher
  * [.NET Core CLI](/umbraco-cms/get-started/installation/install-umbraco-with-templates)
* [SQL connection string (SQL Server)](/umbraco-cms/develop-with-umbraco/configuration/connectionstringssettings)
* [Node.js version 24.11.1](https://nodejs.org/en/download/prebuilt-installer) and higher

Umbraco can be installed with a SQLite or SQL Server database and configured with a [connection string](/umbraco-cms/develop-with-umbraco/configuration/connectionstringssettings). For SQL Server, [support is aligned with Microsoft](https://learn.microsoft.com/en-us/sql/sql-server/end-of-support/sql-server-end-of-support-overview?view=sql-server-ver17#lifecycle-dates), indicating a minimum supported version of SQL Server 2016.

{% hint style="info" %}
When using Visual Studio as your primary Integrated Development Environment (IDE), we recommend [finding and downloading the Software Development Kits (SDKs) for Visual Studio](https://dotnet.microsoft.com/en-us/download/visual-studio-sdks).
{% endhint %}

{% hint style="info" %}
Are you using Microsoft SQL as your data? The Umbraco Data Access Layer (DAL) does not support case-sensitive naming. When you use Microsoft SQL as your database, ensure that the database is created using a case-insensitive (CI) collation variant. For example, `SQL_Latin1_General_CP1_CI_AS`. Learn more about [collation modes](https://learn.microsoft.com/en-us/sql/relational-databases/collations/collation-and-unicode-support?view=sql-server-ver16) in the official Microsoft documentation.
{% endhint %}

## Hosting

### Recommendation requirements to run Umbraco

As Umbraco releases are aligned to the .NET release cadence, it's also aligned with Microsoft's Long-term support policy for the underlying framework. For the best experience, we would recommend that you ensure you are on the latest and supported Microsoft versions to run and host Umbraco CMS:

* [Windows Supported releases](https://learn.microsoft.com/en-us/dotnet/core/install/windows?tabs=net70#supported-releases)
* [MacOs Supported releases](https://learn.microsoft.com/en-us/dotnet/core/install/macos#supported-releases)
* [Ubuntu Supported distributions](https://learn.microsoft.com/en-us/dotnet/core/install/linux-ubuntu#supported-distributions) and other [Linux Packages](https://learn.microsoft.com/en-us/dotnet/core/install/linux#packages)
* [.NET Supported releases](https://dotnet.microsoft.com/en-us/platform/support/policy)
* [IIS Supported releases](https://learn.microsoft.com/en-us/lifecycle/products/internet-information-services-iis)
* [SQL Server Supported releases](https://learn.microsoft.com/en-us/sql/sql-server/end-of-support/sql-server-end-of-support-overview?view=sql-server-ver16#lifecycle-dates)
* [SQLite](https://www.sqlite.org/index.html)

*For more information, see the* [*Host and deploy ASP.NET Core applications*](https://learn.microsoft.com/en-us/aspnet/core/host-and-deploy/?view=aspnetcore-7.0) *article in the Microsoft documentation.*

{% hint style="success" %}
You can use [Umbraco Cloud](https://umbraco.com/products/umbraco-cloud/) to manage the hosting infrastructure. All Umbraco Cloud plans are hosted on Microsoft Azure, which gives your site a proven and solid foundation.
{% endhint %}

### Other Recommendations

* Ability to set file permissions to include create/read/write (or better) for the user that "owns" the Application Pool for your site. This would typically be **NETWORK SERVICE**.
* Umbraco's backoffice features such as preview and server events uses SignalR, which works best over **WebSockets** but will negotiate to **Server-Sent Events/Long Polling**. Some hosting setups buffer streamed responses, which can break the SSE fallback and surface as a "`Could not establish a connection to the server`" warning \~30s after opening preview.
* To ensure the preferred WebSocket transport is available on Windows Server/IIS, install the **WebSocket Protocol feature** via **Server Manager → Add Roles and Features → Web Server (IIS) → Web Server → Application Development → WebSocket Protocol**.

## Database Account Roles

The database account used in the connection string will need permission to read and write from tables. It will also require permission to create a schema during installs and upgrades:

* The `db_owner` role has full permissions on the database.
* To use an account with more restricted permissions, the `db_datareader` and `db_datawriter` roles will be needed for normal use to read from and write to the database. The `db_ddladmin` role, which can modify the database schema, is required for installs and upgrades of the CMS and/or any packages that create database tables.

For more information on the Database-level roles, see the [Microsoft documentation](https://docs.microsoft.com/en-us/sql/relational-databases/security/authentication-access/database-level-roles?view=sql-server-ver16#fixed-database-roles).

{% hint style="info" %}
For more information on how to create a database user via SQL, you can check the [Microsoft documentation](https://learn.microsoft.com/en-us/sql/relational-databases/security/authentication-access/database-level-roles?view=sql-server-ver16#a--adding-a-user-to-a-database-level-role).
{% endhint %}


# Install Using .NET CLI

We have made custom Umbraco templates that are available for use with `dotnet new`. The steps below will demonstrate the minimum amount of actions required to get you going and set up an Umbraco project from the command line using .NET templates.

## Video Tutorial

{% embed url="<https://www.youtube-nocookie.com/embed/ZByL3qILNnI>" %}
Video Tutorial
{% endembed %}

## Install the template

1. Install the latest [.NET SDK](https://dotnet.microsoft.com/download).
2. Run `dotnet new install Umbraco.Templates` to install the project templates. *The solution is packaged up into the NuGet package* [*Umbraco.Templates*](https://www.nuget.org/packages/Umbraco.Templates) *and can be installed into the dotnet CLI*.

> Once that is complete, you can see that Umbraco was added to the list of available projects types by running `dotnet new list`:

```cli
Templates                    Short Name               Language          Tags
------------------------------------------------------------------------------------------------------
Umbraco Project              umbraco                  [C#]              Web/CMS/Umbraco
Umbraco Extension            umbraco-extension        [C#]              Web/CMS/Umbraco/Extension/Plugin/Razor Class Library
Umbraco Docker Compose       umbraco-compose                            Web/CMS/Umbraco
```

{% hint style="info" %}
In some cases the templates may silently fail to install (usually this is an issue with NuGet sources). If this occurs you can try specifying the NuGet source in the command by running `dotnet new install Umbraco.Templates --nuget-source "https://api.nuget.org/v3/index.json"`.
{% endhint %}

To get **help** on a project template with `dotnet new` run the following command:

`dotnet new umbraco -h`

From that command's output, you will get a better understanding of what are the default template options, as well as those command-line flags specific to Umbraco that you can use (as seen below):

```
Umbraco Project (C#)
Author: Umbraco HQ
Description: An empty Umbraco project ready to get started.

Usage:
  dotnet new umbraco [options] [template options]

Options:
  -n, --name <name>       The name for the output being created. If no name is specified, the name of the output directory is used.
  -o, --output <output>   Location to place the generated output.
  --dry-run               Displays a summary of what would happen if the given command line were run if it would result in a template
                          creation.
  --force                 Forces content to be generated even if it would change existing files.
  --no-update-check       Disables checking for the template package updates when instantiating a template.
  --project <project>     The project that should be used for context evaluation.
  -lang, --language <C#>  Specifies the template language to instantiate.
  --type <project>        Specifies the template type to instantiate.

Template options:
  -r, --release <Latest|LTS>                 The Umbraco release to use, either latest or latest long term supported
                                             Type: choice
                                               Latest  The latest umbraco release
                                               LTS     The most recent long term supported version
                                             Default: Latest
   -pm, --package-management <choice>         Choose how to manage NuGet package versions
                                             Type: choice
                                               Central     Use Directory.Packages.props (recommended for new projects)
                                               PerProject  Use versions in .csproj (recommended when adding to existing projects)
                                             Default: Central
  --use-https-redirect                       Adds code to Startup.cs to redirect HTTP to HTTPS and enables the UseHttps setting.
                                             Type: bool
                                             Default: false
  -da, --use-delivery-api                    Enables the Delivery API
                                             Type: bool
                                             Default: false
  --add-docker                               Adds a docker file to the project.
                                             Type: bool
                                             Default: false
  --no-restore                               If specified, skips the automatic restore of the project on create.
                                             Type: bool
                                             Default: false
  --exclude-gitignore                        Whether to exclude .gitignore from the generated template.
                                             Type: bool
                                             Default: false
  --minimal-gitignore                        Whether to only include minimal (Umbraco specific) rules in the .gitignore.
                                             Type: bool
                                             Default: false
  --connection-string <connection-string>    Database connection string used by Umbraco.
                                             Type: string
  --connection-string-provider-name          Database connection string provider name used by Umbraco.
  <connection-string-provider-name>          Type: string
                                             Default: Microsoft.Data.SqlClient
  --development-database-type <choice>       Database type used by Umbraco for development.
                                             Type: choice
                                               None     Do not configure a database for development.
                                               SQLite   Use embedded SQLite database.
                                               LocalDB  Use embedded LocalDB database (requires SQL Server Express with Advanced
                                             Services).
                                             Default: None
  --friendly-name <friendly-name>            Used to specify the name of the default admin user when using unattended install on
                                             development (stored as plain text).
                                             Type: string
  --email <email>                            Used to specify the email of the default admin user when using unattended install on
                                             development (stored as plain text).
                                             Type: string
  --password <password>                      Used to specify the password of the default admin user when using unattended install on
                                             development (stored as plain text).
                                             Type: string
  --telemetry-level <telemetry-level>        Used to specify the level of telemetry the installation will report (Minimal, Basic or Detailed).
                                             Type: string
  --no-nodes-view-path <no-nodes-view-path>  Path to a custom view presented with the Umbraco installation contains no published
                                             content.
                                             Type: string
  -dm, --development-mode <choice>           Choose the development mode to use for the project.
                                             Type: choice
                                               BackofficeDevelopment  Enables backoffice development, allowing you to develop from
                                             within the backoffice, this is the default behaviour.
                                               IDEDevelopment         Configures appsettings.Development.json to Development runtime
                                             mode and SourceCodeAuto models builder mode, and configures appsettings.json to
                                             Production runtime mode, Nothing models builder mode, and enables UseHttps
                                             Default: BackofficeDevelopment
  -mm, --models-mode <choice>                Choose the models builder mode to use for the project. When development mode is set to
                                             IDEDevelopment this only changes the models builder mode appsetttings.development.json
                                             Type: choice
                                               Default           Let DevelopmentMode determine the models builder mode.
                                               InMemoryAuto      Generate models in memory, automatically updating when a content
                                             type change, this means no need for app rebuild, however models are only available in
                                             views.
                                               SourceCodeManual  Generate models as source code, only updating when requested
                                             manually, this means a interaction and rebuild is required when content type(s) change,
                                             however models are available in code.
                                               SourceCodeAuto    Generate models as source code, automatically updating when a
                                             content type change, this means a rebuild is required when content type(s) change,
                                             however models are available in code.
                                               Nothing           No models are generated, this is recommended for production assuming
                                             generated models are used for development.
                                             Default: Default
  -sk, --starter-kit <choice>                Choose a starter kit to install.
                                             Type: choice
                                               None                   No starter kit.
                                               Umbraco.TheStarterKit  The Umbraco starter kit.
                                             Default: None
```

## Create an Umbraco project

1. Create a new empty Umbraco solution: `dotnet new umbraco -n MyCustomUmbracoProject`

You will now have a new project with the name *MyCustomUmbracoProject*, or the name you chose to use. The new project can be opened and run using your favorite IDE or you can continue using the CLI commands.

{% hint style="info" %}
If you want to create a solution file as well you can run the commands below. `dotnet new sln` `dotnet sln add MyCustomUmbracoProject`
{% endhint %}

## Run Umbraco

1. Navigate to the newly created project folder: `cd MyCustomUmbracoProject`
2. Build and run the new Umbraco .Net Core project: `dotnet build` `dotnet run`

The project is now running on the [Kestrel server](https://docs.microsoft.com/en-us/aspnet/core/fundamentals/servers/?view=aspnetcore-5.0\&tabs=windows#kestrel) and has assigned a free available port to run it on. Look in the terminal window after the `dotnet run` command to see the URLs.

{% hint style="info" %}
Cookies are shared between sites on `localhost`, no matter which port each site runs on. To sign in to more than one local backoffice at a time, give each site unique cookie names. See [Site name](/umbraco-cms/develop-with-umbraco/configuration/securitysettings#site-name) in the security settings article.
{% endhint %}

The next step is to run through the Umbraco CMS installation. If you chose to use MS SQL Server/Azure you will need to add your connection string during this setup process to get access to the Umbraco backoffice.


# Install Using Visual Studio

A guide to install Umbraco CMS using Visual Studio.

## Prerequisites

* Check the [Requirements](https://github.com/umbraco/UmbracoDocs/tree/main/18/umbraco-cms/get-started/requirements.md) article to ensure you have everything you need to start your Umbraco project.

## Install the template

1. Install the latest [.NET SDK](https://dotnet.microsoft.com/download).
2. Run `dotnet new install Umbraco.Templates` to install the project templates.

### Create the Visual Studio project

1. Go to **File > New > Project/Solution**.
2. Search for `Umbraco` in the *Search for templates* field.
3. Select **Umbraco Project (Umbraco HQ)**.
4. Click **Next**.
5. Enter a **Project name**.

{% hint style="info" %}
Refrain from changing the Solution name, as this will cause a namespace conflict with the CMS itself.
{% endhint %}

5. Select **.Net 10.0 Long-Term Support (LTS)** from the **Framework** dropdown. The rest of the fields are optional.
6. Click **Create**.

The Umbraco Project is ready for you.

### Running the site

You can now run the site through Visual Studio using **F5** or the **Debug** button.

Follow the installation wizard and after a few steps, you will get a message saying the installation was a success.

## Next steps

You are now ready to start building your Umbraco project. Have a look below for different resources on the next steps.

* [Getting Started with Umbraco](https://github.com/umbraco/UmbracoDocs/tree/main/18/develop-with-umbraco/tutorials/creating-a-basic-website/getting-started.md)
* [Tutorial: Create a website from scratch](https://github.com/umbraco/UmbracoDocs/tree/main/18/develop-with-umbraco/tutorials/creating-a-basic-website/README.md)
* [Find different options for hosting your Umbraco website](https://github.com/umbraco/UmbracoDocs/tree/main/18/run-in-production/infrastructure-and-ops/server-setup/README.md)
* [Learn about configuration in Umbraco CMS](https://github.com/umbraco/UmbracoDocs/tree/main/18/develop-with-umbraco/configuration/README.md)


# Install Using Visual Studio Code

The benefit of using Visual Studio Code is that it is super quick to get up and running. Follow these steps to set up an Umbraco project with Visual Studio Code.

## Installing and setting up Visual Studio Code

1. Go to <https://code.visualstudio.com/> and download Visual Studio Code for free.
2. Launch Visual Studio Code once the installation is complete.
3. Click the extensions menu on the left side.
4. Search for **C#** and install it.

## Creating your Umbraco project

Follow the [Install using .NET CLI](/umbraco-cms/get-started/installation/install-umbraco-with-templates) article to create your project folder.

## Configure Visual Studio Code to run the Umbraco project

1. Open your project folder in Visual Studio Code.
2. Open the command palette using the shortcut `Ctrl+Shift+P`.
3. Type **Tasks: Configure**.
4. Select **Tasks: Configure Task**.
5. Select **Create task.json from template**.
6. select **.NET Core** as your template.

Visual Studio Code creates a folder called **.vscode** that contains a file called **tasks.json**. The **tasks.json** file tells Visual Studio Code how to build your project.

7. Select the **Run and Debug** button from the left side menu.
8. Select the **Create a launch.json file** link.
9. Select **.NET 5+ and .NET Core**.

{% hint style="info" %}
If **.NET 5+ and .NET Core** is missing in the drop-down menu:

1. Press **Ctrl + Shift + P** (on Windows/Linux) or **Cmd + Shift + P** (on macOS) to open the Command Palette.
2. Search for the command `.NET: Generate Assets for Build and Debug`. This command will generate the necessary assets for building and debugging your .NET application.
   {% endhint %}

You'll see a green play button appear with a dropdown where **.NET Core Launch (web)** is selected.

If you navigate to the **Explorer** section, a new **launch.json** file is created in the **.vscode** folder. When you press F5, the **launch.json** file tells Visual Studio Code to build your project, run it, and then open a browser.

With that, you're ready to run the project.

3. Press **F5** or click the green play button in the **Run and Debug** section to run your brand new Umbraco site locally.

## Umbraco Web Installer

This section covers the installation and configuration of Umbraco inside your web browser when you run Umbraco for the first time.

You will see the install screen where you will need to fill in some data before Umbraco can be installed.

When the installation is completed, you will be prompted to enter the login credentials. Enter the credentials you used to install Umbraco.

After entering the credentials, you are logged into the backoffice.

Congratulations, you have now installed an Umbraco site.

{% hint style="info" %}
You can log into your Umbraco site by entering the following into your browser: `https://localhost:xxxxx/umbraco/`.
{% endhint %}


# Running Umbraco on Linux/macOS

Since Umbraco 9 it has been possible to run Umbraco CMS natively on Linux or macOS High Sierra 10.13 and newer.

With Umbraco CMS on .NET Core, Linux and macOS is natively supported with SQLite as the database.

In the below section, we describe how to get started with running Umbraco CMS on Linux or macOS.

## How to get started running Umbraco CMS on Linux or macOS

To get started with Umbraco CMS first have a look at the [requirements for running Umbraco CMS](https://github.com/umbraco/UmbracoDocs/tree/main/18/umbraco-cms/get-started/requirements.md#local-development).

Once you've made sure you meet the requirements it is time to install the Umbraco Templates on your system.

To do this follow the [Install using .NET CLI](/umbraco-cms/get-started/installation/install-umbraco-with-templates#install-the-template) guide.

With the templates installed on your system, it is now possible to create Umbraco projects.

To create a project, there are two options:

* Continue creating projects using the .NET CLI.
* Create new projects using Visual Studio (only macOS).

To create new projects using Visual Studio, you can use the [Install using Visual Studio](/umbraco-cms/get-started/installation/visual-studio) guide.

Once you create a new project it will use SQLite by default on Linux/macOS.

If you prefer using SQL Server as your database, you can either install it locally or run it via [Docker](https://skrift.io/issues/umbraco-and-docker-part-1-getting-familiar-with-containers/).


# Running Umbraco in Docker Using Docker Compose

Running Umbraco on docker locally using docker compose

This article shows how to run Umbraco locally in Docker using Docker Compose. You can use either SQL Server or SQLite for development.

{% hint style="info" %}
This setup is intended for local development only. It is not recommended for production environments.
{% endhint %}

## Prerequisites

Before you can run Umbraco in Docker, make sure the following are installed:

* .NET SDK with Umbraco Templates v16 or higher
* Docker Desktop

## Installing

To install Umbraco using the provided Dockerfile and Docker Compose setup, follow these steps:

### Option 1: Using SQL Server

1. Create a folder and navigate into it:

```bash
mkdir MyDockerProject
cd MyDockerProject
```

2. Create a new Umbraco project with Docker support:

```csharp
dotnet new umbraco -n MyDockerProject --add-docker
```

3. Add Docker Compose files:

```csharp
dotnet new umbraco-compose -P "MyDockerProject"
```

The `-P` flag is required to specify the correct paths in the docker-compose file. The project is now ready to run with Docker Compose.

The folder structure should now look like this:

* `MyDockerProject/`
  * `Database/`
    * `Dockerfile`
    * `healthcheck.sh`
    * `setup.sql`
    * `startup.sh`
  * `MyDockerProject/`
    * `Your project files`
    * `Dockerfile`
    * `.dockerignore`
  * `.env`
  * `docker-compose.yml`

The project now includes docker files for both Umbraco and the SQL server database.

It also includes additional scripts to launch and configure the database and a `.env` file with the database password.

4. Run the following command from the root folder (where `docker-compose.yml` is located):

```bash
docker compose up
```

5. Access the site at `http://localhost:44372`.

### Option 2: Using SQLite

1. Create a new folder and navigate into it:

```bash
mkdir MyDockerSqliteProject
cd MyDockerSqliteProject
```

2. Create a new Umbraco project:

```csharp
dotnet new umbraco -n MyDockerSqliteProject
```

3. Add a Dockerfile

{% code overflow="wrap" fullWidth="false" %}

```bash
FROM mcr.microsoft.com/dotnet/aspnet:9.0 AS base
WORKDIR /app
EXPOSE 8080

FROM mcr.microsoft.com/dotnet/sdk:9.0 AS build
ARG BUILD_CONFIGURATION=Release
WORKDIR /src
COPY ["MyDockerSqliteProject/MyDockerSqliteProject.csproj", "MyDockerSqliteProject/"]
RUN dotnet restore "MyDockerSqliteProject/MyDockerSqliteProject.csproj"
COPY . .
WORKDIR "/src/MyDockerSqliteProject"
RUN dotnet build "MyDockerSqliteProject.csproj" -c  $BUILD_CONFIGURATION -o /app/build

FROM build AS publish
RUN dotnet publish "MyDockerSqliteProject.csproj" -c  $BUILD_CONFIGURATION -o /app/publish /p:UseAppHost=false

FROM base AS final
WORKDIR /app
COPY --from=publish /app/publish .
ENTRYPOINT ["dotnet", "MyDockerSqliteProject.dll"]
```

{% endcode %}

{% hint style="info" %}
To speed up the build process, add a `.dockerignore` file to exclude unnecessary folders like `.git`, `bin`, and `obj`.
{% endhint %}

4. Build the container:

```bash
docker build -t umbraco-sqlite .
```

5. Run the container:

```bash
docker run -p 8080:8080 umbraco-sqlite
```

6. Access the site at `http://localhost:8080`.

## Useful Commands

There are some useful commands you can use to manage the docker containers:

* `docker compose down --volumes`: Deletes containers and the volumes they use. This is useful if you want to start from scratch.

{% hint style="warning" %}
Be careful with this command, as it deletes your database and all data in it.
{% endhint %}

* `docker compose up --build`: Rebuild the images and start the containers. This is useful if you have made changes to the project and want to see them reflected on the running site.
* `docker compose watch`: Start the containers and watch the default models folder. This means that if the project uses a source-code models builder the images are automatically rebuilt and restarts when you change the models.

## Bind Mounts (SQL Server setup)

The docker compose file uses bind mounts for the following folders:

* `/wwwroot/media`
* `/wwwroot/scripts`
* `/wwwroot/css`
* `/Views`
* `/models`

This is not meant to be used in production.

For local development, however, this means that the files necessary for development are available from outside the container in your IDE. This allows development even though the project is running in docker.

## Template Options (SQL Server only)

The `umbraco-compose` template supports:

* `-P` or `--project-name`: The name of the project. This is required and used to set the correct paths in the docker-compose file.
* `-dbpw` or `--DatabasePassword`: Used to specify the database password. This is stored in the `.env` file and defaults to: `Password1234`.
* `-p` or `--Port`: Used to specify the port the site will run on. Defaults to `44372`.


# Local IIS With Umbraco

This article describes how to run an Umbraco 9 site on a local IIS server.

This is a quick guide on getting your Umbraco website running locally on IIS.

The guide will assume you already have IIS configured and know your way around it, as well as having a local website you wish to host.

## Setting up prerequisites

First, you need to ensure you have "Development time IIS support installed". To check this, go to the Visual Studio installer, click modify and check on the right side under "ASP.NET and web development":

Once that is installed you should set up a new IIS site - and make sure to add the hostname to your hosts file as well. Here is my setup for an example:

{% hint style="info" %}
For the path you want to point it at the root of your site - where the `.csproj` file is.
{% endhint %}

## Add permissions to NuGet cache folder

You might need to change permissions for the NuGet cache folder - `C:\users\<username>\.nuget\packages`. The user or group (IIS\_IUSRS) that the IIS site is running on requires Read permissions on this folder because this is where some of the files for Umbraco and Umbraco packages are being served from during development. If the IIS user or group does not have permission to read from the NuGet cache folder, you could run into a `DirectoryNotFoundException` while running the site.

When the site is published these files are copied from the NuGet cache folder to `wwwroot/umbraco` and `wwwroot/App_Plugins` and these folders will typically have the correct permissions. For more information on setting permissions, see the [File and folder permissions](https://github.com/umbraco/UmbracoDocs/tree/main/18/run-in-production/infrastructure-and-ops/server-setup/permissions.md) article.

## Add new launch profile

At this point you can go to your Visual Studio solution of the site and in the `Properties` folder there is a `launchSettings.json` file, that looks like this:

```json
{
  "iisSettings": {
    "windowsAuthentication": false,
    "anonymousAuthentication": true,
    "iisExpress": {
      "applicationUrl": "http://localhost:40264",
      "sslPort": 44360
    }
  },
  "profiles": {
    "IIS Express": {
      "commandName": "IISExpress",
      "launchBrowser": true,
      "environmentVariables": {
        "ASPNETCORE_ENVIRONMENT": "Development"
      }
    },
    "Umbraco.Web.UI.NetCore": {
      "commandName": "Project",
      "environmentVariables": {
        "ASPNETCORE_ENVIRONMENT": "Development"
      },
      "applicationUrl": "https://localhost:44360;http://localhost:40264"
    }
  }
}
```

You can add a new profile called IIS, and point it at your local domain. Here it is with my example domain:

```json
{
  "iisSettings": {
    "windowsAuthentication": false,
    "anonymousAuthentication": true,
    "iis": {
      "applicationUrl": "https://testsite.local",
      "sslPort": 0
    },
    "iisExpress": {
      "applicationUrl": "http://localhost:40264",
      "sslPort": 44360
    }
  },
  "profiles": {
    "IIS Express": {
      "commandName": "IISExpress",
      "launchBrowser": true,
      "environmentVariables": {
        "ASPNETCORE_ENVIRONMENT": "Development"
      }
    },
    "IIS": {
      "commandName": "IIS",
      "launchBrowser": true,
      "launchUrl": "https://testsite.local",
      "environmentVariables": {
        "ASPNETCORE_ENVIRONMENT": "Development"
      }
    },
    "Umbraco.Web.UI.NetCore": {
      "commandName": "Project",
      "environmentVariables": {
        "ASPNETCORE_ENVIRONMENT": "Development"
      },
      "applicationUrl": "https://localhost:44360;http://localhost:40264"
    }
  }
}
```

At this point IIS will be added to the launch profiles, and you can run the site from Visual Studio by choosing IIS in the dropdown:

And finally the site is running from your local IIS:


# Installing Nightly Builds

Instructions on installing nightly builds of Umbraco.

{% hint style="warning" %}
Nightly builds are pre-releases and may be unstable. Do not use them in production environments.
{% endhint %}

This article covers how to get the latest builds of Umbraco. You can do this in three steps:

1. [Adding the nightly feed as a NuGet source](#adding-the-nightly-feed-as-a-nuget-source)
2. [Finding the latest nightly version](#finding-the-latest-nightly-version)
3. [Installing the latest nightly version template](#installing-the-latest-nightly-version-template)

## Adding the nightly feed as a NuGet source

The nightly builds are available on the following NuGet feed: `https://www.myget.org/F/umbraconightly/api/v3/index.json`.

You can either add the feed through the command line or use an IDE of your choice.

This article covers the following options:

* [Using the command line](#option-1-using-the-command-line)
* [Using Visual Studio](#option-2-using-visual-studio)
* [Using Rider](#option-3-using-rider)

### Option 1: Using the command line

Follow these steps to add the nightly feed using the command line:

1. Open a command prompt of your choice.
2. Run the following command:

```bash
dotnet nuget add source "https://www.myget.org/F/umbraconightly/api/v3/index.json" -n "Umbraco Nightly"
```

Now the feed is added as a source named `Umbraco Nightly`.

### Option 2: Using Visual Studio

Follow these steps to add the nightly feed using Visual Studio:

1. Open Visual Studio.
2. Go to **Tools** > **NuGet Package Manager** > **Package Manager Settings**.
3. Select the **Package Sources** option in the **NuGet Package Manager** section.
4. Click the `+` icon.
5. Enter the desired name for the feed in the **Name** field.
6. Enter the link `https://www.myget.org/F/umbraconightly/api/v3/index.json` into the **Source** field.
7. Click **OK**.

Now the feed is added as a source named `Umbraco Nightly`.

### Option 3: Using Rider

Follow these steps to add the nightly feed using Rider:

1. Open Rider.
2. Go to **View** > **Tool Windows** > **NuGet**.
3. Go to **Sources** tab.
4. Select the global `NuGet.Config` to add the feed globally.
5. Click the green `+` button in the **New Feed** field.
6. Enter the desired name in the **Name** field.
7. Enter `https://www.myget.org/F/umbraconightly/api/v3/index.json` in the URL field.

{% hint style="info" %}
Leave the **User, Password** fields empty, and the **Enabled** checkbox ticked.
{% endhint %}

8. Click **OK**.

Now the feed is added as a source named `Umbraco Nightly`.

## Finding the latest nightly version

The next step is to identify which nightly build to install.

However, which version do you choose? This is especially relevant when creating a new site using the dotnet template. The dotnet command does not allow for using wildcard characters to install the newest version.

Using an IDE, you can see a list of available versions in both Visual Studio and Rider. Use these versions to install the template you need.

The following steps apply to creating a new site using the dotnet template. The approach is the same if you're updating an existing site. You'll click the **Update** button for the `Umbraco.Cms` package instead of installing the template through the terminal.

Find the latest version of the nightly build using either of the following options:

* [Visual Studio](#option-1-using-visual-studio)
* [Rider](#option-2-using-rider)

### Option 1: Using Visual Studio

Use the package manager in Visual Studio to browse the available template versions.

1. Open Visual Studio.
2. Go to **Tools** > **NuGet Package Manager** > **Manage NuGet Packages For Solution...**
3. Select **Umbraco Nightly** from the **Package source** dropdown in the **NuGet - Solution** window.
4. Check the **Include prerelease** checkbox.
5. Search for **Umbraco.Templates** in the **Browse** field.
6. Choose that package.
7. Click on the **Version** dropdown and see the available nightly builds.
8. Choose the applicable version and note down the version number.

### Option 2: Using Rider

Use the NuGet window in Rider to browse the available template versions.

1. Open Rider.
2. Go to the **Packages** tab in the **NuGet** window.
3. Select **Umbraco Nightly** from the **All Feeds** dropdown.
4. Check the **Prerelease** checkbox.
5. Search for **Umbraco.Templates** in the **Search** field.
6. Choose that package.
7. Click on the **Version** drop down and see the available nightly builds.
8. Choose the applicable version and note down the version number.

## Installing the latest nightly version template

To install the latest nightly version template:

1. Open the command prompt/terminal.
2. Run the following command, replacing the version with the one you noted in the previous step:

```bash
dotnet new install Umbraco.Templates::X.Y.Z--build.N
```

You can now create a site using the `dotnet new umbraco -n MyAwesomeNightlySite` command.

For more information about installing Umbraco, see the [Installation](/umbraco-cms/get-started/installation) article.


# Unattended Installs

In some cases, you might need to install Umbraco instances automatically without having to run through the installation wizard to configure the instance.

You can use the **Unattended installs** feature to allow for quick installation and set up of Umbraco instances on something like Azure Web Apps.

This article will give you the details you need to install Umbraco unattended.

## Get clean install of Umbraco

In order to get a clean instance of Umbraco, follow our installation guide for how to [Install an Umbraco project template](/umbraco-cms/get-started/installation/install-umbraco-with-templates#install-using-net-cli).

## Configure your database

As you will not be running through the installation wizard when using this feature, you need to manually tell Umbraco which database to use.

* Set up and configure a new database - see [Requirements](https://github.com/umbraco/UmbracoDocs/tree/main/18/umbraco-cms/get-started/requirements.md#hosting) for details.
* Add the connection string using configuration.

{% hint style="info" %}
Umbraco can create an SQL Server database for you during the unattended install process. The user specified by the credentials in your connection string needs to have the `CREATE DATABASE` permission granted and the global setting [InstallMissingDatabase](https://github.com/umbraco/UmbracoDocs/tree/main/18/develop-with-umbraco/configuration/globalsettings.md#install-missing-database) is set to `true`.

If your connection string is for SQLite or SQL Server Express LocalDB it is assumed that a database should be created when missing. This is regardless of the value of the `InstallMissingDatabase` setting.
{% endhint %}

### SQL Server Example in appsettings.json

```json
{
  "ConnectionStrings": {
    "umbracoDbDSN": "server=localhost;database=UmbracoUnicore;user id=sa;password='P@ssw0rd'",
    "umbracoDbDSN_ProviderName": "System.Data.SqlClient"
  }
}
```

{% hint style="info" %}
The 'umbracoDbDSN\_ProviderName' attribute sets the .NET Framework data provider name for the DataSource control's connection. For more information on the data providers included in the .Net Framework, see the [Microsoft Documentation](https://learn.microsoft.com/en-us/dotnet/api/system.web.ui.webcontrols.sqldatasource.providername?#remarks).
{% endhint %}

### SQLite Example in appsettings.json

A value is configured for the key`umbracoDbDSN_ProviderName` to ensure usage of the `Microsoft.Data.SQLite` ADO.NET provider.

It is recommended that you make use of the values shown below for the `Cache`, `Foreign Keys` and `Pooling` keywords on your connection string.

```json
{
  "ConnectionStrings": {
    "umbracoDbDSN": "Data Source=|DataDirectory|/Umbraco.sqlite.db;Cache=Shared;Foreign Keys=True;Pooling=True",
    "umbracoDbDSN_ProviderName": "Microsoft.Data.Sqlite"
  }
}
```

## Enable the unattended installs feature

The unattended installs feature is disabled by default. In order to enable it, you need to add the following JSON object to a JSON configuration source.

```json
{
  "Umbraco": {
    "CMS": {
      "Unattended": {
        "InstallUnattended": true,
        "UnattendedUserName": "FRIENDLY_NAME",
        "UnattendedUserEmail": "EMAIL",
        "UnattendedUserPassword": "PASSWORD",
        "UnattendedTelemetryLevel": "Detailed"
      }
    }
  }
}
```

Remember to set the value of `InstallUnattended` to `true`.

The `UnattendedTelemetryLevel` can be set to `Minimal`, `Basic`, or `Detailed`. If omitted, `Detailed` is the default.

Alternatively you may set your configuration with Environment Variables or other means. Learn more about this in the [Microsoft .Net Core config documentation](https://docs.microsoft.com/en-us/aspnet/core/fundamentals/configuration/?view=aspnetcore-5.0#environment-variables).

The keys for this would then be as follows:

```
Umbraco__CMS__Unattended__InstallUnattended
Umbraco__CMS__Unattended__UnattendedUserName
Umbraco__CMS__Unattended__UnattendedUserEmail
Umbraco__CMS__Unattended__UnattendedUserPassword
Umbraco__CMS__Unattended__UnattendedTelemetryLevel
```

## Initialize the unattended install

After completing the steps above you can now initialize the installation by booting up the Umbraco instance.

Once it has completed, you should see the following when visiting the frontend of the site.

## Configuration options

Depending on your preferences, you can use any type of configuration to specify the connection string and login information, as well as enable unattended install. With the extending configuration functionality, it is possible to read from all kinds of sources. One example can be using a JSON file or environment variables.

**Program.cs** has a condition, which if met, an *appsettings.Local.json* file will be added and configured as a configuration source.

```
#if DEBUG
  .ConfigureAppConfiguration(config
    => config.AddJsonFile(
      "appsettings.Local.json",
      optional: true,
      reloadOnChange: true))
#endif
```

Having intellisense will help you to add your connection string and information needed for the unattended install.

```json
{
    "ConnectionStrings": {
        "umbracoDbDSN": "server=localhost;database=UmbracoUnicore;user id=sa;password='P@ssw0rd'"
    },
    "Umbraco": {
        "CMS": {
            "Unattended": {
                "InstallUnattended": true,
                "UnattendedUserName": "FRIENDLY_NAME",
                "UnattendedUserEmail": "EMAIL",
                "UnattendedUserPassword": "PASSWORD",
                "UnattendedTelemetryLevel": "Detailed"
            }
        }
    }
}
```

## More support

We have added support for unattended installs with Name, Email and Password, and Connection String as CLI params, which are also available in Visual Studio. There you can fill in your information as follows:

### CLI

```powershell
dotnet new umbraco -n MyNewProject --friendly-name "Friendly User" --email user@email.com --password password1234 --telemetry-level Detailed --connection-string "Server=(localdb)\Umbraco;Database=MyDatabase;Integrated Security=true" --version 10.0.0
```

### Visual Studio

## References

For running Umbraco in Docker containers, see [Running Umbraco in Docker using Docker Compose](/umbraco-cms/get-started/installation/running-umbraco-on-docker-locally) article.


# Upgrading and Migrating

Introduces upgrades in Umbraco, describing what to consider when planning an upgrade.

## What is involved in an upgrade

When upgrading to a new version of Umbraco, there are four key aspects of the migration to be aware of.

### Database schema and content

Firstly there's the update of your Umbraco database's schema and how the content is stored. On occasion changes are necessary to support a new feature. This might be adding new tables or columns, or updating the stored data. This is something Umbraco takes care of for you. When Umbraco starts up and is running a newer version, the necessary changes will be detected and applied.

As a developer responsible for the Umbraco website, there's nothing specific you need to do here. We will communicate key migrations that will happen on major version upgrades. As if you have a large site and significant amounts of data need to be updated, the migration could take some time to complete.

Minor or patch versions may contain schema and content updates too, but they won't be extensive.

### Supported features

Secondly you should review your use of property editors to ensure that they are available on the new version. It's rare for these to be removed, but it can happen when better alternatives are available. These are only removed in major versions and with plenty of notice on the [announcements repository](https://github.com/umbraco/Announcements). Property editors for retirement will also have been indicated as legacy on earlier versions.

### Project customizations

The third aspect is determining and verifying that your own code customizations are compatible with the new version. This includes C# server-side functionality, Razor templates and JavaScript backoffice extensions.

Extensive efforts are made to avoid breaking changes that would cause issues for these types of customization other than in a major version update.

### Third-party packages

Finally you should consider the packages you are using on your project. You will need to verify that the package will work with the new version of Umbraco. Or that a compatible upgrade of the package is available or planned.

As above, breaking changes that would prevent packages from working other than in a major version update are avoided.

### Considerations for major version upgrades

For the reasons described, projects always need to be considered case by case when upgrading to new versions.

Umbraco communicates about the breaking changes in release blog posts and on the documented [version specific upgrade details](/umbraco-cms/get-started/upgrading-and-migrating/version-specific). There will be extended release candidate periods to ensure upgrades can be tested and to help package developers support new major versions.

Breaking changes are minimized but there will be cases when such updates are needed. How straightforward the upgrade will be depends on the breaking changes included in the major and whether your project(s) are impacted by them.

## Before you upgrade

The following lists a few things to be aware of before initiating an upgrade of your Umbraco CMS project.

* Sometimes, there are exceptions to general upgrade guidelines. These are listed in the [**version-specific guide**](/umbraco-cms/get-started/upgrading-and-migrating/version-specific). Be sure to read this article before moving on.
* Ensure your setup meets the [requirements](/umbraco-cms/get-started/installation/requirements) for the new versions you will be upgrading your project to.
* Things may go wrong for different reasons. Be sure to **always** keep a backup of both your site's files and the database. This way, you can always return to a version that you know works.
* Before upgrading to a new major version, check if the packages you're using are compatible with the version you're upgrading to. On the package's page on the [Umbraco Marketplace](https://marketplace.umbraco.com/), check the "Umbraco versions" field.

## Upgrade Guides

* [Upgrade Details](/umbraco-cms/get-started/upgrading-and-migrating/upgrade-details) - how to upgrade Umbraco across major, minor, and patch versions.
* [Upgrade Unattended](/umbraco-cms/get-started/upgrading-and-migrating/upgrade-unattended) - configure Umbraco to upgrade in an unattended mode, avoiding the need to click through the installation wizard.
* [Version Specific Upgrades](/umbraco-cms/get-started/upgrading-and-migrating/version-specific) - details of changes to be aware of when upgrading to specific versions.
* [Downgrades and Re-running Migrations](/umbraco-cms/get-started/upgrading-and-migrating/downgrades-and-rerunning-migrations) - covers the possibility of downgrading to a previous version and re-running migrations from an upgrade.


# Upgrade Your Project

Describes how to upgrade existing installations to new versions.

In this article, you will find everything you need to upgrade your Umbraco CMS project.

If you are new to upgrades, be sure to read the [upgrade introduction article](/umbraco-cms/get-started/upgrading-and-migrating) first.

* [Upgrade to a new Major](#upgrade-to-a-new-major)
* [Upgrade to a new Minor](#upgrade-to-a-new-minor)
* [Legacy Umbraco](#legacy-umbraco)

## Upgrade to a new Major

You can upgrade to a new major version of Umbraco CMS directly by using NuGet.

You must upgrade to the closest [Long-term Support (LTS) major](https://umbraco.com/products/knowledge-center/long-term-support-and-end-of-life/) version before upgrading to the latest version. For Umbraco 10, the closest long-term support version is Umbraco 13. Once the project is on Umbraco 13, you can move on to Umbraco 14.

{% hint style="warning" %}
Switching to a new major version of Umbraco CMS also means switching to a new .NET version. Ensure that any packages used on your site are compatible with this version before upgrading.

The package compatibility can be checked on the package's download page. Locate the **Project compatibility** area and select **View details** to check version-specific compatibility.
{% endhint %}

### Choose the correct .NET version

Use the table below to determine which .NET version to upgrade to when going through the steps below.

| CMS version | .NET version |
| ----------- | ------------ |
| 18          | 10.0         |
| 17          | 10.0         |
| 16          | 9.0          |
| 15          | 9.0          |
| 14          | 8.0          |
| 13          | 8.0          |
| 12          | 7.0          |
| 11          | 7.0          |
| 10          | 6.0.5        |

### Upgrade your project using Visual Studio

{% hint style="info" %}
If you are upgrading a Cloud project locally from version 14 to 15, remove the `Umbraco.Cloud.Cms.PublicAccess` and `Umbraco.Cloud.Identity.Cms` packages. For more details, see [Step 3: Upgrade the project locally using Visual Studio](https://docs.umbraco.com/umbraco-cloud/product-upgrades/major-upgrades#step-3-upgrade-the-project-locally-using-visual-studio) in the Umbraco Cloud Documentation.
{% endhint %}

It's recommended that you upgrade the site offline and test the upgrade fully before deploying it to the production environment.

1. Stop your site in IIS to prevent any changes from being made while you are upgrading.
2. Open your Umbraco project in Visual Studio.
3. Right-click on the project name in the Solution Explorer and select **Properties**.
4. Select the **.NET** version from the **Target Framework** drop-down.
5. Go to **Tools** > **NuGet Package Manager** > **Manage NuGet Packages for Solution...**
6. Go to the **Installed** tab in the NuGet Package Manager.
7. Upgrade **Umbraco.Cms**.

   a. Select the correct version from the **Version** drop-down.

   b. Click **Install** to upgrade your project.

{% hint style="info" %}
If you have other packages like Umbraco Forms installed, upgrade them before upgrading **Umbraco.CMS**. Consult the [version-specific upgrade notes for Umbraco Forms](https://docs.umbraco.com/umbraco-forms/upgrading/version-specific) if relevant.
{% endhint %}

8. Make sure that your connection string has `TrustServerCertificate=True` to complete the upgrade successfully:

{% code title="appsettings.json" %}

```csharp
"ConnectionStrings": {
    "umbracoDbDSN": "Server=YourLocalSQLServerHere;Database=NameOfYourDatabaseHere;User Id=NameOfYourUserHere;Password=YourPasswordHere;TrustServerCertificate=True"
}
```

{% endcode %}

9. Restart your site in IIS, then build and run your project to finish the installation.

{% hint style="info" %}
Umbraco 13 and later versions use the [Minimal Hosting Model](https://github.com/umbraco/Umbraco-CMS/pull/14656).

If you have added custom code to the `startup.cs` file, it is recommended to move that code into a Composer after upgrading.
{% endhint %}

{% hint style="warning" %}
If your database experiences timeout issues after an upgrade, it might be due to the [ASP.NET Core Module's](https://learn.microsoft.com/en-us/aspnet/core/test/troubleshoot-azure-iis?#default-startup-limits) `startupTimeLimit` configuration.

To fix the issue, try increasing the [`startupTimeLimit`](https://learn.microsoft.com/en-us/aspnet/core/host-and-deploy/iis/web-config?) in the `web.config` file. Additionally, you can set the [`Connection Timeout`](https://learn.microsoft.com/en-us/dotnet/api/system.data.sqlclient.sqlconnection.connectiontimeout?) value in the [`ConnectionString`](https://learn.microsoft.com/en-us/dotnet/api/microsoft.data.sqlclient.sqlconnection.connectionstring?) in the `appsettings.json` file.
{% endhint %}

{% hint style="info" %}
It is necessary to run the upgrade installer on each environment of your Umbraco site. This wil occur on first boot of an upgraded project as it is deployed into a new environment.
{% endhint %}

### Potential issues and gotchas

If you receive an error that **a deploy license is missing** even though you have a valid license, follow the guide below.

Google Chrome has aggressive caching, so when experiencing startup issues, clear the cache and cookies thoroughly. Ideally, this should be done for other browsers as well.

Nudge the cache in Chrome following these steps:

1. Open the developer tools (F12).
2. Go to the settings (Cog icon).
3. Ensure that "Disable cache (while DevTools is open)" is checked.
4. Refresh the page, and the cache will be invalidated.
5. Right-click the "reload" button next to your address bar and choose "Empty cache and hard reload".

All caches and cookies have now been cleared from your Google Chrome browser. Generally, it is a good thing to do occasionally.

## Upgrade to a new Minor

NuGet installs the latest version of the package when you use the `dotnet add package` command unless you specify a package version:

`dotnet add package Umbraco.Cms --version <VERSION>`

Add a package reference to your project by executing the `dotnet add package Umbraco.Cms` command in the directory that contains your project file.

Run `dotnet restore` to install the package.

{% hint style="warning" %}
**For Umbraco 9**\
If you are using SQL CE in your project, you need to run `dotnet add package Umbraco.Cms.SqlCe --version <VERSION>` before the `dotnet restore` command. From Umbraco 10, SQL CE has been replaced with SQLite, so a `dotnet restore` should be sufficient. If this is not working, then you need to run `dotnet add package Umbraco.Cms.Persistence.Sqlite --version <VERSION>` , and then `dotnet restore`.
{% endhint %}

When the command completes, open the `.csproj` file to make sure the package reference was updated:

{% code title="YourProjectName.csproj" %}

```xml
<ItemGroup>
  <PackageReference Include="Umbraco.Cms" Version="x.x.x" />
</ItemGroup>
```

{% endcode %}

## Legacy Umbraco

The steps outlined in this article apply to Umbraco version 10 and later versions.

Are you upgrading to a minor version for Umbraco 6, 7, or 8? You can find the appropriate guide below:

{% content-ref url="/pages/FhaEL2wRDlBOLvli39Ko" %}
[Minor Upgrades for Umbraco 8](/umbraco-cms/get-started/upgrading-and-migrating/find-your-upgrade-path/minor-upgrades-for-umbraco-8)
{% endcontent-ref %}

{% content-ref url="/pages/4925XlcUTBoiHUd9VcJ5" %}
[Minor Upgrades for Umbraco 7](/umbraco-cms/get-started/upgrading-and-migrating/find-your-upgrade-path/minor-upgrades-for-umbraco-7)
{% endcontent-ref %}


# Breaking Changes Overview

Breaking changes introduced in each major version of Umbraco CMS, with notes on what to update when upgrading.

Use the information below to learn about any potential breaking changes and common pitfalls when upgrading your Umbraco CMS project.

If any specific steps are involved with upgrading to a specific version they will be listed below.

Use the [general upgrade guide](/umbraco-cms/get-started/upgrading-and-migrating/upgrade-details) to complete the upgrade of your project.

## Preparation for Upgrade

Before running the upgrade, consider the following:

### Empty the media recycle bin

In Umbraco 18, the `EnableMediaRecycleBinProtection` setting defaults to `true`. With this enabled, media files moved to the recycle bin are renamed with a `.deleted` suffix (and renamed back on restore). Emptying the media recycle bin before upgrading avoids any uncertainty around the state of files already in the bin from prior versions.

For details, see the entry on `EnableMediaRecycleBinProtection` further down.

### Implement `ITypedSingleBlockListProcessor` for custom block-list nesting property editors

The single-mode block list migration was added in Umbraco 17 but disabled by default. It now runs automatically during the upgrade to Umbraco 18.

If your site has custom property editors that nest block list values, you must implement and register an `ITypedSingleBlockListProcessor` before upgrading. Without this, nested data in those property values will not be migrated and will remain in the old format.

For details, see the [Single block migration](/umbraco-cms/get-started/upgrading-and-migrating/find-your-upgrade-path/single-block-migration) article.

## Breaking changes

<details>

<summary>Umbraco 18</summary>

**Swashbuckle replaced with Microsoft.AspNetCore.OpenApi**

Umbraco no longer uses Swashbuckle for OpenAPI documentation. It has been replaced with [Microsoft.AspNetCore.OpenApi](https://learn.microsoft.com/en-us/aspnet/core/fundamentals/openapi/overview). If you have custom APIs with OpenAPI documentation, you will need to update your code.

You can still use Swashbuckle for your own OpenAPI documents if you prefer, but Umbraco no longer ships or configures it. You are responsible for installing the `Swashbuckle.AspNetCore` NuGet package and wiring it up yourself.

The main changes you will need to migrate:

* **Registering OpenAPI documents** — replace `IConfigureOptions<SwaggerGenOptions>` with `AddOpenApi()` (and `AddOpenApiDocumentToUi()` to show it in the Swagger UI dropdown). See [Adding your own OpenAPI documents](/umbraco-cms/extend-your-project/server-side-extensions/api-versioning-and-openapi#adding-your-own-openapi-documents). For backoffice APIs, the new `AddBackOfficeOpenApiDocument(name, configure)` builder wires up authentication and Umbraco's conventions in one call — see [Custom Backoffice API](/umbraco-cms/extend-your-project/server-side-extensions/custom-backoffice-api).
* **Backoffice security requirements** — replace `BackOfficeSecurityRequirementsOperationFilterBase` with the `AddBackofficeSecurityRequirements()` extension. See [Custom Backoffice API](/umbraco-cms/extend-your-project/server-side-extensions/custom-backoffice-api).
* **Schema ID handlers** — `ISchemaIdHandler` / `SchemaIdHandler` / `ISchemaIdSelector` / `SchemaIdSelector` have been removed. Use `CreateSchemaReferenceId` on `OpenApiOptions`. See [Schema IDs](/umbraco-cms/extend-your-project/server-side-extensions/api-versioning-and-openapi#schema-ids).
* **Operation ID handlers** — `IOperationIdHandler` / `OperationIdHandler` / `IOperationIdSelector` / `OperationIdSelector` have been removed. Use `IOpenApiOperationTransformer`. See [Operation IDs](/umbraco-cms/extend-your-project/server-side-extensions/api-versioning-and-openapi#operation-ids).
* **Sub-types handlers** — `ISubTypesHandler`, `ISubTypesSelector`, `SubTypesHandler`, and `SubTypesSelector` have been removed. Configure JSON polymorphism through `JsonSerializerOptions` instead.
* **Document inclusion selector** — `IDocumentInclusionSelector` and `DocumentInclusionSelector` have been removed. Each document now controls its own membership through `ShouldInclude`.
* **Enum schema filter** — `EnumSchemaFilter` has been removed. Enum serialization is now driven by the document's `JsonOptions`.
* **Delivery API member authentication** — `ConfigureUmbracoMemberAuthenticationDeliveryApiSwaggerGenOptions` has been removed. Use the `AddDeliveryApiOpenApiMemberAuthentication()` extension. See [Testing with Swagger](/umbraco-cms/develop-with-umbraco/headless-and-apis/content-delivery-api/protected-content-in-the-delivery-api#testing-with-swagger).
* **Route and availability configuration** — `OpenApiRouteTemplatePipelineFilter` overrides are no longer supported. Use `PostConfigure<UmbracoOpenApiOptions>` instead. See [Route and availability](/umbraco-cms/extend-your-project/server-side-extensions/api-versioning-and-openapi#route-and-availability).
* **Controlling which endpoints appear in your document** — `[MapToApi]` no longer auto-filters custom documents. Set `ShouldInclude` on each document. See [Controlling which endpoints appear in your document](/umbraco-cms/extend-your-project/server-side-extensions/api-versioning-and-openapi#controlling-which-endpoints-appear-in-your-document).
* **OpenAPI spec version** — generated documents now use OpenAPI 3.1 instead of 3.0. Regenerated client SDKs may differ — verify your generator supports OpenAPI 3.1.
* **Source generator compilation (class libraries)** — class library projects that register OpenAPI documents must add `<InterceptorsNamespaces>$(InterceptorsNamespaces);Microsoft.AspNetCore.OpenApi.Generated</InterceptorsNamespaces>` to their `.csproj`. Without it, the build fails with "error CS9137: The 'interceptors' feature is not enabled." See [Adding your own OpenAPI documents](/umbraco-cms/extend-your-project/server-side-extensions/api-versioning-and-openapi#adding-your-own-openapi-documents).

*OpenAPI URL changes*

The OpenAPI endpoints have been renamed from `swagger` to `openapi` to follow Microsoft's naming conventions:

| Old URL                                        | New URL                                |
| ---------------------------------------------- | -------------------------------------- |
| `/umbraco/swagger`                             | `/umbraco/openapi`                     |
| `/umbraco/swagger/{documentName}/swagger.json` | `/umbraco/openapi/{documentName}.json` |

**UmbracoApiController and front-end API auto-routing removed**

The `UmbracoApiController` base class — obsoleted in Umbraco 15 — has now been removed, along with the convention-based front-end API auto-routing pipeline that supported it. Custom APIs must be written as standard ASP.NET Core controllers using the `[ApiController]` and `[Route]` attributes.

Before:

```csharp
public class ProductsController : UmbracoApiController
{
    public IActionResult GetAll() => Ok(new[] { "Table", "Chair" });
}
```

After:

```csharp
using Microsoft.AspNetCore.Mvc;

[ApiController]
[Route("/api/shop/products")]
public class ProductsController : Controller
{
    [HttpGet]
    public IActionResult GetAll() => Ok(new[] { "Table", "Chair" });
}
```

**`IPublishedContent.Parent` and `IPublishedContent.Children` removed**

The `Parent` and `Children` navigation members on `IPublishedContent` — obsolete in earlier versions — have now been removed.

In Razor views and other code with access to the ambient Umbraco services, switch to the equivalent extension methods `Parent()` and `Children()`, defined in the `Umbraco.Extensions` namespace.

Before:

```csharp
var parent = Model.Parent;
foreach (var child in Model.Children)
{
    // ...
}
```

After:

```csharp
var parent = Model.Parent();
foreach (var child in Model.Children())
{
    // ...
}
```

The extension methods are designed for view-side use and rely on ambient Umbraco services that may not be set up outside a web request. In code that runs outside a request — for example, a background service — inject `IDocumentNavigationQueryService` (or `IMediaNavigationQueryService` for media) to obtain parent and child keys. Resolve those keys through `IPublishedContentCache` or `IPublishedContentQuery`.

**`GetAtRoot()` removed**

The `GetAtRoot()` method — obsolete in earlier versions — has now been removed from `UmbracoHelper`, `IPublishedContentCache`, and `IUmbracoContext.Content`. The replacement depends on the use case:

* To enumerate all root nodes inside a web request, use `ContentAtRoot()` on `UmbracoHelper` or `IPublishedContentQuery`:

  ```csharp
  IEnumerable<IPublishedContent> roots = Umbraco.ContentAtRoot();
  ```
* To enumerate root nodes outside a web request, inject `IDocumentNavigationQueryService` (or `IMediaNavigationQueryService` for media) and use its `TryGetRootKeys(out IEnumerable<Guid> rootKeys)` method to obtain the root keys, then resolve them via `IPublishedContentCache.GetById(key)`.
* To look up a specific node by its key or ID, use `IPublishedContentQuery.Content(id)` (or `UmbracoHelper.Content(id)`) directly.

**Content finder and URL provider renames**

The earlier `ContentFinderByUrl` and `DefaultUrlProvider` classes — obsolete since their `New`-suffixed replacements were introduced — have now been removed, and the replacements have been renamed to drop the suffix:

* `ContentFinderByUrlNew` → `ContentFinderByUrl`
* `NewDefaultUrlProvider` → `DefaultUrlProvider`

**`ILocalizationService` removed**

`ILocalizationService` — obsolete since Umbraco 12 — has now been removed. Its responsibilities have been split between two services:

* `ILanguageService` for language operations.
* `IDictionaryItemService` for dictionary item operations.

The new services expose an asynchronous API throughout, removing the sync-over-async patterns that existed on `ILocalizationService`.

Before:

```csharp
public class MyComponent
{
    private readonly ILocalizationService _localizationService;

    public MyComponent(ILocalizationService localizationService)
        => _localizationService = localizationService;

    public IEnumerable<ILanguage> GetLanguages()
        => _localizationService.GetAllLanguages();
}
```

After:

```csharp
public class MyComponent
{
    private readonly ILanguageService _languageService;

    public MyComponent(ILanguageService languageService)
        => _languageService = languageService;

    public async Task<IEnumerable<ILanguage>> GetLanguagesAsync()
        => await _languageService.GetAllAsync();
}
```

For dictionary item operations such as `GetDictionaryItemByKey`, switch the injected service to `IDictionaryItemService` and use the corresponding async method.

**`IFileService` split into per-file-type services**

`IFileService` — obsolete in earlier versions — has now been removed. Its functionality was previously moved into four dedicated services:

| Old (`IFileService`) | New                   |
| -------------------- | --------------------- |
| Templates            | `ITemplateService`    |
| Partial views        | `IPartialViewService` |
| Stylesheets          | `IStylesheetService`  |
| Scripts              | `IScriptService`      |

**Service cleanups: obsolete sync method removals**

Synchronous methods on the following services — obsolete in earlier versions in favor of async equivalents — have now been removed. Switch to the `…Async` overloads:

* `IContentTypeBaseService` and `IDomainService` ([#22629](https://github.com/umbraco/Umbraco-CMS/pull/22629))
* `IDataTypeService` ([#22634](https://github.com/umbraco/Umbraco-CMS/pull/22634))
* `IEmailSender`, `MediaPermissions`, and `MemberConfigurationResponseModel` ([#22642](https://github.com/umbraco/Umbraco-CMS/pull/22642))
* `IMemberGroupService` ([#22632](https://github.com/umbraco/Umbraco-CMS/pull/22632))
* `IMemberService.GetMembersByPropertyValue` ([#22678](https://github.com/umbraco/Umbraco-CMS/pull/22678))

**`IHostingEnvironment.ApplicationMainUrl` is now nullable**

The `ApplicationMainUrl` property on `IHostingEnvironment` is now declared as `Uri?`. Add a null-check before using it. See [#22558](https://github.com/umbraco/Umbraco-CMS/pull/22558).

**`UmbracoHelper.GetDictionaryValue` nullability change**

The return type of `GetDictionaryValue` has been changed from `string?` to `string`. This matches the actual runtime behavior — an empty string is returned when no dictionary item is found for the key. Callers can remove any defensive null checks against the return value. See [#21372](https://github.com/umbraco/Umbraco-CMS/pull/21372).

**MigrationBase removed — migrations must inherit AsyncMigrationBase**

The synchronous `MigrationBase` class has been removed. It was obsoleted in Umbraco 16, when `AsyncMigrationBase` was introduced.

All bundled migrations between Umbraco 13 and 17 have also been deleted. Custom migrations must inherit `AsyncMigrationBase` and implement `MigrateAsync`.

The synchronous `PackageMigrationBase` has likewise been removed. Package migrations must inherit `AsyncPackageMigrationBase`.

Before:

```csharp
public class AddCommentsTable : MigrationBase
{
    public AddCommentsTable(IMigrationContext context) : base(context)
    {
    }

    protected override void Migrate()
    {
        if (TableExists("BlogComments") == false)
        {
            Create.Table<BlogCommentSchema>().Do();
        }
    }
}
```

After:

```csharp
public class AddCommentsTable : AsyncMigrationBase
{
    public AddCommentsTable(IMigrationContext context) : base(context)
    {
    }

    protected override Task MigrateAsync()
    {
        if (TableExists("BlogComments") == false)
        {
            Create.Table<BlogCommentSchema>().Do();
        }

        return Task.CompletedTask;
    }
}
```

Custom migration plans must also be executed via `IMigrationPlanExecutor.ExecutePlanAsync()`.

**Master Template renamed to Layout Template**

To match the terminology used elsewhere in the editor and templating engine, "Master Template" has been renamed to "Layout Template" throughout the codebase:

* `ITemplate` adds `IsLayoutTemplate` and `LayoutTemplateAlias` properties.
* Service parameters previously named `masterTemplateId` are now `layoutTemplateId`.

The old `MasterTemplate…` members are retained as `[Obsolete]` shims and will be removed in Umbraco 20.

**`HideBackOfficeLogo` content setting removed**

The `HideBackOfficeLogo` option has been removed from `ContentSettings`. Remove any entries for it from `appsettings.json`.

**`EnableMediaRecycleBinProtection` now defaults to `true`**

The `EnableMediaRecycleBinProtection` content setting — introduced in Umbraco 17 — now defaults to `true`. With protection enabled, media files moved to the recycle bin are renamed with a `.deleted` suffix (and renamed back on restore). A middleware component blocks unauthenticated access to recycle bin media URLs.

To restore the previous (unprotected) behavior, set `Umbraco:CMS:Content:EnableMediaRecycleBinProtection` to `false` in your configuration.

**Default markdown converter changed**

`MarkdigMarkdownToHtmlConverter` is now the default registered implementation of `IMarkdownToHtmlConverter`, replacing the previous Hey Red Markdown-based default.

The Hey Red Markdown library is deprecated, and the corresponding implementation will be removed in Umbraco 19. To revert to the previous behavior for now, register `HeyRedMarkdownToHtmlConverter` explicitly in a composer.

**EF Core type names: `EfCore` renamed to `EFCore`**

EF Core code constructs in `Umbraco.Cms.Persistence.EFCore` have been renamed to use the all-uppercase `EF` acronym. For example, `EfCoreScope` is now `EFCoreScope`, `IEfCoreScopeProvider` is now `IEFCoreScopeProvider`, and `EfCoreMigrationExecutor` is now `EFCoreMigrationExecutor`. Code that referenced these types directly must be updated to the new casing.

**Block list "single mode" migrated to the single block editor**

Umbraco 17 shipped a migration to convert "single" mode block list Data Types to the new single block property editor, but kept it disabled. It now runs by default in Umbraco 18.

Standard block list Data Types are migrated automatically and require no action. Sites with custom property editors that nest block list values must implement `ITypedSingleBlockListProcessor` so their nested data is migrated correctly.

**`ConfigureSecurityStampOptions` service registration removed**

The `ConfigureSecurityStampOptions` options-configuration class is no longer registered by the framework. Host applications that copied `Program.cs` from earlier versions should remove any explicit `services.ConfigureOptions<ConfigureSecurityStampOptions>()` call.

**Updated dependencies**

As is usual for a major upgrade, Umbraco's dependencies have been updated to their latest compatible versions.

`Markdig` was updated to a major version from 0.45.0 to 1.1.x. If you are using this library directly — for example, via `MarkdigMarkdownToHtmlConverter` — minor API differences may be encountered.

`Microsoft.CodeAnalysis.CSharp` was updated by a major version from 4.14.0 to 5.0.0. Projects that take a direct dependency on Roslyn for code analysis may need updates.

The Serilog hosting packages were updated by a major version from 9.0.0 to 10.0.0. This includes `Serilog.AspNetCore`, `Serilog.Extensions.Hosting`, and `Serilog.Settings.Configuration`. Sites with custom Serilog configuration should review the [Serilog release notes](https://github.com/serilog/serilog-aspnetcore/releases).

`Asp.Versioning.Mvc` was updated by a major version from 8.1.1 to 10.0.0. Custom code using these APIs should review the new major version for breaking changes.

**Other breaking changes**

The full details of breaking changes can be found from [this list of labelled PRs](https://github.com/umbraco/Umbraco-CMS/pulls?q=is:pr+label:category/breaking+is:closed+label:release/18.0.0).

</details>

<details>

<summary>Umbraco 17</summary>

**System dates are updated to UTC**

In earlier versions of Umbraco, system dates have been primarily persisted as server time without time zone information, with some stored as UTC. With Umbraco 17, system dates are now always stored in UTC.

To ensure that existing stored system dates align, a migration will run when upgrading to Umbraco 17.

The migration consists of:

* Determining the current time zone for the server.
* If a time zone is detected and it is not already UTC, database queries will update all system dates previously stored as server time to UTC.

There is configuration available to customize this migration.

Adding the following configuration setting will disable the migration from running.

```json
  "Umbraco": {
    "CMS": {
      "SystemDateMigration": {
        "Enabled": false
      }
    }
  }
```

You can also explicitly define the time zone for your server. If this is provided as the standard English name of the time zone, it will be used over the detected one.

```json
  "Umbraco": {
    "CMS": {
      "SystemDateMigration": {
        "LocalServerTimeZone": "Eastern Standard Time"
      }
    }
  }
```

Progress of the migration is written to the Umbraco log file.

For more details on this update see the following PRs: [#19705](https://github.com/umbraco/Umbraco-CMS/pull/19705), [#19798](https://github.com/umbraco/Umbraco-CMS/pull/19798), and [#20112](https://github.com/umbraco/Umbraco-CMS/pull/20112).

**InMemoryAuto models builder and Razor runtime compilation have moved into their own package**

The `InMemoryAuto` models builder and the Umbraco feature that uses Razor runtime compilation (`Microsoft.AspNetCore.Mvc.Razor.RuntimeCompilation`) have been moved to a separate package: `Umbraco.Cms.DevelopmentMode.Backoffice`.

*Why was this change made?*

[Razor runtime compilation is obsolete in .NET](https://learn.microsoft.com/en-us/dotnet/core/compatibility/aspnet-core/10/razor-runtime-compilation-obsolete) and prevents Hot Reload from working. Since `InMemoryAuto` depends on Razor runtime compilation, keeping it in the core would prevent Hot Reload from working.

By moving `InMemoryAuto` to its own package, Umbraco can enable Hot Reload by default for a better development experience.

*When you need to reference `Umbraco.Cms.DevelopmentMode.Backoffice`*?

Add the package if any of the following apply:

1. You use the `InMemoryAuto` models builder:
   * By explicitly selecting `InMemoryAuto`.
   * By starting a new project with the default `--models-mode` (which is `InMemoryAuto`, adding the package automatically).
2. You rely on Razor runtime compilation to edit templates via the backoffice.
3. You use the RoslynCompiler class (you'll also need to update your namespace usings).

{% hint style="info" %}
The choice to include `Umbraco.Cms.DevelopmentMode.Backoffice` depends on how you work with models and templates. It is not based in the hosting environment, and using it enables Razor runtime compilation and disables Hot Reload.
{% endhint %}

*When you do not need the package*?

You don’t need to reference it if you use Models Builder in a source-code mode, such as:

* `AppData`
* `SourceCodeAuto`
* `SourceCodeManual`

{% hint style="warning" %}
**Important!** These modes do not rely on Razor runtime compilation. However, ensure the following settings are removed from your `.csproj` file.

```xml
<RazorCompileOnBuild>false</RazorCompileOnBuild>
<RazorCompileOnPublish>false</RazorCompileOnPublish>
```

{% endhint %}

*Additional notes*

If you use the `ModelsMode` enum or its extension methods, use the string constants in `Constants.ModelsBuilder.ModelsModes` instead.

For more details on this update, see [PR #20187](https://github.com/umbraco/Umbraco-CMS/pull/20187).

**Date Picker Property Editor Kind**

The existing date picker that returns a `DateTime` object has been updated to provide one with a `Kind` of `Unspecified`. Previously, it was `UTc`, but this was incorrect because Umbraco cannot determine the intended use of a particular date picker. This update makes that explicit.

For more details on this update see the following PR: [#19727](https://github.com/umbraco/Umbraco-CMS/pull/19727).

**Color Picker Property Editor**

The color picker property editor used for the built-in approved color Data Type will now always make available a `PickedColor` object. Previously, this was only output when labels were configured on the Data Type. Without labels the previous behavior was to expose a `string`.

For more details on this update see the following PR: [#19430](https://github.com/umbraco/Umbraco-CMS/pull/19430).

**Segmented Content Fallback**

The Template and Delivery API output for segmented properties will perform an explicit fallback to the default segment, if they do not have a value.

In earlier versions, if you created a segmented version of a document, you had to complete every property. This made segments an editorial burden unless the behavior was customized. With the new behavior, segmented content now only needs to have the properties that require a segmented value completed.

For more details on this update see the following PR: [#20309](https://github.com/umbraco/Umbraco-CMS/pull/20309).

**Removal of Extension Methods**

Extension and public helper methods, unused in Umbraco and obsolete in previous versions, have been removed.

These are:

* `GetAssemblyFile`
* `ToSingleItemCollection`
* `GenerateDataTable`, `CreateTableData`, `AddRowData`, `ChildrenAsTable`, `ChildrenAsTable` all related to `DataTable`
* `RetryUntilSuccessOrTimeout`
* `RetryUntilSuccessOrMaxAttempts`
* `HasFlagAny`
* `Deconstruct`
* `AsEnumerable`, `ContainsKey` and `GetValue` extending `NameValueCollection`
* `DisposeIfDisposable`
* `SafeCast`
* `ToDictionary` on `object`
* `SanitizeThreadCulture`

For more details on this update see the following PR: [#17051](https://github.com/umbraco/Umbraco-CMS/pull/17051).

**Tiptap external extensions package**

The import namespace `@umbraco-cms/backoffice/external/tiptap` has been removed, replaced with `@umbraco-cms/backoffice/tiptap`.

This means backoffice extension code must be updated from:

```typescript
import { Editor } from '@umbraco-cms/backoffice/external/tiptap';
```

To:

```typescript
import { Editor } from '@umbraco-cms/backoffice/tiptap';
```

For more details on this update see the following PR: [#20256](https://github.com/umbraco/Umbraco-CMS/pull/20256).

**Client-side user related entities**

The following components have been moved from `user` to `current-user` and exported.

* `UmbCurrentUserAllowMfaActionCondition`
* `UmbCurrentUserConfigRepository`
* `UmbCurrentUserConfigStore`
* `UMB_CURRENT_USER_CONFIG_STORE_CONTEXT`

They should now be imported from `@umbraco-cms/backoffice/current-user`.

For more details on this update see the following PR: [#20125](https://github.com/umbraco/Umbraco-CMS/pull/20125).

**URL provider updates**

URL providers are now responsible for generating content preview URLs. To achieve this, the `IUrlProvider` interface has been extended with the `GetPreviewUrlAsync()` method.

The `IUrlProvider` interface must also provide a unique system-wide `Alias`.

Lastly, the `UrlInfo` class has been revamped to support this setup.

For more details on this update see the following PR: [#20021](https://github.com/umbraco/Umbraco-CMS/pull/20021).

See also this announcement: [#27](https://github.com/umbraco/Announcements/issues/27).

**HTTPS is enabled by default**

The default value of the `UseHttps` configuration in [Global Settings](/umbraco-cms/develop-with-umbraco/configuration/globalsettings) has been changed from `false` to `true`.

If you *need* to run Umbraco without HTTPS, make sure to update `appsettings.json` accordingly.

**Authentication for the backoffice client**

Following the draft [Request for Comments (RFC) from the Internet Engineering Task Force (IETF)](https://datatracker.ietf.org/doc/html/draft-ietf-oauth-browser-based-apps), the backoffice client authentication has been changed to tighten security.

This change affects *only* the backoffice client authentication against the Management API. API user authentication against the Management API remains unaffected, as does the Delivery API.

This change *might* affect custom backoffice extensions that interact with the Management API. All fetch requests to the Management API must include credentials by declaring `credentials: 'include'`.

By default, backoffice extensions built using the HQ package starter template are not affected.

For more details on this update, see the following PRs: [#20779](https://github.com/umbraco/Umbraco-CMS/pull/20779) and [#20820](https://github.com/umbraco/Umbraco-CMS/pull/20820).

**Updated dependencies**

As is usual for a major upgrade, Umbraco’s dependencies have been updated to their latest compatible versions.

NPoco was updated by a major version from 5.7.1 to 6.1.0. There were some changes to Umbraco code necessary after this update, so customer projects or packages that use NPoco directly may also require some changes.

Swashbuckle was updated to a new major version 10.0.1. If you are using this library to provide a Swagger document in your package or project, changes around namespaces, nullability, and types will be encountered.

The other specific dependency updates made for Umbraco 17 for server and client-side libraries can be found in these PRs:

* [#20385](https://github.com/umbraco/Umbraco-CMS/pull/20385)
* [#20184](https://github.com/umbraco/Umbraco-CMS/pull/20184)
* [#20925](https://github.com/umbraco/Umbraco-CMS/pull/20925)

**Sections**

In `UmbSectionContext`, the `setManifest()` method has been replaced with a manifest. This is done to align with most other extension types. The `ManifestSection` interface has been modified to extend `ManifestElementAndApi` instead of `ManifestElement`. The `UmbSectionElement` that a section extends from now extends `UmbControllerHostElement` instead of `HTMLElement`.

For more details on these updates, see the following PRs: [#20305](https://github.com/umbraco/Umbraco-CMS/pull/20305)

**Other breaking changes**

The full details of breaking changes can be found from [this list of labelled PRs](https://github.com/umbraco/Umbraco-CMS/pulls?q=is:pr+label:category/breaking+is:closed+label:release/17.0.0).

</details>

<details>

<summary>Umbraco 16</summary>

**TinyMCE is removed**

In Umbraco 15, two property editors were available for a rich text editor: TinyMCE and TipTap.

With Umbraco 16, only TipTap is available as an option out of the box. TinyMCE's [change of license](https://github.com/tinymce/tinymce/issues/9453#issuecomment-2327646149) precludes us from shipping it with the MIT-licensed Umbraco CMS.

When upgrading to Umbraco 16, any data types using TinyMCE will be migrated to use TipTap.

To continue to use TinyMCE, a third-party package must be installed prior to the upgrade. This will disable the migration and allow you to continue with TinyMCE.

**Package migrations are asynchronous**

Umbraco 16 adds support for asynchronous migrations and part of this work involved creating a new base class for package migrations. This leads to a source-compatible but binary-incompatible breaking change. In practice, this means that package code using migrations and calling base class helper methods such as `TableExists` can be recompiled without change. But if built against 15 and run on 16, a "method missing" exception will be thrown. For more details on the feature and the changes implemented, see the [PR](https://github.com/umbraco/Umbraco-CMS/pull/17057).

**Examine is now registered via a composer**

[A new abstraction and implementation for search](https://github.com/umbraco/Umbraco.Cms.Search) is being worked on in an external package. To support this, a method has been implemented to disable the default Examine-based search in Umbraco. This has required moving the Examine component registration to a composer.

There is no effect on the default search experience in Umbraco, but it may affect search customizations. As Examine is now registered in a composer, any custom code registered the same way is not guaranteed to run after the core setup. You should ensure to use a `[ComposeAfter(typeof(Umbraco.Cms.Infrastructure.Examine.AddExamineComposer))]` attribute to make sure custom code runs after Umbraco's default setup of Examine.

Read more in the article on [custom indexing](/umbraco-cms/develop-with-umbraco/application-code/examine/indexing) and see [PR #18988](https://github.com/umbraco/Umbraco-CMS/pull/18988) for reference.

**Updated dependencies**

As is usual for a major upgrade, the dependencies Umbraco takes have been updated to their latest, compatible versions. This had little impact on the code of Umbraco itself, so we don't expect this to affect upgraded customer projects.

The specific dependency updates made for Umbraco 16 can be found in these PRs: for [server-side](https://github.com/umbraco/Umbraco-CMS/pull/19117) and [client-side](https://github.com/umbraco/Umbraco-CMS/pull/19121) libraries.

**Other breaking changes**

Other than the above, breaking changes are minimal in Umbraco 16. On the server side, changes are limited to removing already obsolete constructors and methods.

Client-side there are a few things to look out for if you've built extensions to the backoffice:

* When consuming contexts, an `undefined` response will be resolved when the context can't be provided or the host is disconnected. See [PR 19113](https://github.com/umbraco/Umbraco-CMS/pull/19113) for more information.
* Similarly, consuming a context as a promise can result in a promise rejection and getting a context can result in an undefined response. See [PR 18611](https://github.com/umbraco/Umbraco-CMS/pull/18611) for more information.
* When making calls to retrieve data from the server, if you used either of Umbraco's helper methods `tryExecute` or `tryExecuteAndNotify`, then you need to adjust your code slightly. `tryExecuteAndNotify` is obsolete, and `tryExecute` takes the 'host' as the first argument. See [PR 18939](https://github.com/umbraco/Umbraco-CMS/pull/18939) for more information.
* The `urls` property is no longer populated on the document and media detail response models. This was removed to alleviate performance concerns. Dedicated repositories and management API endpoints exist for retrieving URLs for documents and media. See [PR #19030](https://github.com/umbraco/Umbraco-CMS/pull/19030) and [PR 19130](https://github.com/umbraco/Umbraco-CMS/pull/19130).

The full details of breaking changes can be found from [this list of labelled PRs](https://github.com/umbraco/Umbraco-CMS/pulls?q=is:pr+label:category/breaking+is:closed+label:release/16.0.0).

</details>

<details>

<summary>Umbraco 15</summary>

**Snapshots are removed**

Snapshots have been removed, meaning any code using `IPublishedSnapshot`, and by extension `IPublishedSnapshotAccessor`, must be updated. Inject `IPublishedContentCache` or `IPublishedMediaCache` and use those directly instead.

**Modelsbuilder models needs to be rebuilt**

Models generated by ModelsBuilder used the `IPublishedSnapshot` interface, which has been removed. This means that the models need to be rebuilt. The approach to this will differ depending on the mode chosen:

**InMemoryAuto**

Remove the `umbraco\Data\TEMP\InMemoryAuto` folder to trigger a rebuild of the models.

**SourceCodeAuto and SourceCodeManual**

Remove the old models located in the `\umbraco\models` folder by default. This will cause your views to no longer be able to build due to missing types. To get around this you can disable the precompiled view temporarily by adding the following to your `.csproj` file:

```xml
<PropertyGroup>
  <RazorCompileOnBuild>false</RazorCompileOnBuild>
  <RazorCompileOnPublish>false</RazorCompileOnPublish>
</PropertyGroup>
```

This will allow your site to start up, but you will still see an error page when loading a page.

1. Disregard the error.
2. Enter the backoffice.
3. Rebuild the models from the ModelsBuilder dashboard.

You can now re-enable precompiled views and rebuild your site.

If you have custom C# code that references the models this will also not build. You can either comment out your custom code temporarily until the models have been rebuilt or fix the models manually. To fix the models manually you need to find and replace `IPublishedSnapshotAccessor` with `IPublishedContentTypeCache`.

**Handling Precompressed Files**

When upgrading from Umbraco 14 to 15, you might notice that `JavaScript` and `CSS` files are automatically precompressed, adding additional `.br` and `.gz` files. This behavior is introduced in ASP.NET Core version 9, where static files are fingerprinted and precompressed by default at build and publish time.

To disable this feature, set `<CompressionEnabled>false</CompressionEnabled>` in your project file. If you are using Umbraco's templates: `dotnet new umbraco`, this setting is already included.

In the project containing the `/umbraco` folder, set `<CompressionEnabled>false</CompressionEnabled>` in the `.csproj` file. This ensures the CMS can manage its own system files correctly. If you have separate Class Library projects for your custom frontend assets (CSS, JS), you may set this to `true` for performance benefits.

For more details, see the [ASP.NET Core Documentation](https://learn.microsoft.com/en-us/aspnet/core/migration/80-90?view=aspnetcore-9.0\&tabs=visual-studio#replace-usestaticfiles-with-mapstaticassets).

</details>

<details>

<summary>Umbraco 14</summary>

Read more about the release of Umbraco 14 in the [Blog Post](https://umbraco.com/blog/umbraco-14-release/).

Below you can find the list of breaking changes introduced in Umbraco 14 CMS.

* [**AngularJS removed: A new backoffice built with Web Components, Lit, and fueled by the Umbraco UI Library**](https://github.com/umbraco/Umbraco.CMS.Backoffice)

This is by far the most impactful update of Umbraco in years. We’ve fundamentally changed the way you extend Umbraco. If you are experienced in developing Web Components you can now use your preferred framework for this. If you are unsure how to proceed, you can implement it with TypeScript and the Lit library like we’ve done. In this case, start with this article on how to [customize the Backoffice](https://docs.umbraco.com/umbraco-cms/customizing/overview).

The new Backoffice (Bellissima) is entirely built on the Umbraco UI Library. This means that you might experience some of your components not being rendered on the page because the name has been changed. You should be able to find equivalents to what you were used to. For example, the `umb-button` is now called `uui-button`, and `umb-box` is now `uui-box`. When extending the Backoffice, we encourage you to use our [Umbraco UI Library](https://uui.umbraco.com/) to ensure the same look and feel in your extensions. The UI Library is Open Source and [hosted on GitHub](https://github.com/umbraco/Umbraco.UI), so feel free to contribute with new components or raise issues or discussions.

* **Icons are based on Lucide.**

Umbraco 13 and earlier used sets of icons ranging from custom SVGs to Font Awesome. This has all been converged into the [Lucide icon pack](https://docs.umbraco.com/umbraco-cms/customizing/icons) with icon names mapped from Umbraco 13.

* **Custom icons**

To add custom icons to the Backoffice, you must add an extension type called “icons”, which can provide icons given a Name and a File. The file can reside anywhere on disk or in RCLs the only requirements being that it must be routable and it must be an SVG.

* **User provided translations**

Translations used in the UI (which are most of them) have been migrated from XML to JavaScript modules. This means that if you wish to override any of the built-in translation keys for the UI, you have to add an extension type called “localization”. It is still possible to add XML translations, but they can no longer be used in the Backoffice UI. However, you may still find usage for them in server-to-server scenarios. Umbraco also keeps its e-mail templates as XML translations. Package and extension developers working with localization will find many benefits from this change seeing that you can add logic to JavaScript modules making your localization files more dynamic and even making them able to react to input parameters.

You can read more about [localization on the Umbraco Documentation](https://docs.umbraco.com/umbraco-cms/extending/language-files).

* **BackOffice controllers have been replaced with the Management API**

Following the implementation of the new Backoffice (Bellissima), Umbraco has now internally upgraded Headless to a first-class citizen. This means that all controllers previously available under the `/umbraco/api` route have been removed and replaced with controllers in the Management API. You can read more about the Management API on the [Management API](https://docs.umbraco.com/umbraco-cms/reference/management-api) article. You can also check out the Swagger UI in your local Umbraco instance available under `/umbraco/swagger`.

* **A new way of writing authorized controllers**

If you have implemented API controllers in Umbraco before, we recommend you update or rewrite these. Follow the [Documenting your Controllers](https://docs.umbraco.com/umbraco-cms/tutorials/creating-a-backoffice-api/documenting-your-controllers) article, as you’ll then ensure the same cool documentation of your APIs. Notice, that we’ve made a much better separation of concern between controllers and services so that there is no more business logic in controllers.

* [**Migration from Newtonsoft.Json to the System.Text.Json which removes Nested Content and Grid value converter and so on**](https://github.com/umbraco/Umbraco-CMS/pull/15728)

Although this sounds like it's not a big change, it’s one of the most breaking changes on the backend. Whereas Newtonsoft.Json was flexible and error-tolerant by default, System.Text.Json is strict but more secure by default. You can therefore run into things that will not be serialized. You can [read more about the differences between Newtonsoft.Json and System.Text.Json here](https://learn.microsoft.com/en-us/dotnet/standard/serialization/system-text-json/migrate-from-newtonsoft?pivots=dotnet-9-0).

* **Nested Content and Grid Layout have been removed**

These two property editors have been deprecated in Umbraco for some time as you can read in our breaking change announcements for [Nested Content](https://github.com/umbraco/Announcements/issues/6) and [Grid Layout](https://github.com/umbraco/Announcements/issues/7). The recommended action is to use blocks instead - Block Grid for the grid layout and either Block Grid or Block List for Nested Content.

* [**The legacy media picker has been removed**](https://github.com/umbraco/Umbraco-CMS/pull/15835)

We have for some time [encouraged to not use the legacy Media Picker](https://github.com/umbraco/Announcements/issues/8), and now it’s fully removed. You should use the default Media Picker instead.

* **Macros and Partial View Macros have been removed. Use partial views and/or blocks in the Rich Text Editor (RTE)**

Depending on the usage of macros, you’ll be able to use either partial views or blocks in the Rich Text Editor. They are not the same kind of functionality, but they cover all the identified use cases in a more consistent and supportable way.

For more information on migrating from macros to using blocks in the Rich Text Editor, see the [Migrating Macros](https://docs.umbraco.com/umbraco-cms/17.latest/get-started/upgrading-and-migrating/version-specific/migrating-macros) article.

* **XPath has been removed**

An alternative is using the Dynamic Roots in the Multinode Treepicker and for ContentXPath the alternative is [IContentLastChanceFinder](https://docs.umbraco.com/umbraco-cms/tutorials/custom-error-page).

* [**The package manifest format has changed**](https://docs.umbraco.com/umbraco-cms/customizing/umbraco-package)

The `package.manifest` file is no longer supported and has been replaced with the `umbraco-package.json` file. The format is similar and after building your Umbraco solution, you have access to a JSON schema file which you can reference and thereby have type-safety in the file. You can read more about the new format on the [Package Manifest](https://docs.umbraco.com/umbraco-cms/customizing/umbraco-package) article.

* **Smidge is no longer a default dependency**

[Smidge has been removed from the default installation](https://github.com/umbraco/Umbraco-CMS/pull/15788) along with the RuntimeMinification setting and related classes. Smidge used to bundle up Backoffice and package assets before, however, with the Bellissima, we have migrated entirely to ESModules. This means we can no longer predict how modules work in automated bundles.

It's recommended that you bundle up your Backoffice static assets for instance by a tool called Vite. You can read more about this on the [Vite Package Setup](https://docs.umbraco.com/umbraco-cms/customizing/development-flow/vite-package-setup) article. You can still use libraries like Smidge for frontend static assets by manually installing the package from NuGet.

You can read the [Smidge documentation](https://github.com/Shazwazza/Smidge/wiki) on how to set up a similar setting to RuntimeMinification. For sites being upgraded from V13 or below, remove [these two lines](https://github.com/umbraco/Umbraco-CMS/blob/04ed514a21279ae82d95b34c55cb2ba96545eb39/src/Umbraco.Web.UI/Views/_ViewImports.cshtml#L7-L8) from the `_ViewImports.cshtml` file.

* **Base classes for Backoffice controllers have been removed**

The `UmbracoAuthorizedApiController` and `UmbracoAuthorizedJsonController` classes have been removed. We recommend basing your Backoffice APIs on the `ManagementApiControllerBase` class from the `Umbraco.Cms.Api.Management` project.

Read the [Creating a Backoffice API article](https://docs.umbraco.com/umbraco-cms/tutorials/creating-a-backoffice-api) for a comprehensive guide to writing APIs for the Management API.

* **Removal of certain AppSettings**

Some AppSettings have been removed or found a new place. In general, any UI-related app settings will now have to be configured as [extensions through the manifest system](https://docs.umbraco.com/umbraco-cms/customizing/extending-overview/extension-types).

* **RichTextEditor**

The global configuration of TinyMCE has been removed in order to support more rich text editors in the future. Instead, a new extension type called “tinyMcePlugin” has been added. This extension type gives you access to each instance of TinyMCE allowing you to configure it exactly as you see fit. You can even make it dependent on more factors such as Document Type, user group, environment, and much more. You have access to the full array of contexts in the Backoffice.

* **ShowDeprecatedPropertyEditors**

There are no deprecated property editors in Bellissima and this configuration will no longer have an effect.

* **HideBackOfficeLogo**

This configuration will no longer have an effect. Instead, you can add a CSS file where you can modify the default CSS variables in the Backoffice. The Backoffice loads a CSS file which can be overwritten by placing a similar file in your project at `/umbraco/backoffice/css/user-defined.css` with the following content:

```css
:root {
  --umb-header-logo-display: none;
}
```

* **IconsPath**

This configuration will no longer have an effect. Instead, you should add icons through the “icons” extension type.

* **AllowedMediaHosts**

This configuration will no longer have an effect.

* **Notifications**

Notifications have changed their behavior to an extent. You can still implement notifications such as `ContentSavingNotification` to react to changes for related systems or add messages to be shown in the Backoffice. You can no longer modify the models being transferred through the API.

If you wish to modify the Backoffice UI, register the extensions through the manifest system that hook on to the desired areas of the Backoffice UI. If you used to modify the models because you needed more data on the models, it's recommended that you build your own API controller to achieve this. You can read more about [building custom API controllers on the Umbraco Documentation](/umbraco-cms/extend-your-project/server-side-extensions/custom-backoffice-api) and even learn how to register your controllers in Swagger UI.

* **Property editors have been split in two**

The new Backoffice and the Management API ushers in a shift in responsibility. Traditionally, a lot of UI responsibility has been misplaced on the server.

For example, it is hardly a server concern how many rows a text area should span by default.

To this end, property editors have been split into two, individually reusable parts; the server implementation and the client implementation.

This change will likely impact custom Property Editors. See the [Migrate custom Property Editors to Umbraco version 14 and later](/umbraco-cms/get-started/upgrading-and-migrating/find-your-upgrade-path/migrate-custom-property-editors-to-umbraco-14) article for details.

* **Property value converters for package.manifest based property editors**

The `package.manifest` file format is no longer known on the server side. It has been changed to be a purely client-side responsibility (and it has adopted a new format and a new name). If you have implemented a property value converter for a property editor defined in a `package.manifest` file, you will likely need to make a small change to the property value converter.

The property value converter must implement `IsConverter()` to determine if it can handle a given property. In this implementation, it is common to use the EditorAlias of the passed in IPublishedPropertyType. However, in Umbraco 14 you should use the EditorUiAlias instead.

More details can be found in [this article](https://docs.umbraco.com/umbraco-cms/tutorials/creating-a-property-editor/custom-value-conversion-for-rendering).

* **UmbracoApiController breakage**

Due to the shift from `Newtonsoft.Json` to the `System.Text.Json`, the `UmbracoApiController` will yield camel-cased output in Umbraco 14, where it was pascal-cased in the previous versions.

Make sure to perform thorough testing of all usages of `UmbracoApiController`. As the class has now been marked as obsolete, we recommend these controllers to be based on the Controller class from ASP.NET Core moving forward.

* **Two-Factor Authentication requires a client registration**

The C# models for Two-Factor Authentication previously supported setting a custom AngularJS view to setup the QR code. This has been moved to the Backoffice client and requires a registration through the new extension type [`mfaLoginProvider`](https://docs.umbraco.com/umbraco-cms/customizing/umbraco-package#extensions):

```typescript
    {
      "type": "mfaLoginProvider",
      "alias": "my.2fa.provider",
      "name": "My 2fa Provider",
      "forProviderName": "UmbracoUserAppAuthenticator",
      "meta": {
        "label": "Authenticate with a 2FA code"
      }
    }
```

This will use Umbraco’s default configuration of the two-factor provider. The user scans a QR code using an app such as Google Authenticator or Authy by Twilio.

It is additionally possible to register your own configurator similar to Umbraco 13. You can achieve this by providing a custom JavaScript element through the `elementJs` property.

More details and code examples can be found in the [Two-Factor Authentication](/umbraco-cms/run-in-production/security/two-factor-authentication) article.

* **External Login Providers require a client registration**

The C# models for External Login Providers have changed and no longer hold configuration options for the “Sign in with XYZ” button. To show a button in the Backoffice to sign in with an external provider, you need to register this through the extension type called [`authProvider`](https://docs.umbraco.com/umbraco-cms/customizing/umbraco-package#extensions) :

```typescript
   {
      "type": "authProvider",
      "alias": "My.AuthProvider.Google",
      "name": "Google Auth Provider",
      "forProviderName": "Umbraco.Google",
      "meta": {
        "label": "Google",
        "defaultView": {
          "icon": "icon-google"
        },
        "linking": {
          "allowManualLinking": true
        }
      }
    }

```

This will use Umbraco’s default button to sign in with the provider. You can also choose to provide your own element to show in the login form. You can achieve this by adding the `elementJs` property.

Additionally, on the backend side, there is an additional helper available to do proper error handling. You can utilize this by using the options pattern to configure the provider.

More details and code examples can be found in the [External Login Providers](/umbraco-cms/run-in-production/security/external-login-providers) article.

* **Deprecated SQLite provider name removed**

In previous versions of Umbraco the `umbracoDbDSN_ProviderName` (and `umbracoCommerceDbDSN_ProviderName`) value could be `Microsoft.Data.SQLite` or `Microsoft.Data.Sqlite` with the former being deprecated in Umbraco 12.

The deprecated version, `Microsoft.Data.SQlite`, has been removed and will require the value to be updated to `Microsoft.Data.Sqlite` for installations using an SQLite database.

```json
{
    ...
    "ConnectionStrings": {
        "umbracoDbDSN": "Data Source=|DataDirectory|/Umbraco.sqlite.db;Cache=Shared;Foreign Keys=True;Pooling=True",
        "umbracoDbDSN_ProviderName": "Microsoft.Data.Sqlite",
        "umbracoCommerceDbDSN": "Data Source=|DataDirectory|/Umbraco.Commerce.sqlite.db;Mode=ReadWrite;Foreign Keys=True;Pooling=True;Cache=Shared",
        "umbracoCommerceDbDSN_ProviderName": "Microsoft.Data.Sqlite"
    },
    ...
}

```

* **Webhook payload property casing has changed**

Following changes to serialization, property names in the payload now use camelCase instead of PascalCase. For example, the 'CreateDate' property is now 'createDate'.

**In-depth and further breaking changes for Umbraco 14 can be found on the** [**CMS GitHub**](https://github.com/umbraco/Umbraco-CMS/pulls?q=is%3Apr+base%3Av14%2Fdev+label%3Acategory%2Fbreaking) **repository and on** [**Our Website**](https://our.umbraco.com/download/releases/1400)**.**

</details>

<details>

<summary>Umbraco 14 RC Versions</summary>

Below you can find the list of breaking changes introduced in Umbraco 14 RC release versions.

**RC 5**

* [Bellissima (frontend/backoffice) changes](https://github.com/umbraco/Umbraco.CMS.Backoffice/releases/tag/v14.0.0-rc5)
* [Backend (CMS) changes](https://github.com/umbraco/Umbraco-CMS/releases/tag/release-14.0.0-rc5)

**RC 4**

* [Bellissima (frontend/backoffice) changes](https://github.com/umbraco/Umbraco.CMS.Backoffice/releases/tag/v14.0.0-rc4)
* [Backend (CMS) changes](https://github.com/umbraco/Umbraco-CMS/releases/tag/release-14.0.0-rc4)

**RC 3**

* [Bellissima (frontend/backoffice) changes](https://github.com/umbraco/Umbraco.CMS.Backoffice/releases/tag/v14.0.0-rc3)
* [Backend (CMS) changes](https://github.com/umbraco/Umbraco-CMS/releases/tag/release-14.0.0-rc3)

**RC 2**

* [Bellissima (frontend/backoffice) changes](https://github.com/umbraco/Umbraco.CMS.Backoffice/releases/tag/v14.0.0-rc2)
* [Backend (CMS) changes](https://github.com/umbraco/Umbraco-CMS/releases/tag/release-14.0.0-rc2)

**RC 1**\
First RC release - 17th of April. Breaking changes since Beta 3:

* [Bellissima (frontend/backoffice) changes](https://github.com/umbraco/Umbraco.CMS.Backoffice/releases/tag/v14.0.0-rc1)
* [Backend (CMS) changes](https://github.com/umbraco/Umbraco-CMS/releases/tag/release-14.0.0-rc1)

</details>

<details>

<summary>Umbraco 14 Beta Versions</summary>

Below you can find the list of breaking changes introduced in Umbraco 14 Beta release versions.

**Beta 3**

* [Bellissima (frontend/backoffice) changes](https://github.com/umbraco/Umbraco.CMS.Backoffice/releases/tag/v14.0.0-beta003)
* [Backend (CMS) changes](https://github.com/umbraco/Umbraco-CMS/releases/tag/release-14.0.0-beta003)

**Beta 2**

There are a few breaking changes since **Beta 1**. Most of the changes concern property editors and getting them to work with migrations as well as new values.

* [Bellissima (frontend/backoffice) changes](https://github.com/umbraco/Umbraco.CMS.Backoffice/releases/tag/v14.0.0-beta002)
* [Backend (CMS) changes](https://github.com/umbraco/Umbraco-CMS/releases/tag/release-14.0.0-beta002)

**Beta 1**\
Official release of Beta, 6th March 2023.

* [Bellissima (frontend/backoffice) changes](https://github.com/umbraco/Umbraco.CMS.Backoffice/releases/tag/v14.0.0-beta001)
* [Backend (CMS) changes](https://github.com/umbraco/Umbraco-CMS/releases/tag/release-14.0.0-beta001)

</details>

<details>

<summary>Umbraco 13</summary>

Below you can find the list of breaking changes introduced in Umbraco 13.

* [Use ISO codes instead of language IDs for fallback languages and translations](https://github.com/umbraco/Umbraco-CMS/issues/13751)
* [Breaking changes for the Delivery API](https://github.com/umbraco/Umbraco-CMS/issues/14745)
* [V13: New login screen](https://github.com/umbraco/Umbraco-CMS/issues/14780)
* [Updated NuGet Dependencies](https://github.com/umbraco/Umbraco-CMS/issues/14795)
* [Fix \`JsonNetSerializer\` settings leaking into derived implementations](https://github.com/umbraco/Umbraco-CMS/issues/14814)
* [Add default property value converters for all value types](https://github.com/umbraco/Umbraco-CMS/issues/14869)
* [V13: Add config to limit concurrent logins](https://github.com/umbraco/Umbraco-CMS/issues/14989)
* [Updates and support for re-use of CMS logic in Deploy](https://github.com/umbraco/Umbraco-CMS/issues/14990)
* [Don't explicitly index nested property by default](https://github.com/umbraco/Umbraco-CMS/issues/15028)
* [Blocks in the Rich Text Editor](https://github.com/umbraco/Umbraco-CMS/issues/15029)
* [Fix FurthestAncestorOrSelfDynamicRootQueryStep and FurthestDescendantOrSelfDynamicRootQueryStep](https://github.com/umbraco/Umbraco-CMS/issues/15113)
* [Remove parameter value/return nullability in \`IImageSourceParser\`, \`ILocalLinkParser\` and \`IMacroParser\`](https://github.com/umbraco/Umbraco-CMS/issues/15130)
* [Update PackageMigrationsPlans collection to be Weighted and not Lazy](https://github.com/umbraco/Umbraco-CMS/issues/15138)
* [Move IContextCache parameter to base Deploy interfaces and add checksum to artifact dependency](https://github.com/umbraco/Umbraco-CMS/issues/15144)
* [V13: Update IWebHookService to proper casing](https://github.com/umbraco/Umbraco-CMS/issues/15169)
* [V13: Implement webhook as i entity](https://github.com/umbraco/Umbraco-CMS/issues/15267)
* [Change \`WebhookEventCollectionBuilder\` to set collection](https://github.com/umbraco/Umbraco-CMS/issues/15351)
* [V13: Log webhook firing exceptions when they happen](https://github.com/umbraco/Umbraco-CMS/issues/15393)
* [Remove date header from webhook request and use constants](https://github.com/umbraco/Umbraco-CMS/issues/15407)

You can find more information about all breaking changes for v13.0.0 on [Our Umbraco](https://our.umbraco.com/download/releases/1300) website.

{% hint style="info" %}
You need to be aware of some things if you are using EF Core, and have installed the `Microsoft.EntityFrameworkCore.Design 8.0.0` package:

* This package has a transient dependency to `Microsoft.CodeAnalysis.Common` which clashes with the same transient dependency from `Umbraco.Cms 13.0.0`. This happens because `Microsoft.EntityFrameworkCore.Design 8.0.0` requires `Microsoft.CodeAnalysis.CSharp.Workspaces` in v4.5.0 or higher.
* If there are no other dependencies that need that package then it installs it in the lowest allowed version (4.5.0). That package then has a strict dependency on `Microsoft.CodeAnalysis.Common` version 4.5.0. The problem is `Umbraco.Cms` through its own transient dependencies that require the version of `Microsoft.CodeAnalysis.Common` to be >= 4.8.0.
* This can be fixed by installing `Microsoft.CodeAnalysis.CSharp.Workspaces` version 4.8.0 as a specific package instead of leaving it as a transient dependency. This is because it will then have a strict transient dependency on `Microsoft.CodeAnalysis.Common` version 4.8.0, which is the same that Umbraco has.
  {% endhint %}

{% hint style="success" icon="lightbulb-message" %}
Community Insight: Watch this [video walkthrough](https://www.youtube.com/watch?v=LHW3bbIR_VU) for a deep dive into the major changes from Umbraco 13 through 17.
{% endhint %}

</details>

<details>

<summary>Umbraco 12</summary>

Umbraco 12 does not include many binary breaking changes, but there are some.

Most notable is a functional breaking change in Migrations, that from Umbraco 12. Each translation will be executed in its own transactions instead of all migrations in one big transaction. This change has been made to ease the support for Sqlite.

**A type, enum, record, or struct visible outside the assembly is missing in the compared assembly when required to be present.**

* PagedModel has moved namespace from Umbraco.New\.Cms.Core.Models to Umbraco.Cms.Core.Models
* Umbraco.Cms.Infrastructure.Migrations.PostMigrations.ClearCsrfCookies is removed. The functionality can be archived by implementing a notification handler for the new UmbracoPlanExecutedNotification.
* Umbraco.Cms.Core.Cache.DistributedCacheBinder is now divided into separate files for each notification handler
* Umbraco.Cms.Infrastructure.Migrations.PostMigrations.DeleteLogViewerQueryFile was a no-op method removed.
* Umbraco.Cms.Infrastructure.Migrations.PostMigrations.RebuildPublishedSnapshot replaced with a RebuildCache flag on the MigrationBase

**A member that is visible outside of the assembly is missing in the compared assembly when required to be present.**

* Umbraco.Cms.Core.Migrations.IMigrationPlanExecutor.Execute(Umbraco.Cms.Infrastructure.Migrations.MigrationPlan,System.String) replaced with Umbraco.Cms.Core.Migrations.IMigrationPlanExecutor.ExecutePlan(Umbraco.Cms.Infrastructure.\* \* Migrations.MigrationPlan,System.String) that returns an rich object instead of a string
* Umbraco.Cms.Infrastructure.Migrations.IMigrationContext.AddPostMigration\`\`1 Removed and replaced with notification
* Umbraco.Cms.Infrastructure.Migrations.MigrationPlan.AddPostMigration\`\`1
* Removed and replaced with notification
* Umbraco.Cms.Infrastructure.Migrations.MigrationPlan.get\_PostMigrationTypes removed.
* Umbraco.Cms.Infrastructure.Migrations.Upgrade.Upgrader.Execute(Umbraco.Cms.Core.Migrations.IMigrationPlanExecutor,Umbraco.Cms.Core.Scoping.IScopeProvider,Umbraco.Cms.Core.Services.IKeyValueService) was obsolete and is replaced by method taking a ICoreScopeProvider instead of a IScopeProvider

**An abstract member was added to the right side of the comparison to an unsealed type.**

* PublishedPropertyBase now requires inheritors to implement GetDeliveryApiValue(System.Boolean,System.String,System.String)

**A member was added to an interface without a default implementation.**

* Umbraco.Cms.Core.Events.IEventAggregator.Publish`2(System.Collections.Generic.IEnumerable{`0})
* Umbraco.Cms.Core.Events.IEventAggregator.PublishAsync`2(System.Collections.Generic.IEnumerable{`0},System.Threading.CancellationToken)
* Umbraco.Cms.Core.Models.PublishedContent.IPublishedProperty.GetDeliveryApiValue(System.Boolean,System.String,System.String)
* Umbraco.Cms.Core.Models.PublishedContent.IPublishedPropertyType.ConvertInterToDeliveryApiObject(Umbraco.Cms.Core.Models.PublishedContent.IPublishedElement,Umbraco.Cms.Core.PropertyEditors.PropertyCacheLevel,System.Object,System.Boolean,System.Boolean)
* Umbraco.Cms.Core.Models.PublishedContent.IPublishedPropertyType.ConvertInterToDeliveryApiObject(Umbraco.Cms.Core.Models.PublishedContent.IPublishedElement,Umbraco.Cms.Core.PropertyEditors.PropertyCacheLevel,System.Object,System.Boolean)
* Umbraco.Cms.Core.Models.PublishedContent.IPublishedPropertyType.DeliveryApiCacheLevel
* Umbraco.Cms.Core.Scoping.ICoreScope.Locks
* Umbraco.Cms.Core.Migrations.IMigrationPlanExecutor.ExecutePlan(Umbraco.Cms.Infrastructure.Migrations.MigrationPlan,System.String)
* Umbraco.Cms.Infrastructure.Search.IUmbracoIndexingHandler.RemoveProtectedContent
* Umbraco.Cms.Infrastructure.Examine.IUmbracoIndex.SupportProtectedContent

</details>

<details>

<summary>Umbraco 11</summary>

Most breaking changes are introduced due to **updated dependencies**. The breaking changes in .NET 7 and ASP.NET Core 7 are documented by [Microsoft](https://learn.microsoft.com/en-us/dotnet/core/compatibility/7.0).

Besides the documented changes, we have also seen a few method signatures that are changed to support Nullable-Reference-Types.

If you are using **TinyMCE** plugins or custom TinyMCE configuration you need to migrate to the latest version. Learn more about this in the [Rich Text Editor documentation](/umbraco-cms/model-your-content/property-editors/built-in-umbraco-property-editors/rich-text-editor).

The breaking changes in TinyMCE are also documented in the official migration guides for [version 4 to 5](https://www.tiny.cloud/docs/migration-from-4x/) and from [version 5 to 6](https://www.tiny.cloud/docs/tinymce/6/migration-from-5x/).

The breaking changes in Umbraco 11 are mainly the removal of classes, methods, and so on, marked as obsolete in Umbraco 9.

A few methods and classes have also been moved and changed namespace. Decoupled dependencies are documented on the [Umbraco Announcements repository](https://github.com/umbraco/Announcements/issues/5).

The full list of API-breaking changes can be found below.

**Obsolete code removed**

The following have been removed after having been obsoleted since Umbraco 9.

**Umbraco.Extensions**

```csharp
Umbraco.Extensions.ServiceCollectionExtensions.AddUnique<TImplementing>(Microsoft.Extensions.DependencyInjection.IServiceCollection)

Umbraco.Extensions.EnumExtensions.HasFlagAll<T>(T, T)

Umbraco.Extensions.FriendlyImageCropperTemplateExtensions.GetLocalCropUrl(Umbraco.Cms.Core.Models.MediaWithCrops, string, string?)
```

**Umbraco.Cms.Core**

```csharp
Umbraco.Cms.Core.Constants.Conventions.Member.IsApproved
Umbraco.Cms.Core.Constants.Conventions.Member.IsApprovedLabel
Umbraco.Cms.Core.Constants.Conventions.Member.IsLockedOut
Umbraco.Cms.Core.Constants.Conventions.Member.IsLockedOutLabel
Umbraco.Cms.Core.Constants.Conventions.Member.LastLoginDate
Umbraco.Cms.Core.Constants.Conventions.Member.LastLoginDateLabel
Umbraco.Cms.Core.Constants.Conventions.Member.LastPasswordChangeDate
Umbraco.Cms.Core.Constants.Conventions.Member.LastPasswordChangeDateLabel
Umbraco.Cms.Core.Constants.Conventions.Member.LastLockoutDate
Umbraco.Cms.Core.Constants.Conventions.Member.LastLockoutDateLabel
Umbraco.Cms.Core.Constants.Conventions.Member.FailedPasswordAttempts
Umbraco.Cms.Core.Constants.Conventions.Member.FailedPasswordAttemptsLabel

Umbraco.Cms.Core.WebAssets.IRuntimeMinifier.Reset()

Umbraco.Cms.Core.Services.IExternalLoginService

Umbraco.Cms.Core.Services.ExternalLoginService.ExternalLoginService(
    Umbraco.Cms.Core.Scoping.ICoreScopeProvider,
    Microsoft.Extensions.Logging.ILoggerFactory,
    Umbraco.Cms.Core.Events.IEventMessagesFactory,
    Umbraco.Cms.Core.Persistence.Repositories.IExternalLoginRepository)

Umbraco.Cms.Core.Services.ExternalLoginService.GetExternalLogins(int)

Umbraco.Cms.Core.Services.ExternalLoginService.GetExternalLoginTokens(int)

Umbraco.Cms.Core.Services.ExternalLoginService.Save(int,
    System.Collections.Generic.IEnumerable<Umbraco.Cms.Core.Security.IExternalLogin>)

Umbraco.Cms.Core.Services.ExternalLoginService.Save(int,
    System.Collections.Generic.IEnumerable<Umbraco.Cms.Core.Security.IExternalLoginToken>)

Umbraco.Cms.Core.Services.ExternalLoginService.DeleteUserLogins(int)

Umbraco.Cms.Core.Services.IMacroWithAliasService

Umbraco.Cms.Core.Services.ITwoFactorLoginService2

Umbraco.Cms.Core.Services.LocalizedTextService.LocalizedTextService(
    System.Collections.Generic.IDictionary<System.Globalization.CultureInfo, System.Collections.Generic.IDictionary<string, System.Collections.Generic.IDictionary<string, string>>>,
    Microsoft.Extensions.Logging.ILogger<Umbraco.Cms.Core.Services.LocalizedTextService>)

Umbraco.Cms.Core.Services.ServiceContext.ServiceContext(
    System.Lazy<Umbraco.Cms.Core.Services.IPublicAccessService>?,
    System.Lazy<Umbraco.Cms.Core.Services.IDomainService>?,
    System.Lazy<Umbraco.Cms.Core.Services.IAuditService>?,
    System.Lazy<Umbraco.Cms.Core.Services.ILocalizedTextService>?,
    System.Lazy<Umbraco.Cms.Core.Services.ITagService>?,
    System.Lazy<Umbraco.Cms.Core.Services.IContentService>?,
    System.Lazy<Umbraco.Cms.Core.Services.IUserService>?,
    System.Lazy<Umbraco.Cms.Core.Services.IMemberService>?,
    System.Lazy<Umbraco.Cms.Core.Services.IMediaService>?,
    System.Lazy<Umbraco.Cms.Core.Services.IContentTypeService>?,
    System.Lazy<Umbraco.Cms.Core.Services.IMediaTypeService>?,
    System.Lazy<Umbraco.Cms.Core.Services.IDataTypeService>?,
    System.Lazy<Umbraco.Cms.Core.Services.IFileService>?,
    System.Lazy<Umbraco.Cms.Core.Services.ILocalizationService>?,
    System.Lazy<Umbraco.Cms.Core.Services.IPackagingService>?,
    System.Lazy<Umbraco.Cms.Core.Services.IServerRegistrationService>?,
    System.Lazy<Umbraco.Cms.Core.Services.IEntityService>?,
    System.Lazy<Umbraco.Cms.Core.Services.IRelationService>?,
    System.Lazy<Umbraco.Cms.Core.Services.IMacroService>?,
    System.Lazy<Umbraco.Cms.Core.Services.IMemberTypeService>?,
    System.Lazy<Umbraco.Cms.Core.Services.IMemberGroupService>?,
    System.Lazy<Umbraco.Cms.Core.Services.INotificationService>?,
    System.Lazy<Umbraco.Cms.Core.Services.IExternalLoginService>?,
    System.Lazy<Umbraco.Cms.Core.Services.IRedirectUrlService>?,
    System.Lazy<Umbraco.Cms.Core.Services.IConsentService>?,
    System.Lazy<Umbraco.Cms.Core.Services.IKeyValueService>?,
    System.Lazy<Umbraco.Cms.Core.Services.IContentTypeBaseServiceProvider>?)

Umbraco.Cms.Core.Services.ServiceContext.CreatePartial(
    Umbraco.Cms.Core.Services.IContentService?,
    Umbraco.Cms.Core.Services.IMediaService?,
    Umbraco.Cms.Core.Services.IContentTypeService?,
    Umbraco.Cms.Core.Services.IMediaTypeService?,
    Umbraco.Cms.Core.Services.IDataTypeService?,
    Umbraco.Cms.Core.Services.IFileService?,
    Umbraco.Cms.Core.Services.ILocalizationService?,
    Umbraco.Cms.Core.Services.IPackagingService?,
    Umbraco.Cms.Core.Services.IEntityService?,
    Umbraco.Cms.Core.Services.IRelationService?,
    Umbraco.Cms.Core.Services.IMemberGroupService?,
    Umbraco.Cms.Core.Services.IMemberTypeService?,
    Umbraco.Cms.Core.Services.IMemberService?,
    Umbraco.Cms.Core.Services.IUserService?,
    Umbraco.Cms.Core.Services.ITagService?,
    Umbraco.Cms.Core.Services.INotificationService?,
    Umbraco.Cms.Core.Services.ILocalizedTextService?,
    Umbraco.Cms.Core.Services.IAuditService?,
    Umbraco.Cms.Core.Services.IDomainService?,
    Umbraco.Cms.Core.Services.IMacroService?,
    Umbraco.Cms.Core.Services.IPublicAccessService?,
    Umbraco.Cms.Core.Services.IExternalLoginService?,
    Umbraco.Cms.Core.Services.IServerRegistrationService?,
    Umbraco.Cms.Core.Services.IRedirectUrlService?,
    Umbraco.Cms.Core.Services.IConsentService?,
    Umbraco.Cms.Core.Services.IKeyValueService?,
    Umbraco.Cms.Core.Services.IContentTypeBaseServiceProvider?)

Umbraco.Cms.Core.Services.TwoFactorLoginService.TwoFactorLoginService(
    Umbraco.Cms.Core.Persistence.Repositories.ITwoFactorLoginRepository,
    Umbraco.Cms.Core.Scoping.ICoreScopeProvider,
    System.Collections.Generic.IEnumerable<Umbraco.Cms.Core.Security.ITwoFactorProvider>,
    Microsoft.Extensions.Options.IOptions<Microsoft.AspNetCore.Identity.IdentityOptions>,
    Microsoft.Extensions.Options.IOptions<Umbraco.Cms.Core.Security.BackOfficeIdentityOptions>)

Umbraco.Cms.Core.Routing.DefaultUrlProvider.DefaultUrlProvider(
    Microsoft.Extensions.Options.IOptionsMonitor<Umbraco.Cms.Core.Configuration.Models.RequestHandlerSettings>,
    Microsoft.Extensions.Logging.ILogger<Umbraco.Cms.Core.Routing.DefaultUrlProvider>,
    Umbraco.Cms.Core.Routing.ISiteDomainMapper,
    Umbraco.Cms.Core.Web.IUmbracoContextAccessor,
    Umbraco.Cms.Core.Routing.UriUtility)

Umbraco.Cms.Core.Persistence.Repositories.IExternalLoginRepository

Umbraco.Cms.Core.Persistence.Repositories.IMacroWithAliasRepository

Umbraco.Cms.Core.Persistence.Repositories.IMemberRepository.SetLastLogin(string, System.DateTime)

Umbraco.Cms.Core.Notifications.UmbracoApplicationComponentsInstallingNotification

Umbraco.Cms.Core.Notifications.UmbracoApplicationMainDomAcquiredNotification


Umbraco.Cms.Core.Notifications.UmbracoApplicationStartingNotification.UmbracoApplicationStartingNotification(Umbraco.Cms.Core.RuntimeLevel)

Umbraco.Cms.Core.Notifications.UmbracoApplicationStoppingNotification.UmbracoApplicationStoppingNotification()

Umbraco.Cms.Core.Models.IContentTypeWithHistoryCleanup

Umbraco.Cms.Core.Models.Language.Language(Umbraco.Cms.Core.Configuration.Models.GlobalSettings, string)

Umbraco.Cms.Core.Models.RelationType.RelationType(string, string, bool, System.Nullable<System.Guid>, System.Nullable<System.Guid>)

Umbraco.Cms.Core.Models.PublishedContent.PublishedContentType.PublishedContentType(int, string,
    Umbraco.Cms.Core.Models.PublishedContent.PublishedItemType,
    System.Collections.Generic.IEnumerable<string>,
    System.Collections.Generic.IEnumerable<Umbraco.Cms.Core.Models.PublishedContent.PublishedPropertyType>,
    Umbraco.Cms.Core.Models.ContentVariation,
    bool)

Umbraco.Cms.Core.Models.PublishedContent.PublishedContentType.PublishedContentType(int, string,
    Umbraco.Cms.Core.Models.PublishedContent.PublishedItemType, System.Collections.Generic.IEnumerable<string>,
    System.Func<Umbraco.Cms.Core.Models.PublishedContent.IPublishedContentType,
    System.Collections.Generic.IEnumerable<Umbraco.Cms.Core.Models.PublishedContent.IPublishedPropertyType>>,
    Umbraco.Cms.Core.Models.ContentVariation,
    bool)

Umbraco.Cms.Core.Models.Mapping.ContentTypeMapDefinition.ContentTypeMapDefinition(
    Umbraco.Cms.Core.Models.Mapping.CommonMapper,
    Umbraco.Cms.Core.PropertyEditors.PropertyEditorCollection,
    Umbraco.Cms.Core.Services.IDataTypeService,
    Umbraco.Cms.Core.Services.IFileService,
    Umbraco.Cms.Core.Services.IContentTypeService,
    Umbraco.Cms.Core.Services.IMediaTypeService,
    Umbraco.Cms.Core.Services.IMemberTypeService,
    Microsoft.Extensions.Logging.ILoggerFactory,
    Umbraco.Cms.Core.Strings.IShortStringHelper,
    Microsoft.Extensions.Options.IOptions<Umbraco.Cms.Core.Configuration.Models.GlobalSettings>,
    Umbraco.Cms.Core.Hosting.IHostingEnvironment)

Umbraco.Cms.Core.Models.ContentEditing.UserGroupPermissionsSave.Validate(System.ComponentModel.DataAnnotations.ValidationContext)

Umbraco.Cms.Core.Install.InstallSteps.TelemetryIdentifierStep.TelemetryIdentifierStep(
    Microsoft.Extensions.Logging.ILogger<Umbraco.Cms.Core.Install.InstallSteps.TelemetryIdentifierStep>,
    Microsoft.Extensions.Options.IOptions<Umbraco.Cms.Core.Configuration.Models.GlobalSettings>,
    Umbraco.Cms.Core.Configuration.IConfigManipulator)

Umbraco.Cms.Core.IO.ViewHelper.ViewHelper(Umbraco.Cms.Core.IO.IFileSystem)

Umbraco.Cms.Core.HealthChecks.Checks.Security.BaseHttpHeaderCheck.BaseHttpHeaderCheck(
    Umbraco.Cms.Core.Hosting.IHostingEnvironment,
    Umbraco.Cms.Core.Services.ILocalizedTextService,
    string,
    string,
    string,
    bool)

Umbraco.Cms.Core.DependencyInjection.UmbracoBuilderExtensions.AddOEmbedProvider<T>(Umbraco.Cms.Core.DependencyInjection.IUmbracoBuilder)

Umbraco.Cms.Core.DependencyInjection.UmbracoBuilderExtensions.OEmbedProviders(Umbraco.Cms.Core.DependencyInjection.IUmbracoBuilder)

Umbraco.Cms.Core.Configuration.Models.RequestHandlerSettings.CharCollection.get
Umbraco.Cms.Core.Configuration.Models.RequestHandlerSettings.CharCollection.set

Umbraco.Cms.Core.Composing.IUserComposer

Umbraco.Cms.Core.Security.BackOfficeUserStore.BackOfficeUserStore(
    Umbraco.Cms.Core.Scoping.ICoreScopeProvider,
    Umbraco.Cms.Core.Services.IUserService,
    Umbraco.Cms.Core.Services.IEntityService,
    Umbraco.Cms.Core.Services.IExternalLoginService,
    Microsoft.Extensions.Options.IOptions<Umbraco.Cms.Core.Configuration.Models.GlobalSettings>,
    Umbraco.Cms.Core.Mapping.IUmbracoMapper,
    Umbraco.Cms.Core.Security.BackOfficeErrorDescriber,
    Umbraco.Cms.Core.Cache.AppCaches)

Umbraco.Cms.Core.Security.MemberUserStore.MemberUserStore(
    Umbraco.Cms.Core.Services.IMemberService,
    Umbraco.Cms.Core.Mapping.IUmbracoMapper,
    Umbraco.Cms.Core.Scoping.ICoreScopeProvider,
    Microsoft.AspNetCore.Identity.IdentityErrorDescriber,
    Umbraco.Cms.Core.PublishedCache.IPublishedSnapshotAccessor,
    Umbraco.Cms.Core.Services.IExternalLoginService)

Umbraco.Cms.Core.Logging.Viewer.ILogViewer.GetLogLevel()

Umbraco.Cms.Core.Logging.Viewer.SerilogLogViewerSourceBase.SerilogLogViewerSourceBase(
    Umbraco.Cms.Core.Logging.Viewer.ILogViewerConfig,
    Serilog.ILogger)

Umbraco.Cms.Core.Logging.Viewer.SerilogLogViewerSourceBase.GetLogLevel()

Umbraco.Cms.Core.Configuration.JsonConfigManipulator.JsonConfigManipulator(Microsoft.Extensions.Configuration.IConfiguration)
```

**Umbraco.Cms.Infrastructure**

```csharp
Umbraco.Cms.Infrastructure.Persistence.Repositories.Implement.MemberRepository.SetLastLogin(string, System.DateTime)

Umbraco.Cms.Infrastructure.Packaging.PackageMigrationBase.PackageMigrationBase(
    Umbraco.Cms.Core.Services.IPackagingService,
    Umbraco.Cms.Core.Services.IMediaService,
    Umbraco.Cms.Core.IO.MediaFileManager,
    Umbraco.Cms.Core.PropertyEditors.MediaUrlGeneratorCollection,
    Umbraco.Cms.Core.Strings.IShortStringHelper,
    Umbraco.Cms.Core.Services.IContentTypeBaseServiceProvider,
    Umbraco.Cms.Infrastructure.Migrations.IMigrationContext)

Umbraco.Cms.Infrastructure.Migrations.Install.DatabaseSchemaCreator.DatabaseSchemaCreator(
    Umbraco.Cms.Infrastructure.Persistence.IUmbracoDatabase?,
    Microsoft.Extensions.Logging.ILogger<Umbraco.Cms.Infrastructure.Migrations.Install.DatabaseSchemaCreator>,
    Microsoft.Extensions.Logging.ILoggerFactory,
    Umbraco.Cms.Core.Configuration.IUmbracoVersion,
    Umbraco.Cms.Core.Events.IEventAggregator)

Umbraco.Cms.Infrastructure.Migrations.Install.DatabaseSchemaCreatorFactory.DatabaseSchemaCreatorFactory(
    Microsoft.Extensions.Logging.ILogger<Umbraco.Cms.Infrastructure.Migrations.Install.DatabaseSchemaCreator>,
    Microsoft.Extensions.Logging.ILoggerFactory,
    Umbraco.Cms.Core.Configuration.IUmbracoVersion,
    Umbraco.Cms.Core.Events.IEventAggregator)

Umbraco.Cms.Infrastructure.HostedServices.RecurringHostedServiceBase.RecurringHostedServiceBase(
    System.TimeSpan,
    System.TimeSpan)

Umbraco.Cms.Infrastructure.HostedServices.ReportSiteTask.ReportSiteTask(
    Microsoft.Extensions.Logging.ILogger<Umbraco.Cms.Infrastructure.HostedServices.ReportSiteTask>,
    Umbraco.Cms.Core.Configuration.IUmbracoVersion,
    Microsoft.Extensions.Options.IOptions<Umbraco.Cms.Core.Configuration.Models.GlobalSettings>)
```

**Umbraco.Cms.Web**

```csharp
Umbraco.Cms.Web.Common.Security.ConfigureIISServerOptions

Umbraco.Cms.Web.Common.RuntimeMinification.SmidgeRuntimeMinifier.Reset()

Umbraco.Cms.Web.Common.Middleware.UmbracoRequestMiddleware.UmbracoRequestMiddleware(
    Microsoft.Extensions.Logging.ILogger<Umbraco.Cms.Web.Common.Middleware.UmbracoRequestMiddleware>,
    Umbraco.Cms.Core.Web.IUmbracoContextFactory,
    Umbraco.Cms.Core.Cache.IRequestCache,
    Umbraco.Cms.Core.Events.IEventAggregator,
    Umbraco.Cms.Core.Logging.IProfiler,
    Umbraco.Cms.Core.Hosting.IHostingEnvironment,
    Umbraco.Cms.Core.Routing.UmbracoRequestPaths,
    Umbraco.Cms.Infrastructure.WebAssets.BackOfficeWebAssets,
    Microsoft.Extensions.Options.IOptionsMonitor<Smidge.Options.SmidgeOptions>,
    Umbraco.Cms.Core.Services.IRuntimeState,
    Umbraco.Cms.Core.Models.PublishedContent.IVariationContextAccessor,
    Umbraco.Cms.Core.PublishedCache.IDefaultCultureAccessor)

Umbraco.Cms.Web.Website.Controllers.UmbLoginController.UmbLoginController(
    Umbraco.Cms.Core.Web.IUmbracoContextAccessor,
    Umbraco.Cms.Infrastructure.Persistence.IUmbracoDatabaseFactory,
    Umbraco.Cms.Core.Services.ServiceContext,
    Umbraco.Cms.Core.Cache.AppCaches,
    Umbraco.Cms.Core.Logging.IProfilingLogger,
    Umbraco.Cms.Core.Routing.IPublishedUrlProvider,
    Umbraco.Cms.Web.Common.Security.IMemberSignInManager)

Umbraco.Cms.Web.BackOffice.Trees.MemberTypeAndGroupTreeControllerBase.MemberTypeAndGroupTreeControllerBase(
    Umbraco.Cms.Core.Services.ILocalizedTextService,
    Umbraco.Cms.Core.UmbracoApiControllerTypeCollection,
    Umbraco.Cms.Core.Trees.IMenuItemCollectionFactory,
    Umbraco.Cms.Core.Events.IEventAggregator)

Umbraco.Cms.Web.BackOffice.Controllers.CurrentUserController.CurrentUserController(
    Umbraco.Cms.Core.IO.MediaFileManager,
    Microsoft.Extensions.Options.IOptions<Umbraco.Cms.Core.Configuration.Models.ContentSettings>,
    Umbraco.Cms.Core.Hosting.IHostingEnvironment,
    Umbraco.Cms.Core.Media.IImageUrlGenerator,
    Umbraco.Cms.Core.Security.IBackOfficeSecurityAccessor,
    Umbraco.Cms.Core.Services.IUserService,
    Umbraco.Cms.Core.Mapping.IUmbracoMapper,
    Umbraco.Cms.Core.Security.IBackOfficeUserManager,
    Microsoft.Extensions.Logging.ILoggerFactory,
    Umbraco.Cms.Core.Services.ILocalizedTextService,
    Umbraco.Cms.Core.Cache.AppCaches,
    Umbraco.Cms.Core.Strings.IShortStringHelper,
    Umbraco.Cms.Web.Common.Security.IPasswordChanger<Umbraco.Cms.Core.Security.BackOfficeIdentityUser>)

Umbraco.Cms.Web.BackOffice.Controllers.EntityController.GetUrlsByUdis(Umbraco.Cms.Core.Udi[], string?)

Umbraco.Cms.Web.BackOffice.Controllers.HelpController.HelpController(Microsoft.Extensions.Logging.ILogger<Umbraco.Cms.Web.BackOffice.Controllers.HelpController>)

Umbraco.Cms.Web.BackOffice.Controllers.LanguageController.LanguageController(
    Umbraco.Cms.Core.Services.ILocalizationService,
    Umbraco.Cms.Core.Mapping.IUmbracoMapper,
    Microsoft.Extensions.Options.IOptionsSnapshot<Umbraco.Cms.Core.Configuration.Models.GlobalSettings>)

Umbraco.Cms.Web.BackOffice.Controllers.LogViewerController.LogViewerController(Umbraco.Cms.Core.Logging.Viewer.ILogViewer)
Umbraco.Cms.Web.BackOffice.Controllers.LogViewerController.GetLogLevel()

Umbraco.Cms.Web.BackOffice.Controllers.MediaController.GetPagedReferences(int, string, int, int)

Umbraco.Cms.Web.BackOffice.Controllers.MemberTypeController.GetAllTypes()

Umbraco.Cms.Web.BackOffice.Controllers.TemplateController.TemplateController(
    Umbraco.Cms.Core.Services.IFileService,
    Umbraco.Cms.Core.Mapping.IUmbracoMapper,
    Umbraco.Cms.Core.Strings.IShortStringHelper)
```

**Umbraco.Cms.Tests**

```csharp
Umbraco.Cms.Tests.Common.Testing.TestOptionAttributeBase.ScanAssemblies
```

**Code moved to new assemblies and namespaces**

The following have been moved to new assemblies and their namespaces have been updated accordingly.

**Umbraco.Extensions**

```csharp
Umbraco.Extensions.NPocoDatabaseExtensions.ConfigureNPocoBulkExtensions()

Umbraco.Extensions.UmbracoBuilderExtensions.AddUmbracoImageSharp(Umbraco.Cms.Core.DependencyInjection.IUmbracoBuilder)
```

**Umbraco.Cms.Web**

```csharp
Umbraco.Cms.Web.Common.Media.ImageSharpImageUrlGenerator

Umbraco.Cms.Web.Common.ImageProcessors.CropWebProcessor

Umbraco.Cms.Web.Common.DependencyInjection.ConfigureImageSharpMiddlewareOptions
Umbraco.Cms.Web.Common.DependencyInjection.ConfigurePhysicalFileSystemCacheOptions
```

**Umbraco.Cms.Infrastructure**

```csharp
Umbraco.Cms.Infrastructure.Persistence.LocalDb
Umbraco.Cms.Infrastructure.Persistence.FaultHandling.RetryPolicyFactory
Umbraco.Cms.Infrastructure.Persistence.FaultHandling.ThrottlingMode
Umbraco.Cms.Infrastructure.Persistence.FaultHandling.ThrottlingType
Umbraco.Cms.Infrastructure.Persistence.FaultHandling.ThrottledResourceType
Umbraco.Cms.Infrastructure.Persistence.FaultHandling.ThrottlingCondition
Umbraco.Cms.Infrastructure.Persistence.FaultHandling.Strategies.NetworkConnectivityErrorDetectionStrategy
Umbraco.Cms.Infrastructure.Persistence.FaultHandling.Strategies.SqlAzureTransientErrorDetectionStrategy
```

**New interface methods**

A few interfaces have been merged, adding new members to the original interfaces.

**Umbraco.Cms.Core**

```csharp
Umbraco.Cms.Core.Services.IMacroService.GetAll(params string[])

Umbraco.Cms.Core.Persistence.Repositories.IMacroRepository.GetByAlias(string)
Umbraco.Cms.Core.Persistence.Repositories.IMacroRepository.GetAllByAlias(string[])

Umbraco.Cms.Core.Services.ITwoFactorLoginService.DisableWithCodeAsync(string, System.Guid, string)
Umbraco.Cms.Core.Services.ITwoFactorLoginService.ValidateAndSaveAsync(string, System.Guid, string, string)

Umbraco.Cms.Core.Models.IContentType.HistoryCleanup

Umbraco.Cms.Core.Media.IImageDimensionExtractor.SupportedImageFileTypes
```

**No-Operation methods removed**

A method not doing anything for the last couple of major releases have been removed.

**Umbraco.Cms.Core**

```csharp
Umbraco.Cms.Core.Services.IMembershipMemberService<T>.SetLastLogin(string, System.DateTime)
```

**Changes due to models made immutable**

A single model have been made immutable, so the default constructor and the setters are not available anymore.

**Umbraco.Cms.Infrastructure**

```csharp
Umbraco.Cms.Infrastructure.PublishedCache.DataSource.ContentData.ContentData()
Umbraco.Cms.Infrastructure.PublishedCache.DataSource.ContentData.Name.set
Umbraco.Cms.Infrastructure.PublishedCache.DataSource.ContentData.UrlSegment.set
Umbraco.Cms.Infrastructure.PublishedCache.DataSource.ContentData.VersionId.set
Umbraco.Cms.Infrastructure.PublishedCache.DataSource.ContentData.VersionDate.set
Umbraco.Cms.Infrastructure.PublishedCache.DataSource.ContentData.WriterId.set
Umbraco.Cms.Infrastructure.PublishedCache.DataSource.ContentData.TemplateId.set
Umbraco.Cms.Infrastructure.PublishedCache.DataSource.ContentData.Published.set
Umbraco.Cms.Infrastructure.PublishedCache.DataSource.ContentData.Properties.set
Umbraco.Cms.Infrastructure.PublishedCache.DataSource.ContentData.CultureInfos.set
```

**Classes that does not inherit from base type anymore**

The following classes now directly inherit from OEmbedProviderBase instead of EmbedProviderBase.

**Umbraco.Cms.Core**

```csharp
Umbraco.Cms.Core.Media.EmbedProviders.DailyMotion
Umbraco.Cms.Core.Media.EmbedProviders.Flickr
Umbraco.Cms.Core.Media.EmbedProviders.GettyImages
Umbraco.Cms.Core.Media.EmbedProviders.Giphy
Umbraco.Cms.Core.Media.EmbedProviders.Hulu
Umbraco.Cms.Core.Media.EmbedProviders.Issuu
Umbraco.Cms.Core.Media.EmbedProviders.Kickstarter
Umbraco.Cms.Core.Media.EmbedProviders.Slideshare
Umbraco.Cms.Core.Media.EmbedProviders.Soundcloud
Umbraco.Cms.Core.Media.EmbedProviders.Ted
Umbraco.Cms.Core.Media.EmbedProviders.Twitter
Umbraco.Cms.Core.Media.EmbedProviders.Vimeo
Umbraco.Cms.Core.Media.EmbedProviders.YouTube
```

</details>

<details>

<summary>Umbraco 10</summary>

[**Update 'diff' from 3.5.0 to 5.0.0**](https://github.com/umbraco/Umbraco-CMS/issues/12337)

The `diff` library used in the Backoffice client has been updated and introduces a breaking change since the exposed global object has been renamed from `JsDiff` to `Diff`.

[**Content Schedule performance**](https://github.com/umbraco/Umbraco-CMS/pull/11398)

Removes mutable ContentSchedule property from `IContent/Content` to `read/write` content schedules.

Use *IContentService.GetContentScheduleByContentId && IContentService.PersistContentSchedule* or the optional *contentSchedule parameter* on *IContentService.Save* instead.

[**Removed redundant event handling code**](https://github.com/umbraco/Umbraco-CMS/pull/11842)

* Removed public methods: `PublishedSnapshotServiceEventHandler.Dispose`, `PublishedSnapshotServiceEventHandler.Dispose(bool)`, and `.PublishedSnapshotServiceEventHandler.Initialize`.
* Removed public `ctor`.

[**Scope provider cleanup**](https://github.com/umbraco/Umbraco-CMS/pull/11859)

* Some public classes in the `Cms.Core.Services` namespace have moved assembly from **`Umbraco.Cms.Infrastructure`** to **`Umbraco.Cms.Core`**.
* These same public classes have changed namespace from **`Umbraco.Cms.Core.Services.Implement`** to **`Umbraco.Cms.Core.Services`**.

[**Update to NPoco5**](https://github.com/umbraco/Umbraco-CMS/pull/11880)

NPoco types and interfaces are part of our public interface which means that this upgrade imposes breaking changes.

[**SQLite support**](https://github.com/umbraco/Umbraco-CMS/pull/11922)

* Removed support for Microsoft SQL Server Compact (SQL CE).
* Removed `ReadLock` and `WriteLock` methods from `ISqlSyntaxProvider` interface. Use `IDistributedLockingMechanism` (or IScope which delegates to `IDistributedLockingMechanism`) instead.
* Constants for SQL Server provider name moved+consolidated from `Core.Constants.DatabaseProviders` and `Core.Constants.-DbProviderNames` to `Umbraco.Cms.Persistence.SqlServer.Constants`
* Some SQL Server related services moved from the `Umbraco.Infrastructure` project to the new `Umbraco.Cms.Persistence`.
* SqlServer project with altered namespaces e.g. `SqlServerSyntaxProvider`, `SqlServerBulkSqlInsertProvider`, `SqlServerDatabaseCreator`.

**Added the following methods/properties to ISqlSyntaxProvider. These must be implemented in any downstream implementation e.g:**

* `ISqlSyntaxProvider.HandleCreateTable(IDatabase,TableDefinition,Boolean)`
* `ISqlSyntaxProvider.GetFieldNameForUpdate()`
* `ISqlSyntaxProvider.GetColumn(DatabaseType,String,String,String,String,Boolean)`
* `ISqlSyntaxProvider.InsertForUpdateHint(Sql)`
* `ISqlSyntaxProvider.AppendForUpdateHint(Sql)`
* `ISqlSyntaxProvider.LeftJoinWithNestedJoin(Sql,Func<Sql,Sql>,String)`

[**Update to ImageSharp v2**](https://github.com/umbraco/Umbraco-CMS/pull/12185)

**Update dependency versions**:

* `SixLabors.ImageSharp` from 1.0.4 to 2.1.1
* `SixLabors.ImageSharp.Web` from 1.0.5 to 2.0.0

Renamed the `CachedNameLength` property to `CacheHashLength` on **ImagingCacheSettings**.

Moved **ImageSharpImageUrlGenerator** from project `Umbraco.Infrastructure` to `Umbraco.Web.Common` and updated the corresponding namespace and DI registration (from `AddCoreInitialServices()` to `AddUmbracoImageSharp()`);

Moved **ImageSharp** configuration from the `AddUmbracoImageSharp()` extension method into separate `IConfigureOptions<>` implementations:

* The middleware is configured in ConfigureImageSharpMiddlewareOptions (which also replaces ImageSharpConfigurationOptions that previously only set the default ImageSharp configuration);
* The default physical cache is configured in ConfigurePhysicalFileSystemCacheOptions.

[**Migrate Member properties to columns on the Member table**](https://github.com/umbraco/Umbraco-CMS/pull/12205)

This is breaking because it is no longer possible to access the properties listed below through the *IMember.Properties* collection. You must now access them through their specific properties that is *IMember.IsLockedOut*.

* `umbracoMemberFailedPasswordAttempts`
* `umbracoMemberApproved`
* `umbracoMemberLockedOut`
* `umbracoMemberLastLockoutDate`
* `umbracoMemberLastLogin`
* `umbracoMemberLastPasswordChangeDate`

Additionally, when previously you resolved a Member as published content, all the default properties would be there twice. For instance, `IsLockedOut` would be there both as a property with the alias `umbracoMemberLockedOut` and with the alias `IsLockedOut`. Now it'll only be there once, with the alias being the name of the property, so `IsLockedOut` in this instance.

Lastly the nullable dates on a user, i.e. `LastLoginLate` will now be null instead of `DateTime.MinValue` when getting a user with the UserService.

[**Update examine to version 3**](https://github.com/umbraco/Umbraco-CMS/pull/12307)

**Examine 3 breaking changes:**

* `ValueSet` immutable.
* `ValueSetValidationResult` is renamed to `ValueSetValidationStatus` and `ValueSetValidationResult` is now a type.

[**Async support for content finders**](https://github.com/umbraco/Umbraco-CMS/pull/12340)

```csharp
bool TryFindContent(IPublishedRequestBuilder request);
```

Has changed to:

```csharp
Task<bool> TryFindContent(IPublishedRequestBuilder request);
```

[**Improve redirect Content finder scalability**](https://github.com/umbraco/Umbraco-CMS/pull/12341)

* Added more methods to `IRedirectUrlRepository` and `IRedirectUrlService.cs`.

[**Fix Block List settings exception and optimize PVCs**](https://github.com/umbraco/Umbraco-CMS/pull/12342)

* Added a new method on `IPublishedModelFactory`: Type `GetModelType(string? alias)`;
* The generic types of a `BlockListItem<TContent`, TSettings>`instance in the`BlockListModel`returned by`BlockListPropertyValueConverter`is now determined by calling this new method, which can be different and cause a`ModelBindingException\` in your views.

[**Async tree search**](https://github.com/umbraco/Umbraco-CMS/pull/12344)

```csharp
IEnumerable<SearchResultEntity?> Search(string query, int pageSize, long pageIndex, out long totalFound, string? searchFrom
= null)
```

Has changed to:

```csharp
Task<EntitySearchResults> SearchAsync(string query, int pageSize, long pageIndex, string? searchFrom = null);
```

[**Moved StackQueue to correct namespace**](https://github.com/umbraco/Umbraco-CMS/pull/12347)

StackQueue has been moved from `Umbraco.Core.Collections` to the `Umbraco.Cms.Core.Collections` namespace.

**Globalsetting SqlWriteLockTimeOut has been removed**

This setting has been superseded by `DistributedLockingWriteLockDefaultTimeout`.

**GlobalSetting UmbracoPath cannot be configured**

It is no longer possible to rename the `/Umbraco` folder path using configuration. The property still exists but is hardcoded to `/Umbraco` and will be removed in Umbraco 12, planned for release in June 2023.

</details>

## Release notes

You can find a list of all the released Umbraco versions on [Our Umbraco](https://our.umbraco.com/download/releases/) website. When you visit Our Umbraco website, click on the version number to view the changes made in that specific version.


# Find Your Upgrade Path

Version-specific upgrade notes and breaking changes for Umbraco, covering migration paths between different versions.

Are you looking to upgrade an Umbraco Cloud project from 9 to 10? Follow the guide [Upgrading your project from Umbraco 9 to 10](https://docs.umbraco.com/umbraco-cloud/optimize-and-maintain-your-site/manage-product-upgrades/product-upgrades/major-upgrades) instead, as it requires a few steps specific to Umbraco Cloud.

<details>

<summary>13.latest to the latest version</summary>

**Update \_ViewImports.cshtml file**

In Umbraco 14, Smidge has been removed from the CMS.

In the `_ViewImports.cshtml` of your project, remove the following lines:

```
@addTagHelper *, Smidge
@inject Smidge.SmidgeHelper SmidgeHelper
```

Otherwise, it will cause an error on the front end.

**Update program.cs file**

Remove `u.UseInstallerEndpoints();` from the `program.cs` file to avoid issues when running the project
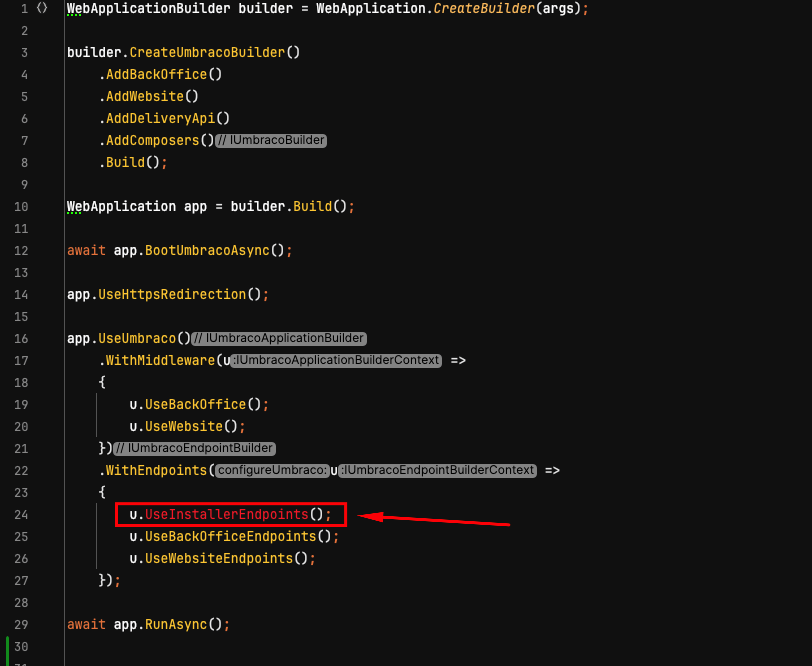
<img src="/files/e1OGd0OzzxGT2OxHqeGV" alt="" data-size="original">

**Update code using Angular JS**

Angular JS has been removed in Umbraco 14. If you have extended your Umbraco project using Angular JS, it must be updated. for more information read the [Backoffice Extensions](/umbraco-cms/extend-your-project/backoffice-extensions) documentation.

**Deprecated property editors**

**Nested Content** and **Grid Layout** have been removed. We recommend rebuilding it using Block Grid for the grid layout and either Block Grid or Block List for Nested Content.

The **legacy Media Picker** has been removed, use the default Media Picker.

**Macros and partial views macros removed**

Macros and partial views macros have been removed in Umbraco 14. We recommend using partial views or blocks in the Rich Text Editor (RTE).

For more information on what has changed in Umbraco 14 read the [Breaking changes in Umbraco 14](/umbraco-cms/get-started/upgrading-and-migrating/version-specific#umbraco-14).

**Block Editor data format has changes**

In Umbraco 15, the internal data format for [Block Editors](/umbraco-cms/model-your-content/property-editors/built-in-umbraco-property-editors/block-editor) has changed. This causes a content migration to run when upgrading.

This content migration can take a while to complete on a large site, causing it to be unresponsive for the duration. To speed up the migration, it is advised to [clean up old content versions](/umbraco-cms/develop-with-umbraco/configuration/content-version-cleanup) before upgrading.

While we don't recommend this, it might be possible for you to skip the content migration. More details can be found in the [Migrate content to Umbraco 15](/umbraco-cms/get-started/upgrading-and-migrating/find-your-upgrade-path/migrate-content-to-umbraco-15) article.

</details>

<details>

<summary>10.latest to 13.latest</summary>

It might be necessary to delete all of the `bin` and `obj` directories in each of the projects of your solution. It has been observed that Visual Studio's "Clean Solution" option is sometimes not enough.

You can upgrade from Umbraco 10 to the latest version directly. If you choose to skip upgrading to versions 11 and 12, you will no longer receive warning messages for obsolete features. However, if you do skip these versions, any breaking changes will no longer compile.

It is recommended that you upgrade to the closest [Long-term Support (LTS) major](https://umbraco.com/products/knowledge-center/long-term-support-and-end-of-life/) version before upgrading to the latest version. For Umbraco 10, the closest long-term support version is Umbraco 13 so a direct upgrade is possible.

</details>

<details>

<summary>9.latest to 10</summary>

**Important**: .NET version 6.0.5 is the minimum required version for Umbraco 10 to be able to run. You can check with `dotnet --list-sdks` what your latest installed Software Development Kit (SDK) version is. The latest SDK version 6.0.301 includes .NET 6.0.6, while SDK version 6.0.300 includes .NET 6.0.5.

Watch the ['Upgrading from Umbraco 9 to Umbraco 10 video tutorial'](https://www.youtube.com/watch?v=075H_ekJBKI\&ab_channel=UmbracoLearningBase) for a complete walk-through of all the steps.

The upgrade path between Umbraco 9 and Umbraco 10 can be done directly by upgrading your project using NuGet. You will need to ensure the packages you are using are available in Umbraco 10.

**SQL CE is no longer a supported database engine**

There is no official migration path from SQL CE to another database engine.

The following options may suit your needs:

* Follow a community guide to migrate from a SQL CE database to SQL Server, like the [article by Jan Reilink](https://www.saotn.org/convert-sqlce-database-to-sql-server/)
* Setup a new database for v10 and use [uSync](https://jumoo.co.uk/usync/) to transfer document types and content across.
* Setup a new database for v10 and use a premium tool such as [redgate SQL Data Compare](https://www.red-gate.com/products/sql-development/sql-data-compare/) to copy database contents across.
* Setup a new database for v10 and use a premium tool such as [Umbraco Deploy](https://umbraco.com/products/umbraco-deploy) to transfer document types and content across.

**Steps to upgrade using Visual Studio**

It's recommended that you upgrade the site offline, and test the upgrade fully before deploying it to the production environment.

1. Stop your site in IIS to prevent any changes being made to the database or filesystem while you are upgrading.
2. Open your Umbraco 9 project in Visual Studio.
3. Right-click on the project name in the Solution Explorer and select **Properties**.
4. Select **.NET 6.0** from the **Target Framework** drop-down.
5. Go to **Tools** > **NuGet Package Manager** > **Manage NuGet Packages for Solution...**
6. Go to the **Installed** tab in the NuGet Package manager.
7. Choose **Umbraco.Cms**.
8. Select **10.0.0** from the **Version** drop-down and click **Install** to upgrade your project to version 10.
9. Update `Program.cs` to the following:

```csharp
public class Program
{
    public static void Main(string[] args)
        => CreateHostBuilder(args)
            .Build()
            .Run();

    // The calls to `ConfigureUmbracoDefaults` and `webBuilder.UseStaticWebAssets()` are new.
    public static IHostBuilder CreateHostBuilder(string[] args) =>
        Host.CreateDefaultBuilder(args)
            .ConfigureUmbracoDefaults()
            .ConfigureWebHostDefaults(webBuilder =>
            {
                webBuilder.UseStaticWebAssets();
                webBuilder.UseStartup<Startup>();
            });
}
```

10. Remove the following files and folders:
    * `/wwwroot/umbraco`
    * `/umbraco/PartialViewMacros`
    * `/umbraco/UmbracoBackOffice`
    * `/umbraco/UmbracoInstall`
    * `/umbraco/UmbracoWebsite`
    * `/umbraco/config/lang`
    * `/umbraco/config/appsettings-schema.json`
11. If using Umbraco Forms, update your files and folders according to the [Upgrading - version specific](https://docs.umbraco.com/umbraco-forms/installation/version-specific) for version 10 article.
12. Restart your site in IIS, build and run your project to finish the installation of Umbraco 10.

To re-enable the appsettings IntelliSense, you must update your schema reference in the `appsettings.json` file and any other `appsettings.{Environment}.json` files from:

```json
"$schema": "./umbraco/config/appsettings-schema.json",
```

To:

```json
"$schema": "./appsettings-schema.json",
```

To upgrade to Umbraco 10, your database needs to be at least on Umbraco 8.18.

**Upgrade of any publicly hosted environment**

When the upgrade is completed and tested, and prior to deploying to any publicly accessible environment, you should consider the following:

1. Ensure you have backups for both the database and the file system.
2. Stop the site so it is not accessible during the upgrade process.
3. Delete the relevant folders from the filesystem prior to deploying:
   * `/wwwroot/umbraco`
   * `/umbraco/PartialViewMacros`
   * `/umbraco/UmbracoBackOffice`
   * `/umbraco/UmbracoInstall`
   * `/umbraco/UmbracoWebsite`
   * `/umbraco/config/lang`
   * `/umbraco/config/appsettings-schema.json`
4. If you are using Umbraco Forms, update your files and folders according to the [Upgrading - version specific](https://docs.umbraco.com/umbraco-forms/installation/version-specific) for version 10 article.
5. Deploy the site how you normally would to your public facing environment.
6. Start the site. At this point it will launch and upgrade the database, after which the site should become accessible and your upgrade is complete.
7. Check the logs for any errors which may have occurred during the upgrade process.

</details>

<details>

<summary>8.latest to 9</summary>

There is no direct upgrade path from Umbraco 8 to Umbraco 9. It is however possible to migrate from Umbraco 8 sites to Umbraco 9 sites.

You can reuse your content by restoring your Umbraco 8 database into a new database used for an Umbraco 9 site.

You need to ensure the packages you are using are available in Umbraco 9, and you will need to reimplement your custom code and templates.

The direct upgrade path is not possible because the codebase has been fundamentally updated in Umbraco 9. The underlying web framework has been updated from ASP.NET to ASP.NET Core.

It is not possible to take this step while maintaining full compatibility with Umbraco 8.

</details>

<details>

<summary>8.0.0 to 8.1.0</summary>

There are a few breaking changes from 8.0.x to 8.1.0. Make sure to check the [full list](https://github.com/umbraco/Umbraco-CMS/issues?q=is%3Aissue+label%3Arelease%2F8.1.0+is%3Aclosed+label%3Acategory%2Fbreaking).

**IPublishedContent breaking changes in 8.1.0**

Due to the [changes in `IPublishedContent`](https://github.com/umbraco/Umbraco-CMS/issues/5170) there are a few steps you will need to take, to make sure that your site works.

The `IPublishedContent` interface is central to Umbraco, as it represents published content and media items at the rendering layer level. This could be in controllers or views. In other words, it is the interface that is used everywhere when building sites.

The introduction of multilingual support in version 8 required changes to the interface. For instance, a property value could be obtained with `GetPropertyValue(alias)` in version 7. Version 8 requires a new parameter for culture, and the call thus became `Value(alias, culture)`.

In the excitement of the version 8 release, we assumed that `IPublishedContent` was "done". By our tests, everything was looking good. However, feedback from early testers showed that the interface was in some places odd or inconsistent or had issues.

Fixing the bugs is a requirement. Some of the required bug fixes could not be achieved without introducing some breaking changes.

At that point, we decided to give `IPublishedContent` some love. We fixed the bugs and made it clean, friendly, discoverable, and predictable for the entire life of version 8.

Breaking changes to such a central interface is not something we take lightly. Even though they do not impact the "concepts" nor require heavy refactoring, they may demand an amount of small fixes here and there.

The general idea underlying these changes is that:

* The proper way to retrieve "something" from an `IPublishedContent` instance is always through a method, for example: `Children()`. And, when that method can be multilingual, the method accepts a `culture` parameter, which can be left `null` to get the "current" culture value.
* To reduce the amount of breaking changes, and to simplify things for non-multilingual sites, existing properties such as `document.Name` and `document.Children` (and others) still exist, and return the value for the current culture. In other words, these properties are now implemented as `document.Name => document.Name()` or `document.Children => document.Children()`.

The rest of this document presents each change in details.

**More interfaces**

It was possible to mock and test the `IPublishedContent` interface in version 7. It has been improved in version 8, but it still relies on concrete `PublishedContentType` and `PublishedPropertyType` classes to represent the content types, which complicates things.

In version 8.1, these two classes are abstracted as `IPublishedContentType` and `IPublishedPropertyType`, thus making `IPublishedContent` easier to mock and test.

**CHANGE**: This impacts every method accepting or returning a content type. For instance, the signature of most `IPropertyValueConverter` methods changes. References to `PublishedContentType` must be replaced with references to `IPublishedContentType`.

The following `IPublishedContent` members change:

**Name**

The `document.Name` property is complemented by the `document.Name(string culture = null)` extension method. The property returns the name for the current culture. The `document.GetCulture(...).Name` syntax is removed.

**CHANGE**: Calls to `document.GetCulture(culture).Name` must be replaced with `document.Name(culture)`.

**UrlSegment**

The `document.UrlSegment` property is complemented by the `document.UrlSegment(string culture = null)` extension method. The property returns the Url segment for the current culture. The `document.GetCulture(...).UrlSegment` syntax is removed.

**CHANGE**: Calls to `document.GetCulture(culture).UrlSegment` must be replaced with `document.UrlSegment(culture)`.

**Culture**

The `document.GetCulture()` method is removed. The proper way to get a culture date is `document.CultureDate(string culture = null)`. The `document.Cultures` property now returns the invariant culture, for invariant documents.

**CHANGE**: Calls to `document.GetCulture(culture).Date` must be replaced with `document.CultureDate(culture)`. Calls to `document.Cultures` must take into account the invariant culture.

**Children**

The `document.Children` property is complemented by the `document.Children(string culture = null)` extension method which, when a culture is specified always return children available for the specified culture. The property returns the children available for the current culture.

A new `document.ChildrenForAllCultures` property is introduced, which returns *all* children, regardless of whether they are available for a culture or not.

**CHANGE**: Calls to `document.Children` may have to be replaced by `document.ChildrenForAllCultures` depending on if the 8.0.x usage of this was relying on it returning unfiltered/all children regardless of the current routed culture.

**Url**

The `document.Url` property is complemented by the `document.Url(string culture = null, UrlMode mode = UrlMode.Auto)` extension method. The `document.GetUrl(...)` and `document.UrlAbsolute()` methods are removed. The `UrlProviderMode` enumeration is renamed `UrlMode`.

**CHANGE**: Calls to `document.GetUrl(...)` must be replaced with `document.Url(...)`. Calls to `document.UrlAbsolute()` must be replaced with `document.Url(mode: UrlMode.Absolute)`.

**UmbracoContext**

Due to the `UrlProviderMode` enumeration being renamed `UrlMode`, the signature of some overloads of the `Url(...)` method has changed. Methods that do not have a mode parameter remain unchanged.

**CHANGE**: Code such as `context.Url(1234, UrlProviderMode.Absolute)` must become `context.Url(1234, UrlMode.Absolute)`.

The `UmbracoContext` class gives access to the rendering layer, which is more than a "cache". To reflect this, its `ContentCache` and `MediaCache` properties are renamed `Content` and `Media`. However, the old properties remain as obsolete properties.

**CHANGE**: None required in 8.1, but code such as `context.ContentCache.GetById(1234)` should eventually be converted to `context.Content.GetById(1234)` as the obsolete properties may be removed in a further release.

**GetCulture**

Version 7 had a `document.GetCulture()` method that was deriving a culture from domains configured in the tree. Somehow, that method was lost during version 8 development (issue [#5269](https://github.com/umbraco/Umbraco-CMS/issues/5269)).

Because that method is useful, especially when building traditional, non-multilingual sites, it has been re-introduced in version 8.1 as `document.GetCultureFromDomains()`.

**CHANGE**: None.

**DomainHelper**

`DomainHelper` has been replaced with a static `DomainUtilities` class.

**CHANGE**: It is rare that `DomainHelper` is used in code since it only contains one public method but if developers are using this, it can no longer be injected since it's now a static class called `DomainUtilities`.

**Models Builder**

If you're using ModelsBuilder in `dll` mode you need to delete the dlls before upgrading. Otherwise, they're going to be wrong and cause your whole site to throw errors.

If you're using ModelsBuilder in `AppData` mode and you have your generated models in your solution you need to update them after upgrading. `PublishedContentType` will need to be replaced with `IPublishedContentType`. If you have an implementation of the `PropertyValueConverter` class, you need to replace all references to `PublishedPropertyType` with `IPublishedPropertyType` within that class. Only after you do that will your solution build again.

**AutoMapper**

Umbraco 8.1 replaces AutoMapper with [UmbracoMapper](/umbraco-cms/extend-your-project/server-side-extensions/mapping). This in itself will not break anything on your site. If you have used AutoMapper in your own code you will have to either include the package yourself or switch your implementation to use UmbracoMapper.

**Follow the** [**upgrade guide for Umbraco 8**](/umbraco-cms/get-started/upgrading-and-migrating/find-your-upgrade-path/minor-upgrades-for-umbraco-8) **to complete the upgrade**

</details>

<details>

<summary>7.latest to 8.0.0</summary>

There is no direct upgrade path from Umbraco 7 to Umbraco 8. It is however possible to migrate content from Umbraco 7 sites to Umbraco 8 sites. We have added content migrations in Umbraco 8.1.0 enabling you to migrate your content from Umbraco 7 to Umbraco 8.

It is not possible to upgrade an Umbraco 7 site to Umbraco 8 because the codebase has been fundamentally updated in Umbraco 8. A lot of outdated code and technology has been removed and instead new, faster, and more secure technology has been implemented.

In Umbraco 8 we have added improvements and updated dependencies. We have also done a thorough clean-up to make it simpler for you to work with and extend your Umbraco project.

[**Migrate your content to Umbraco 8**](/umbraco-cms/get-started/upgrading-and-migrating/find-your-upgrade-path/migrate-content-to-umbraco-8)

</details>

<details>

<summary>7.6.3 to 7.7.0</summary>

Version 7.7.0 introduces User Groups, better user management, and security facilities. This means that anything to do with "User Types" no longer exists including APIs that work with User Types. If your code or any package's code refers to "User Type" APIs, you need to make changes to your code. In many cases, we've added backward compatibility for these scenarios and obsoleted APIs that should no longer be used.

We are now by default using the e-mail address and not the username for the credentials. When trying to login to the backoffice you need to use the e-mail address as opposed to the username. If you do an upgrade from an older version and would like to keep using the username, change the `<usernameIsEmail>true</usernameIsEmail>` setting to **false**.

For a full list of breaking changes see: [the list on the issue tracker](https://issues.umbraco.org/issues/?q=\&project=U4\&tagValue=\&release=7.7.0\&issueType=\&search=search)

Version 7.7.2 no longer ships with the `CookComputing.XmlRpcV2` assembly. If you reference this assembly or have a package that requires this assembly, you need to copy it back into your website.

This version also ships with far fewer client files that were only relevant for older versions of Umbraco (i.e. < 7.0.0). There might be some packages that were referencing these old client files. If you see missing image references you may need to contact the vendor of the package in question to update their references.

Follow the [**upgrade guide for Umbraco 7**](/umbraco-cms/get-started/upgrading-and-migrating/find-your-upgrade-path/minor-upgrades-for-umbraco-7) to complete the upgrade.

</details>

<details>

<summary>7.6.0 to 7.6.3</summary>

In short:

In Umbraco version 7.6.2 we made a mistake in the Property Value Converts (PVCs). This was corrected 2 days later in version 7.6.3. If you were having problems with querying the following Data Types on the frontend, make sure to upgrade to 7.6.3:

* Multi Node Tree Picker
* Related Links
* Member Picker

Depending on whether you tried to fix the problem with those, you will need to fix them after you upgrade to 7.6.3.

**Property Value Converters (PVC)**

Umbraco stores data for Data Types in different ways. For a lot of pickers it will store `1072` or `1083,1283`. These numbers refer to the identifier of the item in Umbraco. In the past, when building your templates, you would manually have to take that value and find the content item it belongs to. Then you would be able to get the data you wanted from there. An example of that is shown below:

```csharp
@{
    IPublishedContent contactPage;
    var contactPageId = Model.Content.GetPropertyValue<int>("contactPagePicker");
    if (contactPageId > 0)
    {
        contactPage = Umbraco.TypedContent(contactPageId);
    }
}

<p>
  <a href="@contactPage.Url">@contactPage.Name</a>
</p>
```

In Umbraco 7.6.0, this is what you would do instead:

```html
<p>
    <a href="@Model.Content.ContactPagePicker.Url">@Model.ContactPagePicker.Name</a>
</p>
```

This is possible using Models Builder and through the inclusion of [core property value converters](https://our.umbraco.com/projects/developer-tools/umbraco-core-property-value-converters/), a package by community member Jeavon Leopold.

To not break everybody's sites (the results of queries are different when PVCs are enabled), we disabled these PVCs by default.

Umbraco 7.6.0 also came with new pickers that store their data as a [UDI (Umbraco Identifier)](https://docs.umbraco.com/umbraco-cms/reference/querying/udi-identifiers). We wanted to simplify the use of these new pickers and by default we wanted PVC's to always be enabled for those pickers.

We noticed that some new pickers also got their PVC's disabled when the configuration setting was set to false (`<EnablePropertyValueConverters>false</EnablePropertyValueConverters>`).

To make everything consistent, we made sure that the UDI pickers would always use PVC's in 7.6.2, this however reversed the behavior. So when PVC's were enabled, the property would not be converted and when PVC's were disabled, the property would be converted after all. This is the exact opposite behavior of 7.6.2.

So we have fixed this now in 7.6.3.

This issue only affects:

* Multi Node Tree Picker
* Related Links
* Member Picker

Have you already upgraded to 7.6.2 and fixed queries for those three Data Types? Then you have to do that again in version 7.6.3.

Follow the [**upgrade guide for Umbraco 7**](/umbraco-cms/get-started/upgrading-and-migrating/find-your-upgrade-path/minor-upgrades-for-umbraco-7) to complete the upgrade.

</details>

<details>

<summary>7.4.0 to 7.6.0</summary>

Find a list of all the breaking changes below and [a list of the items is also available on the tracker](http://issues.umbraco.org/issues/U4?q=Due+in+version%3A+7.6.0+Backwards+compatible%3F%3A+No+)

The three most important things to note are:

1. In web.config do not change `useLegacyEncoding` to `false` if it is currently set to `true` - changing the password encoding will cause you not being able to log in any more.
2. In umbracoSettings.config leave `EnablePropertyValueConverters` set to `false` - this will help your existing content queries to still work.
3. In tinyMceConfig.config make sure to remove `<plugin loadOnFrontend="true">umbracolink</plugin>` so that the rich text editor works as it should.

**Breaking Changes**

**Dependencies**

**UrlRewriting.Net (**[**U4-9004**](https://issues.umbraco.org/issue/U4-9004)**)**

`UrlRewriting` was old, leaking memory, and slowing down website startup when dealing with more than a few rules. It's entirely replaced by the [IIS Url Rewrite](https://www.iis.net/downloads/microsoft/url-rewrite) extension.

**Json.Net (**[**U4-9499**](https://issues.umbraco.org/issue/U4-9499)**)**

Json.Net has been updated to version 10.0.0 to benefit from improvements in features, fixes, and performances (see [release notes](https://github.com/JamesNK/Newtonsoft.Json/releases)). This might be a breaking change for people relying on one of the changed functionality.

**Log4net (**[**U4-1324**](https://issues.umbraco.org/issue/U4-1324)**)**

Umbraco has used a custom build of an old (1.2.11) version of log4net that supported Medium Trust. However, Umbraco itself does not support Medium Trust anymore, and therefore log4net has been upgraded to the standard, latest build of log4net 2.0.8.

**ImageProcessor (**[**U4-8963**](https://issues.umbraco.org/issue/U4-8963)**)**

An optional parameter has been added to the `GetCropUrl` method in order to support the background color parameter. This breaks the method signature and therefore might require a recompile of user's code.

**HtmlAgilityPack (**[**U4-9655**](https://issues.umbraco.org/issue/U4-9655)**)**

The HtmlAgilityPack has been upgraded to version 1.4.9.5. The Umbraco upgrade process should take care of setting up the binding redirects appropriately.

**Core**

**Membership Provider Encoding (**[**U4-6566**](https://issues.umbraco.org/issue/U4-6566)**)**

The Membership Provider `useLegacyEncoding` setting is now `false` by default, as the legacy password encoding has weaknesses.

This change only impacts new installs (no change for upgrades).

**Property Value Converters (**[**U4-7318**](https://issues.umbraco.org/issue/U4-7318)**)**

A large amount of property value converters contributed by the community have been merged in and are now the default value converters. These converters change the object types returned by `GetPropertyValue` for more convenient types.

Instead of returning comma-separated string values like it did before, the `SliderValueConverter` now returns a `decimal` or a `Range<decimal>` value that can be used directly in views.

This change only impacts new installs (no change for upgrades).

The new property value converters are controlled by an `umbracoSettings.config` setting. In the section `settings/content`, setting `EnablePropertyValueConverters` needs to be present and `true` to activate them.

**Database (**[**U4-9201**](https://issues.umbraco.org/issue/U4-9201)**)**

Umbraco has been using a PetaPoco-managed `UmbracoDatabase` instance since version 7 came out. We realized that some of our legacy code still bypassed that mechanism and used parallel, out-of-band database connections, causing issues with transactions.

The legacy code has been refactored to rely on the `UmbracoDatabase` instance. However, because that database is disposed of during `EndRequest`, the code that ran after it has been disposed may not work anymore. This should then be updated to use either an `HttpModule` event that occurs before `EndRequest` or the new `UmbracoModule.EndRequest` event.

More details are available on [issue 146](https://github.com/kipusoep/UrlTracker/issues/146) on the 301 Redirect Tracker GitHub issue tracker.

**Scopes (**[**U4-9406**](https://issues.umbraco.org/issue/U4-9406)**)**

Version 7.6 introduces the notion of *scopes*, which allow for wrapping multiple service-level operations in one single transaction. The scopes API is partially public. Scopes are not meant for public use at this stage and we need a few more releases to ensure that the APIs are stable.

Scopes *should not* change how Umbraco functions.

Introducing scopes means that some public APIs signatures are changing. Most of these changes target internal and/or non-breaking APIs (as per our [guidelines](https://our.umbraco.com/Documentation/Development-Guidelines/breaking-changes)). This should therefore have no impact on sites but may break unit tests.

**Property Editors storing UDI instead of ID (**[**U4-9310**](https://issues.umbraco.org/issue/U4-9310)**)**

The property editors for pickers for content, media, members, and related links have been updated to store UDI instead of the node ID. Pickers in sites being upgraded have been marked as obsolete but will continue to work as they always did.

New sites will have the obsolete pickers filtered out from the list of available property editors, but they can be enabled by a configuration flag.

**Rich Text Editor (RTE) Images attributes (**[**U4-6228**](https://issues.umbraco.org/issue/U4-6228)**,** [**U4-6595**](http://issues.umbraco.org/issue/U4-6595)**)**

For a long time, we had a `rel` attribute on an `<img>` tag when inserted into the RTE. This is invalid HTML markup. We worked around this by stripping this attribute using a Property Editor Value converter. Some developers relied on this attribute so we didn't change it to a "data-id" attribute which would have been valid. In 7.6 we are not storing integer IDs in these attributes. Instead of storing UDI values so with this change we no longer use `rel` or `data-id` and instead there will be a "data-udi" attribute. This change should affect only a small amount of people that were previously relying on the values from the "rel" attribute.

**Others**

We are shipping with SignalR in the core at version 2.2.1. If you already have SignalR installed into your app and are using an older version there may be conflicts.

The creation and editing of WebForms templates will no longer be supported as for version 7.6.0.

**Upgrading via NuGet**

This is an important one and there was no perfect solution to this. We have removed the UrlRewriting dependency and no longer ship with it. However, if you are using it we didn't want to have NuGet delete all of your rewrites. The good news is that if you are using it, the NuGet upgrade will not delete your rewrite file and everything should continue to work.

However, if you are not using it, **you will get an error after upgrading. Here's how to fix it:**

Since you aren't using UrlRewriting you will have probably never edited the UrlRewriting file. In this case, NuGet will detect that and remove it. However you will need to manually remove these UrlRewriting references from your `web.config`:

```xml
<section name="urlrewritingnet" restartOnExternalChanges="true" requirePermission="false" type="UrlRewritingNet.Configuration.UrlRewriteSection, UrlRewritingNet.UrlRewriter" />
```

and

```xml
<urlrewritingnet configSource="config\UrlRewriting.config" />
```

Remove the following `httpModules` from your `web.config`:

```xml
<system.web>
<httpModules>
    <add name="UrlRewriteModule" type="UrlRewritingNet.Web.UrlRewriteModule, UrlRewritingNet.UrlRewriter"/>
    ...
</httpModules>
<system.web>
```

and

```xml
<system.webServer>
    <modules>
    <remove name="UrlRewriteModule"/>
    <add name="UrlRewriteModule" type="UrlRewritingNet.Web.UrlRewriteModule, UrlRewritingNet.UrlRewriter"/>
    ...
    </modules>
</system.webServer>
```

**Forms**

Umbraco Forms 6.0.0 has been released to be compatible with Umbraco 7.6. It is a new major version release of Forms primarily due to the strict dependency on 7.6+. If you are using Forms, you will need to update it to version 6.0.0

There are [**important Forms upgrade documentation that you will need to read.**](https://github.com/umbraco/UmbracoDocs/blob/umbraco-eol-versions/11/umbraco-forms/installation/version-specific.md).

**Courier**

Umbraco Courier 3.1.0 has been released to be compatible with Umbraco 7.6. If you are using Courier, you will need to update it to version 3.1.0.

**Follow the** [**upgrade guide for Umbraco 7**](/umbraco-cms/get-started/upgrading-and-migrating/find-your-upgrade-path/minor-upgrades-for-umbraco-7) **to complete the upgrade**

</details>

<details>

<summary>7.3.0 to 7.4.0</summary>

For manual upgrades:

* Copy the new folder `~/App_Plugins/ModelsBuilder` into the site
* Do not forget to merge `~/Config/trees.config` and `~/Config/Dashboard.config` - they contain new and updated entries that are required to be there
  * If you forget `trees.config` you will either not be able to browse the Developer section or you will be logged out immediately when trying to go to the developer section
* You may experience an error saying `Invalid object name 'umbracoUser'` - this can be fixed by [clearing your cookies on localhost](http://issues.umbraco.org/issue/U4-8031)

Follow the [**upgrade guide for Umbraco 7**](/umbraco-cms/get-started/upgrading-and-migrating/find-your-upgrade-path/minor-upgrades-for-umbraco-7) to complete the upgrade.

</details>

<details>

<summary>7.2.0 to 7.3.0</summary>

Make sure to manually clear your cookies after updating all the files, otherwise you might an error relating to `Umbraco.Core.Security.UmbracoBackOfficeIdentity.AddUserDataClaims()`. The error looks like: `Value cannot be null. Parameter name: value`.

NuGet will do the following for you. If you're upgrading manually make sure to also:

* Delete `bin/Microsoft.Web.Helpers.dll`
* Delete `bin/Microsoft.Web.Mvc.FixedDisplayModes.dll`
* Delete `bin/System.Net.Http.dll`
* Delete `bin/System.Net.Http.*.dll` (all dll files starting with `System.Net.Http`) **except** for `System.Net.Http.Formatting.dll`
* Delete `bin/umbraco.XmlSerializers.dll`
* Add this in the `appSetting` section of your `web.config` file: `<add key="owin:appStartup" value="UmbracoDefaultOwinStartup" />`

Other considerations:

* WebApi has been updated, normally you don’t have to do anything unless you have custom webapi configuration:
  * See this article if you are using `WebApiConfig.Register`: <https://www.asp.net/mvc/overview/releases/how-to-upgrade-an-aspnet-mvc-4-and-web-api-project-to-aspnet-mvc-5-and-web-api-2>
  * You need to update your `web.config` file to have the correct WebApi version references - this should be done by doing a compare/merge of your `~/web.config` file with the `~/web.config` file in the release
* MVC has been updated to MVC5
  * You need to update your `web.config` file to have the correct MVC version references - this should be done by doing a compare/merge of your `~/web.config` file with the `~/web.config` file in the release
  * The upgrader will take care of updating all other web.config’s (in all other folders, for example, the `Views` and `App_Plugins` folders) to have the correct settings
  * For general ASP.NET MVC 5 upgrade details see: <https://www.asp.net/mvc/overview/releases/how-to-upgrade-an-aspnet-mvc-4-and-web-api-project-to-aspnet-mvc-5-and-web-api-2>
* It is not required that you merge the changes for the Examine index paths in the ExamineIndex.config file. However, if you do, your indexes will be rebuilt on startup because Examine will detect that they don’t exist at the new location.
* It's highly recommended to clear the browser cache - the ClientDependency version is automatically bumped during installation which should force the browser cache to refresh, however in some edge cases this might not be enough.

Follow the [**upgrade guide for Umbraco 7**](/umbraco-cms/get-started/upgrading-and-migrating/find-your-upgrade-path/minor-upgrades-for-umbraco-7) to complete the upgrade.

</details>

<details>

<summary>7.1.0 to 7.2.0</summary>

* Copy in the `/Views/Partials/Grid` (contains Grid rendering views).

Follow the [**upgrade guide for Umbraco 7**](/umbraco-cms/get-started/upgrading-and-migrating/find-your-upgrade-path/minor-upgrades-for-umbraco-7) to complete the upgrade.

</details>

<details>

<summary>7.0.2 to 7.1.0</summary>

* Remove the `/Install` folder.

Follow the [**upgrade guide for Umbraco 7**](/umbraco-cms/get-started/upgrading-and-migrating/find-your-upgrade-path/minor-upgrades-for-umbraco-7) to complete the upgrade.

</details>

<details>

<summary>7.0.1 to 7.0.2</summary>

* There was an update to the `/umbraco/config/create/ui.xml` which needs to be manually updated. The original element had this text:

```xml
<nodeType alias="users">
    <header>User</header>
    <usercontrol>/create/simple.ascx</usercontrol>
    <tasks>
    <create assembly="umbraco" type="userTasks" />
    <delete assembly="umbraco" type="userTasks" />
    </tasks>
</nodeType>
```

* The `usercontrol` value has changed to: `/create/user.ascx`. This is a required change otherwise creating a new user will not work.
* There is a breaking change to be aware of, full details can be found in [the Umbraco blog post](https://umbraco.com/blog/heads-up-breaking-change-coming-in-702-and-62/).

Follow the [**upgrade guide for Umbraco 7**](/umbraco-cms/get-started/upgrading-and-migrating/find-your-upgrade-path/minor-upgrades-for-umbraco-7) to complete the upgrade.

</details>

<details>

<summary>7.0.0 to 7.0.1</summary>

* Remove all uGoLive dlls from `/bin`
  * These are not compatible with V7
* Move `appSettings/connectionStrings` back to `web.config`
  * If you are on 7.0.0 you should migrate these settings into the web.config instead of having them in separate files in `/config/`
  * The keys in `config/AppSettings.config` need to be moved back to the web.config `<appSettings>` section and similarly, the `config/ConnectionStrings.config` holds the Umbraco database connections in v7.0.0 and they should be moved back to the web.config `<connectionStrings>` section.
  * `/config/AppSettings.config` and `/config/ConnectionString.config` can be removed after the contents have been moved back to `web.config`.
* Delete all files in `~/App_Data/TEMP/Razor/`
  * Related to issues with razor macros

Follow the [**upgrade guide for Umbraco 7**](/umbraco-cms/get-started/upgrading-and-migrating/find-your-upgrade-path/minor-upgrades-for-umbraco-7) to complete the upgrade.

</details>

<details>

<summary>6.latest to 7</summary>

Read and follow [the full v7 upgrade guide](/umbraco-cms/get-started/upgrading-and-migrating/find-your-upgrade-path/minor-upgrades-for-umbraco-7)

</details>

<details>

<summary>4.latest to 6</summary>

* If your site was ever a version between 4.10.0 and 4.11.4 and you have upgraded to 6.0.0 install the [fixup package](https://our.umbraco.com/projects/developer-tools/path-fixup) and run it after the upgrade process is finished.
* The DocType Mixins package is **not** compatible with v6+ and will cause problems in your Document Types.

</details>

<details>

<summary>Version 4</summary>

**Version 4.10.x to 4.11.x**

* If your site was ever a version between 4.10.0 and 4.11.4 install the [fixup package](https://our.umbraco.com/projects/developer-tools/path-fixup) and run it after the upgrade process is finished.

**Version 4.8.0 to 4.10.0**

* Delete the `bin/umbraco.linq.core.dll` file
* Copy the new files and folders from the zip file into your site's folder
  * `/App_Plugins`
  * `/Views`
  * `Global.asax`
* Remove the `Config/formHandlers.config` file

**Version 4.7.2 to 4.8.0**

* Delete the `bin/App_Browsers.dll` file
* Delete the `bin/App_global.asax.dll` file
* Delete the `bin/Fizzler.Systems.HtmlAgilityPack.dll` file
* For people using uComponents 3.1.2 or below, 4.8.0 breaks support for it. Either upgrade to a newer version beforehand or follow the workaround [posted here](https://our.umbraco.com/projects/backoffice-extensions/ucomponents/questionssuggestions/33021-Upgrading-to-Umbraco-48-breaks-support-for-uComponents)

**Version 4.7.1.1 to 4.7.2**

* Delete the `bin/umbraco.MacroEngines.Legacy.dll` file

**Version 4.6.1 to 4.7.1.1**

* Delete `bin/Iron*.dll` (all dll files starting with "Iron")
* Delete `bin/RazorEngine*.dll` (all dll files starting with "RazorEngine")
* Delete `bin/umbraco.MacroEngines.Legacy.dll`
* Delete `bin/Microsoft.Scripting.Debugging.dll`
* Delete `bin/Microsoft.Dynamic.dll`

</details>


# Upgrade from Umbraco 8 to the Latest Version

Learn how to upgrade your Umbraco 8 project to Umbraco 10.

{% hint style="danger" %}
It is currently not possible to upgrade directly from **Umbraco 8 to the latest version**.

The recommended approach for upgrading from version 8 to the latest version is to use this guide to upgrade from *Umbraco 8 to Umbraco 10*. Umbraco 10 contains the [database migrations](https://github.com/umbraco/Umbraco-CMS/blob/release-10.0.0/src/Umbraco.Infrastructure/Migrations/Upgrade/UmbracoPlan.cs#L66-L73) that must be upgraded from Umbraco 8. You can then use the [Upgrading to Major](/umbraco-cms/get-started/upgrading-and-migrating#upgrade-to-a-new-major) steps to upgrade from *Umbraco 10 to the latest version*.
{% endhint %}

Since the underlying framework going from Umbraco 8 to the latest version has changed, there is no direct upgrade path. That said, it is possible to re-use the database from your Umbraco 8 project on your new project in order to maintain the content.

It is not possible to migrate the custom code as the underlying web framework has been updated from ASP.NET to ASP.NET Core. All templates and custom code will need to be reimplemented.

You also need to make sure that the packages you are using are available on the latest version.

## Prerequisites

* A Umbraco 8 project running **the latest version of Umbraco 8**.
* A backup of your Umbraco 8 project database.
* A clean installation of the latest version of Umbraco.

{% hint style="info" %}
If you use Umbraco Forms, then on the clean installation of Umbraco, you will need to install `Umbraco.Forms` package as well.
{% endhint %}

## Video Tutorial

{% hint style="warning" %}
The video below shows how to complete the upgrade on an Umbraco Cloud project. While the overall process is the same, you must update to the latest supported version on Cloud locally before continuing on Cloud.

Learn more about supported versions in the [End of Service Policy (Cloud)](https://docs.umbraco.com/umbraco-cloud/optimize-and-maintain-your-site/manage-product-upgrades/end-of-service-policy) article.
{% endhint %}

{% embed url="<https://www.youtube-nocookie.com/embed/wD9SGeRQR7o>" %}
A video tutorial guiding you through the steps of upgrading from version 8 to the latest version on Umbraco Cloud.
{% endembed %}

## Step 1: Content Migration

{% hint style="warning" %}
If you use Umbraco Forms, make sure to have [`StoreUmbracoFormsInDbset`](https://docs.umbraco.com/umbraco-forms/developer/forms-in-the-database#enable-storing-forms-definitions-in-the-database)to `True` before **step 1**.
{% endhint %}

1. Create a backup of the database from your Umbraco 8 project (after you have upgraded to the latest version of v8). For this, you can use the [database backup guide](https://docs.umbraco.com/umbraco-cloud/databases/backups).
2. Import the database backup into SQL Server Management Studio.
3. Update the connection string in the new projects `appsettings.json` file so that it connects to the Umbraco 8 database:

```json
"ConnectionStrings": {
    "umbracoDbDSN": "Server=YourLocalSQLServerHere;Database=NameOfYourDatabaseHere;User Id=NameOfYourUserHere;Password=YourPasswordHere;TrustServerCertificate=True"
}
```

{% hint style="info" %}
You can also add the connection details if you spin up a clean installation.
{% endhint %}

4. Run the new project and login to authorize the upgrade.
5. Select "Upgrade" when the upgrade wizard appears.
6. Once the upgrade has been completed, it's recommended to login to the backoffice to verify if your project is upgraded to new version.

{% hint style="success" %}
This is **only content migration** and the database will be migrated.

You need to manually update the view files and custom code implementation. For more information, see Step 3 of this guide.
{% endhint %}

## Step 2: File Migration

1. The following files/folders need to be copied from the Umbraco 8 project into the new project:
   * `~/Views` - **Do not** overwrite the default Macro and Partial View Macro files unless changes have been made to these.
   * `~/Media` - Media folder from v8 needs to be copied over into the `wwwroot - media` folder
   * Any files/folders related to Stylesheets and JavaScript.
2. Migrate custom configuration from the Umbraco 8 configuration files (`.config`) into the `appsettings.json` file on the new project.
   * As of Umbraco version 9, the configuration no longer lives in the `Web.Config` file and has been replaced by the `appsettings.json` file. Learn more about this in the [Configuration](/umbraco-cms/develop-with-umbraco/configuration) article.
3. [Migrate Umbraco Forms data to the database](https://docs.umbraco.com/umbraco-forms/developer/forms-in-the-database#migrating-forms-in-files-into-a-site), if relevant.
   * As of Umbraco Forms version 9, it is only possible to store Forms data in the database. If Umbraco Forms was used on the Umbraco 8 project, the files need to be migrated to the database.
4. Run the new project.
   * It **will** give you an error screen on the frontend as none of the Template files have been updated. Follow **Step 3** to resolve the errors.

## Step 3: Custom Code in the latest version

The latest version of Umbraco is different from Umbraco 8 in many ways. With all the files and data migrated it is now time to rewrite and re-implement all custom code and templates.

### Examples of changes

One of the changes is how published content is rendered through Template files. Due to this, it will be necessary to update **all** the Template files (`.cshtml`) to reflect these changes.

Read more about these changes in the [IPublishedContent](/umbraco-cms/develop-with-umbraco/templating-and-rendering/querying/ipublishedcontent) section of the Umbraco CMS documentation.

* Template files need to inherit from `Umbraco.Cms.Web.Common.Views.UmbracoViewPage<ContentModels.HomePage>` instead of `Umbraco.Web.Mvc.UmbracoViewPage<ContentModels.HomePage>`
* Template files need to use `ContentModels = Umbraco.Cms.Web.Common.PublishedModels` instead of `ContentModels = Umbraco.Web.PublishedModels`

{% hint style="info" %}
For more information on the correct namespaces or custom code, you can find the references in the [API Documentation](/umbraco-cms/extend-your-project/server-side-extensions/api-documentation) article.
{% endhint %}

Depending on the extent of the project and the amount of custom code and implementations, this step is going to require a lot of work.

Once the new project runs without errors on a local setup it is time to deploy the website to production.

This concludes this tutorial. Find related information and further reading in the section below.

## Related Information

* [Issue tracker for known issues with Content Migration](https://github.com/umbraco/UmbracoDocs/issues)
* [Configuration in modern Umbraco](/umbraco-cms/develop-with-umbraco/configuration)
* [Configuration in legacy Umbraco](https://our.umbraco.com/documentation/Reference/Configuration-for-Umbraco-7-and-8/)


# Migrate Content to Umbraco 15

This article will help you migrate content to Umbraco 15, and outline options to skip this content migration

Umbraco 15 changes the internal data format of all [Block Editors](/umbraco-cms/model-your-content/property-editors/built-in-umbraco-property-editors/block-editor).

If you maintain a large Umbraco site with extensive Block Editor usage, the upgrade to Umbraco 15+ might require a long-running content migration. For the duration of the migration, your site will be unresponsive and unable to serve requests.

You can track the progress of the migration in the logs.

It is advised to [clean up old content versions](/umbraco-cms/develop-with-umbraco/configuration/content-version-cleanup) before upgrading. This will make the migration run faster.

## Parallelizing the content migration

It is possible to parallelize the content migration. This will speed up the migration for large sites.

For certain content structures, parallel content migration will fail. Therefore, parallel content migration is strictly opt-in.

If parallel content migration fails, the database state will be rolled back to the last known good state. You can then disable parallel content migration, and try the migration again.

To enable parallel content migration, add an `IComposer` implementation to configure the `ConvertBlockEditorPropertiesOptions` before initiating the upgrade process:

```csharp
using Umbraco.Cms.Core.Composing;
using Umbraco.Cms.Infrastructure.Migrations.Upgrade.V_15_0_0;

namespace UmbracoDocs.Samples;

public class DisableBlockEditorMigrationComposer : IComposer
{
    [Obsolete]
    public void Compose(IUmbracoBuilder builder)
        => builder.Services.Configure<ConvertBlockEditorPropertiesOptions>(options =>
        {
            // setting this to true will parallelize the migration of all Block Editors
            options.ParallelizeMigration = true;
        });
}
```

## Opting out of the content migration

It is strongly recommended to let the migration run as part of the upgrade. However, if you are upgrading to Umbraco versions 15, 16, or 17, you *can* opt out of the migration. Your site will continue to work, albeit with a certain degree of performance degradation.

{% hint style="warning" %}
Blocks in Rich Text Editors might not work as expected if you opt out of the content migration.
{% endhint %}

You can opt out of migrating each Block Editor type individually. To opt-out, add an `IComposer` implementation to configure the `ConvertBlockEditorPropertiesOptions` before initiating the upgrade process:

{% code title="DisableBlockEditorMigrationComposer.cs" %}

```csharp
using Umbraco.Cms.Core.Composing;
using Umbraco.Cms.Infrastructure.Migrations.Upgrade.V_15_0_0;

namespace UmbracoDocs.Samples;

public class DisableBlockEditorMigrationComposer : IComposer
{
    [Obsolete]
    public void Compose(IUmbracoBuilder builder)
        => builder.Services.Configure<ConvertBlockEditorPropertiesOptions>(options =>
        {
            // setting this to true will skip the migration of all Block List properties
            options.SkipBlockListEditors = false;

            // setting this to true will skip the migration of all Block Grid properties
            options.SkipBlockGridEditors = false;

            // setting this to true will skip the migration of all Rich Text Editor properties
            options.SkipRichTextEditors = false;
        });
}
```

{% endcode %}

Subsequently, you are responsible for performing the content migration yourself. This *must* be done before upgrading past Umbraco 17.

Custom code is required to perform the content migration. You can find inspiration in the core migrations:

* [`ConvertBlockListEditorProperties`](https://github.com/umbraco/Umbraco-CMS/blob/main/src/Umbraco.Infrastructure/Migrations/Upgrade/V_15_0_0/ConvertBlockListEditorProperties.cs) for Block List properties.
* [`ConvertBlockGridEditorProperties`](https://github.com/umbraco/Umbraco-CMS/blob/main/src/Umbraco.Infrastructure/Migrations/Upgrade/V_15_0_0/ConvertBlockGridEditorProperties.cs) for Block Grid properties.
* [`ConvertRichTextEditorProperties`](https://github.com/umbraco/Umbraco-CMS/blob/main/src/Umbraco.Infrastructure/Migrations/Upgrade/V_15_0_0/ConvertRichTextEditorProperties.cs) for Rich Text Editor properties.

{% hint style="warning" %}
This custom code should not run while editors are working in the Umbraco backoffice.

The site may require a restart once the content migration is complete.
{% endhint %}


# Migrate Custom Property Editors to Umbraco Version 14 and Later

This article helps you migrate custom Property Editors to Umbraco 14 and later

{% hint style="info" %}
This article applies *only* to implementers of custom Property Editors, that is:

* Maintainers of Property Editor packages.
* Site implementers who have built their own Property Editors.
  {% endhint %}

Umbraco 14 introduces a split between server-side and client-side Property Editor aliases. The reasoning behind this change is two-fold:

1. It allows server-side implementations to be reused for multiple client-side Property Editor UIs.
2. It helps to ensure a better division between client-side and server-side responsibility.

## Migration impact for Property Editors

In the Umbraco source code, the change manifests as the `EditorUiAlias` property on `IDataType`.

When upgrading from Umbraco 13 to Umbraco 14 and later, Umbraco automatically migrates all Data Types to include an `EditorUiAlias` value. For custom Property Editors, this migration is based on certain assumptions.

### Manifest based Property Editors

If the Property Editor is built with a [package manifest](https://docs.umbraco.com/umbraco-cms/13.latest/tutorials/creating-a-property-editor#setting-up-a-plugin):

1. Assign the package manifest `alias` to the Data Type `EditorUiAlias`, and
2. Convert the Data Type `EditorAlias` to the alias of a core Data Editor, based on the `valueType` specified in the package manifest.

The following table contains the applied conversion from `valueType` to `EditorAlias`:

| Property Editor `valueType` | Resulting `EditorAlias`  |
| --------------------------- | ------------------------ |
| `BIGINT`                    | `Umbraco.Plain.Integer`  |
| `DATE`                      | `Umbraco.Plain.DateTime` |
| `DATETIME`                  | `Umbraco.Plain.DateTime` |
| `DECIMAL`                   | `Umbraco.Plain.Decimal`  |
| `JSON`                      | `Umbraco.Plain.Json`     |
| `INT`                       | `Umbraco.Plain.Integer`  |
| `STRING`                    | `Umbraco.Plain.String`   |
| `TEXT`                      | `Umbraco.Plain.String`   |
| `TIME`                      | `Umbraco.Plain.Time`     |
| `XML`                       | `Umbraco.Plain.String`   |

{% hint style="warning" %}
**This might also impact Property Value Converters**

Property Value Converters for package manifest based Property Editors might be impacted by this migration.

It is common practice to pair a Property Editor to a Property Value Converter using the package manifest `alias`:

```csharp
public bool IsConverter(IPublishedPropertyType propertyType)
  => propertyType.EditorAlias.Equals("My.Editor.Alias");
```

Since the migration moves the `alias` to `EditorUiAlias`, the Umbraco 14 and later equivalent code looks like this:

```csharp
public bool IsConverter(IPublishedPropertyType propertyType)
  => propertyType.EditorUiAlias.Equals("My.Editor.Alias");
```

{% endhint %}

### Code based editors

If the Property Editor is built with a [Data Editor](https://docs.umbraco.com/umbraco-cms/13.latest/tutorials/creating-a-property-editor#setting-up-a-property-editor-with-csharp), we:

1. Assign the Data Editor `Alias` to the Data Type `EditorUiAlias`, and
2. Retain the Data Type `EditorAlias` as-is (which is the Data Editor `Alias`).

{% hint style="info" %}
The Data Editor `Alias` is found in the `DataEditor` attribute:

```csharp
[DataEditor("My.Editor.Alias")]
public class MySuggestionsDataEditor : DataEditor
{
}
```

{% endhint %}

## Migration impact for porting Property Editor UIs

The [`umbraco-package.json`](https://docs.umbraco.com/umbraco-cms/tutorials/creating-a-property-editor#setting-up-a-plugin) file is a central component for extensions in Umbraco 14+, including Property Editor UIs.

To keep the Property Editor working with migrated properties, ensure that the `propertyEditorUi` extension is declared with:

1. The migrated value of `EditorUiAlias` as its `alias`, and
2. The migrated value of `EditorAlias` as its `propertyEditorSchemaAlias` (found in the extension `meta` collection).

For example:

{% code title="umbraco-package.json" %}

```json
{
    "name": "My.Editors",
    "version": "1.0.0",
    "extensions": [
        {
            "type": "propertyEditorUi",
            "alias": "My.Editor.Alias",
            (...)
            "meta": {
                "propertyEditorSchemaAlias": "Umbraco.Plain.String",
                (...)
            }
        }
    ]
}
```

{% endcode %}

{% hint style="info" %}
See the [Creating a Property Editor](https://docs.umbraco.com/umbraco-cms/tutorials/creating-a-property-editor) article for guidance on building a Property Editor UI for Umbraco 14 and later.
{% endhint %}

## Alternatives

If the Data Type migration yields an undesirable result, you have two options:

1. Manually change the `EditorAlias` and/or `EditorUiAlias` directly in the `umbracoDataType` table, or
2. Create a custom migration to update the properties. See the [Creating a Custom Database Table](https://docs.umbraco.com/umbraco-cms/extending/database) article for inspiration.


# Migrate Content to Umbraco 8

This guide will show you how to migrate the content from your Umbraco 7 site to a site running Umbraco 8.

Umbraco 8 contains a lot of breaking changes and a lot of code has been cleaned up compared to Umbraco 7. Due to this, it will not be possible to do a direct upgrade from Umbraco 7 to Umbraco 8. You need to **migrate your content** from your Umbraco 7 site into your Umbraco 8 site and then recreate the rest in the new version.

A content migration tool has been implemented in Umbraco 8.1.0, to help you with the transition.

In this guide you can read more about the tool, its limitations, and how to use it in practice.

{% hint style="info" %}
**Migrating Umbraco Cloud sites**

Follow the [steps outlined in the Umbraco Cloud documentation](https://docs.umbraco.com/umbraco-cloud/optimize-and-maintain-your-site/manage-product-upgrades/product-upgrades/version-specific-upgrades/migrate-from-umbraco-7-to-8) to upgrade your Umbraco 7 site on Cloud.
{% endhint %}

## What are the limitations?

In the following section, you can learn more about the limitations of migrating content from Umbraco 7 to Umbraco 8.

### Versions supported

The content migration tool is a database migration, which is made for the database schema of Umbraco 7.14+. This means that in order to do the migration you need to ensure your Umbraco 7 site is running at least Umbraco 7.14.

### Database types supported

Umbraco 8 does not support MySQL databases. This means that the migration will not work when moving from an Umbraco 7 site using MySQL to Umbraco 8 on SQL Server

The database types that are supported are SQL Server and SQL CE.

### Known issues

Feedback from user testing has shown that some databases are harder to migrate than others.

We are collecting [a list of these known issues on our GitHub Issue Tracker](https://github.com/umbraco/Umbraco-CMS/issues?utf8=%E2%9C%93\&q=label%3Acategory%2Fcontent-migration+). There is a community package: [Pre-migration health checks](https://our.umbraco.com/packages/developer-tools/pre-migration-health-checks/) that you can install on your Umbraco 7 site before migration. This will help identify and resolve some of these common issues before triggering the migration steps detailed below.

{% hint style="info" %}
A migration was introduced in Umbraco 8.6 which can break the migration process. See [Issue #7914](https://github.com/umbraco/Umbraco-CMS/issues/7914) for more details.

There are two ways to work around this issue:

* Migrate to version 8.5 as a first step and then post-migration, carry out a normal Umbraco upgrade to the latest version of Umbraco 8, or
* Install the following community Nuget Package: [ProWorks Umbraco 8 Migrations](https://www.nuget.org/packages/ProWorks.Umbraco8.Migrations) into your Umbraco 8 project before running the migration (no configuration required). This package was created by Umbraco Gold Partner [ProWorks](https://www.proworks.com/) and patches the migration process so you can migrate directly from the latest Umbraco 7 to Umbraco 8.6+ without encountering the above issue. [Learn more about the package and the migration process on Prowork's blog](https://www.proworks.com/blog/archive/how-to-upgrade-umbraco-version-7-to-version-8).
  {% endhint %}

### Third party property editors

The migration will transform the data stored in third party editors as well. However, it will be stored as it was in Umbraco 7. If the structure has changed or the property editor doesn't exist, you will still be able to find the data in the database. It will, however, not be available in the backoffice.

<details>

<summary>Learn more about that in the Data Types Migrations</summary>

**Migrating data types**

When migrating content from Umbraco 7 to Umbraco 8, the Data Type 'pre-value' structure has changed. In Umbraco 8, the term 'pre-values' no longer exists and is instead referred to as `property editor configuration`.

In Umbraco 8, property editor configuration is a strongly typed object. There are plenty of examples in the [Umbraco-CMS codebase](https://github.com/umbraco/Umbraco-CMS/blob/v8/dev/src/Umbraco.Web/PropertyEditors/ContentPickerConfiguration.cs).

This configuration is stored differently in Umbraco 8 than it was in Umbraco 7. In Umbraco 7, each pre-value property was stored as a different row in a different database table. In Umbraco 8 this is simplified and property editor configuration is stored as the JSON serialized version of the strongly typed configuration object.

When upgrading from Umbraco 7 to Umbraco 8, Umbraco has no way of knowing how custom property editors have intended to structure their configuration data. During the upgrade, Umbraco will convert the key/value pairs from the old pre-value database table into a serialized JSON version of those values. There is a reasonable chance that the end result of this data conversion is not compatible with the custom property editor.

There are 3 options that a developer can choose to do to work around this automatic data conversion:

**1: Implement a custom `IPreValueMigrator`**

This option requires you to create a custom C# migrator for each of your custom property editors that store custom configuration data. It will also require that you implement these migrators before you run the Umbraco 8 content migration.

To do this, you will create an implementation of `IPreValueMigrator` or inherit from the base class [`DefaultPreValueMigrator`](https://github.com/umbraco/Umbraco-CMS/blob/v8/dev/src/Umbraco.Core/Migrations/Upgrade/V_8_0_0/DataTypes/DefaultPreValueMigrator.cs).

There are plenty of examples of this in the [Umbraco-CMS codebase](https://github.com/umbraco/Umbraco-CMS/tree/v8/dev/src/Umbraco.Core/Migrations/Upgrade/V_8_0_0/DataTypes).

You will then need to register them in a composer:

```csharp
[RuntimeLevel(MinLevel = RuntimeLevel.Upgrade, MaxLevel = RuntimeLevel.Upgrade)] // only on upgrades
public class PreValueMigratorComposer : IUserComposer
{
    public void Compose(Composition composition)
    {
        composition.WithCollectionBuilder<PreValueMigratorCollectionBuilder>()
            // Append all of the migrators required
            .Append<MyCustomPreValueMigrator>()
            .Append<AnotherPreValueMigrator>();
    }
}
```

When running the migrations and encountering a custom configuration, Umbraco will utilize the `PreValueMigrator` when converting the old pre-values into the new JSON format.

**2: Update your Angular configuration (pre-value) and property editor**

This option means that you will choose to use the automatically converted JSON data format. In this case, it will mean updating your pre-value and property editors to use the new JSON configuration data. The converted data won't be much different than the original/intended data format so this might not be too much work.

**3: Update the Angular configuration (pre-value) editor**

With this option the configuration/pre-value editor needs to be updated to transform the JSON converted data into the data structure you want. When this is done and when the Data Type is saved again, the JSON data structure will be saved back to the database. Your property editor will then continue to work.

This will require you to update and save all custom pre-value editors to transform the converted structures back to your intended data structure.

</details>

## What will happen

When the migrations are running, Umbraco will go through your entire Umbraco 7 database and update it to the format required for Umbraco 8. The schema will be remodeled and transformed into the correct format and your existing compatible data will be transformed to fit with Umbraco 8.

These migrations will be running directly on your database. They are transforming schema and data - not transferring. Therefore always ensure that you have a backup before attempting to do this. In case something goes wrong, you will be able to rollback and try again.

It is highly recommended to clean up your site before running this as it will be quicker.

* Empty Content recycle bin
* Empty Media recycle bin
* Clean up the database version history (can be done with a script or a package like [Unversion](https://our.umbraco.com/packages/website-utilities/unversion/))

## How it works

In the following guide we will migrate the content of an Umbraco 7.13.1 site to Umbraco 8.1.0.

### Step 1: Upgrading to 7.14+

Before the content migration can start the site has to run Umbraco 7.14+. Make sure to **always take a backup of the database** before doing an upgrade, and then check the [version specific upgrade instructions](/umbraco-cms/get-started/upgrading-and-migrating/version-specific).

The site in this example is an Umbraco 7.13.1 site, and we will use Nuget to update it.

![v7 site with content](/files/3X9DpEIbtlLgbWcTHalS)

Following the [general upgrade instructions](/umbraco-cms/get-started/upgrading-and-migrating/upgrade-details) we will now upgrade via Nuget until we get to this point:

![Upgrading to v7.14](/files/yT2aVi30kTN2pQImPjrX)

{% hint style="warning" %}
When upgrading an old website, check if you are using obsolete properties in your Data Types. These should be changed to their updated counterparts. The migration **will fail if you are still using obsolete properties.**

The updated properties are:

* Content Picker
* Media Picker
* Member Picker
* Multinode Treepicker
* Nested Content
* Folder Browser
* Related Links

You can see if your site is using the obsolete properties from the `(Obsolete)` prefix in their name.
{% endhint %}

Install the [Pre-migration health checks plugin](https://our.umbraco.com/packages/developer-tools/pre-migration-health-checks/), and run it health check from the Developer section of the backoffice. This is done to identify and resolve some common database schema issues before migration.

Once it is upgraded and you have verified everything is working, move on to the next step.

### Step 2: Migrating content to Umbraco 8

The first thing to do is to spin up a fresh new Umbraco 8.1+ site. Make sure everything works and that no content is there.

![Fresh 8.1 site](/files/Vw3evLpZIEU7zRnje2Fq)

{% hint style="warning" %}
If you have customized the `UsersMembershipProvider` on your Umbraco 7 site you need to copy that over to the 8.1 `web.config` as well. Additionally you need to update the `type` attribute to be `type="Umbraco.Web.Security.Providers.UsersMembershipProvider, Umbraco.Web"`.

This also includes the attribute `useLegacyEncoding` value. Make sure that this setting is copied into your new Umbraco 8 site, as it is needed in order to log in.
{% endhint %}

Take a backup of your database from the **Umbraco 7.14 site**. Take the information for the backup database and add that to the connectionstring for the **Umbraco 8.1 site**. If you are running SQL CE, you will have to copy the database over to the new site as well.

Once the connectionstring is set, the final step is to change the Umbraco version number in the `web.config` on the **Umbraco 8.1 site**. Chang it to `7.14.0`. This will indicate that there is an upgrade pending and it needs to run the migration.

![Set Umbraco version in the web.config](/files/ZdmtH9WN5IbSpasNLPab)

The version will be set to 8.1.0, and you need to change it to the version you are currently migrating from.

When you start the site it will ask you to login and then show you this screen:

![Upgrade database to 8.1](/files/mxnyrWkgEole30DQWOrE)

From here, the automatic migration will take over, and after a little bit you can log in and see your content:

![Content is on 8.1](/files/D31O5fuxm8IG3ArbJYXv)

{% hint style="info" %}
Please be aware that this is a **content migration**. If you go to the frontend after following these steps, it will throw errors.

At this point you will have the content but nothing else.
{% endhint %}

## Step 3: Files migration

Before moving on to this step, make sure that the Umbraco 8 project is no longer running.

The following files/folders need to be copied into the Umbraco 8 project:

* `~/Views` - do **not** overwrite the default Macro and Partial View Macro files, unless changes have been made to these.
* `~/Media`
* Any files/folders related to Stylesheets and JavaScripts.
* Any custom files/folders the Umbraco 7 project uses, that aren't in the `~/Config` or `~/bin`.
* `~/App_Data/UmbracoForms` - in the case Umbraco Forms was used on the Umbraco 7 site.

**Merge the configuration files carefully** to ensure any custom settings are migrated while none of the default configurations for Umbraco 8 is overwritten.

You'll have to revisit all templates and custom implementations to get the site up and running, as all markup is still Umbraco 7-specific.

{% hint style="info" %}
Are you planning on continuing the migration to the latest version on Umbraco CMS?

Then you can skip the step to revisit the template files and custom implementation. We highly recommend waiting with this step until you've reached the latest version.

If you're stopping at Umbraco 8, you can learn more about [rendering content on the Legacy Docs site](https://our.umbraco.com/Documentation/Fundamentals/Design/Rendering-Content/).
{% endhint %}

### Step 4: Post-migration checks

As you are updating your template files and custom implementation, you should also verify your configuration files and settings.

Umbraco 8 contains a few changes regarding the Sections in the Umbraco Backoffice. Because of this, you should also check your User Groups and make sure they have access to the appropriate sections.

Learn more about the Section in the [Sections article](/umbraco-cms/get-started/backoffice-essentials/sections)


# Minor Upgrades for Umbraco 8

This article provides details on how to upgrade to the next minor version when using Umbraco 8.

Sometimes there are exceptions to these guidelines, which are listed in the [**version-specific guide**](/umbraco-cms/get-started/upgrading-and-migrating/version-specific).

## Note

It is necessary to run the upgrade installer on each environment of your Umbraco site. If you want to update your staging and live site you need to repeat the steps below. Make sure you click through the install screens so that your upgrade is complete.

## Contents

In this article you will find instructions for 3 different ways of upgrading:

* [Upgrade using NuGet](#upgrade-using-nuget)
* [Upgrade manually from a Zip file](#upgrade-manually-from-a-zip-file)
* [Run an unattended upgrade (v8.12+)](#run-an-unattended-upgrade)

## Upgrade using NuGet

1. Open up the **Package Console** and type: `Update-Package UmbracoCms`
2. Choose **"No to All"** by pressing the **"L"** when prompted.
   * If there are any specific configuration changes required for the version you are upgrading to then they will be noted in the [**version-specific guide**](/umbraco-cms/get-started/upgrading-and-migrating/version-specific).

Alternatively, you can use the Visual Studio **NuGet Package Manager** to upgrade:

1. Open the **NuGet Package Manager** and select the **Updates** pane to get a list of available updates.
2. Choose the package called **UmbracoCms** and select update.

The upgrade will run through all the files and make sure you have the latest changes while leaving files you have updated.

## Upgrade manually from a zip file

Download the `.zip` file for the new version you are upgrading to from <https://our.umbraco.com/download>

Copy the following folders from inside the `.zip` file over the existing folders in your site:

* `/bin`
* `/Umbraco`

{% hint style="info" %}
There are hosting providers (we know of one: RackSpace Cloud) that require proper casing of file and folder names. Normally on Windows this is not a problem. If your hosting provider however forces proper casing, you will need to verify that the folder and file names are in the same casing as in the newest version you're upgrading to.
{% endhint %}

### Merge configuration files

You can expect some changes to the following configuration files:

* Any file in the `/Config` folder
* The `/Global.asax` file
* The `web.config` file in the root of your site **(Important: make sure to copy back the version number, and the connection string as they were.)**
* In rare cases, the `web.config` file in the `/Views` folder

Use a tool like [WinMerge](http://winmerge.org/) to check changes between all of the config files. Depending on when you last did this there may have been updates to few of them.

There's also the possibility that some files in the `/Config` folder are new or some have been removed (we do make a note of this in the release notes). WinMerge (and other diff tools) can compare folders as well so you can spot these differences.

### Merge UI.xml and language files

Some packages like Umbraco Forms add dialogs to the `UI.xml`. Make sure to merge those changes back in from your backup during the upgrade so that the packages continue to work. This file can be found in: `/Umbraco/Config/Create/UI.xml`.

Packages like Umbraco Forms and Courier also make changes to the language files located in: `/Umbraco/Config/Lang/*.xml` (typically `en.xml`).

### Finalize

After copying the files and making the config changes, you can open your site. You should see the installer which will guide you through the upgrade.

The installer will do two things:

* Update the version number in the `web.config`
* Upgrade your database in case there are any changes

We are aware that, currently, the installer is asking you for the database details of a **blank database** while upgrading. In the near future this will be pre-filled with your existing details and the wording will be updated. So no need to be scared. Enter the details of your existing database and Umbraco will upgrade it to the latest version when necessary.

## Run an unattended upgrade

When upgrading your Umbraco project to Umbraco v8.12+ it is possible to enable the upgrade to run unattended. This means that you will not need to run through the installation wizard when upgrading.

Below you will find the steps you need to take in order to upgrade your project unattended.

{% hint style="info" %}
Are you running a load balanced setup with multiple servers and environments?

Check out the section about [Unattended upgrades in a load balanced setup](/umbraco-cms/get-started/upgrading-and-migrating/upgrade-unattended#unattended-upgrades-in-a-load-balanced-setup).
{% endhint %}

### Enable the feature

1. Add the `Umbraco.Core.RuntimeState.UpgradeUnattended` key to `appSettings` in your web.config file.
2. Set the value of the key to `true`.

```xml
    <add key="Umbraco.Core.RuntimeState.UpgradeUnattended" value="true" />
```

### Check the `ConfigurationStatus`

In order to trigger the actual upgrade, the correct version number needs to be set.

It is important to use the version number of the version that you are upgrading to. If this is not set, the upgrade will not run even if the `UpgradeUnattended` key has been set to `true`.

1. Locate the `ConfigurationStatus` key in the `appSettings` section in your web.config file.
2. Update the value to match the Umbraco version that you are upgrading to.

```xml
<add key="Umbraco.Core.ConfigurationStatus" value="x.x.x"/>
```

### Run the upgrade

With the correct configuration applied, the project will be upgraded on the next boot.

{% hint style="info" %}
While the upgrade processes are running, any requests made to the site will be "put on hold", meaning that no content will be returned before the upgrade is complete.
{% endhint %}

#### Boot order

The Runtime level will use `Run` instead of `Upgrade` in order to allow the website to continue to boot up directly after the migration is run, instead of initiating the otherwise required restart.

{% hint style="info" %}
The upgrade is run after Composers but before Components. This is because the migration requires services that are registered in Composers and Components requires that Umbraco and the database is ready.
{% endhint %}

### Unattended upgrades in a load balanced setup

Follow the steps outlined below to use run unattended upgrades in a load balanced setup.

1. Upgrade Umbraco via NuGet in Visual Studio. Make sure the `Umbraco.Core.ConfigurationStatus` key in `appSetting` in the `web.config` file is updated to match the **target version**.
2. Deploy to all environments, including the updated `appSetting` for `Umbraco.Core.ConfigurationStatus`.
3. Set the `Umbraco.Core.RuntimeState.UpgradeUnattended` key in `appSetting` in the `web.config` to `true` for **the Main server only**.
4. Request a page on the Main server and the upgrade will run automatically.
5. Wait for the upgrade to complete.
6. Browse the Read-Only servers and make sure they do not show the “upgrade required” screen.

## Post installation

One important recommendation is to always remove the `install` folder immediately after upgrading Umbraco and never to upload it to a live server.

## Potential issues and gotchas

### Browser cache

Google Chrome has notoriously aggressive caching, so if something doesn't seem to work well in the backoffice, make sure to clear cache and cookies thoroughly (for other browsers as well). Normally the browser cache problem is automatically handled in an Umbraco upgrade by modifying the config/ClientDependency.config version number. If you however wish to re-force this update you can increment this version number which will ensure that any server-side cache of JavaScript and stylesheets gets cleared as well.

One way to nudge the cache in Chrome is to open the developer tools (F12) and go to the settings (the cog icon). There will be a checkbox that says "Disable cache (while DevTools is open)". Once this checkbox is on you can refresh the page and the cache should be invalidated. To force it even more, the "reload" button next to your address bar now has extra options when you right-click it. It should have "Normal reload", "Hard reload" and "Empty cache and hard reload" now. The last option is the most thorough and you might want to try that.


# Upgrade to Umbraco 7

This document should be used as a reference, not a step by step guide. Upgrading will largely depend on what version of Umbraco you are currently running, what packages you have installed and the many

The [standard upgrade instructions](/umbraco-cms/get-started/upgrading-and-migrating/upgrade-details) still apply to this process as well.

## Backup

It is critical that you back up your website and database before upgrading. There are database changes made during installation and you cannot revert an Umbraco 7 database to an Umbraco 6 database.

## .Net 4.5

Umbraco 7 is built on .Net 4.5 and your development environment will require this version installed in order to operate. Visual Studio users may require 2012 or higher.

## HTML 5 browser support

Umbraco 7 requires browsers with proper HTML 5 support, these include Chrome, Firefox, IE10+

## Breaking changes

Before you upgrade be sure to read the list of breaking changes. This is especially recommended if you have removed or modified code in the core or if one of these breaking changes directly affects your installation.

[See the list of breaking changes](https://our.umbraco.com/contribute/releases/700) for more details.

## Examine

It is recommended to rebuild all Examine indexes after completing the upgrade.

## Xml Cache rebuild

You should re-generate the XML cache. This can be done by following the prompts when visiting the following URL:

`your-domain.com/umbraco/dialogs/republish.aspx?xml=true`

## Configuration changes

It is recommended that you use a Diff tool to compare the configuration file changes with your own current configuration files.

* `/web.config` updates
  * Details are listed here: <https://issues.umbraco.org/issue/U4-2900>
  * You will need to compare the new Umbraco 7 `web.config` with your current `web.config`. Here is a quick reference of what needs to change:
    * Remove the `section name="BaseRestExtensions"` section
    * Remove the `section name="FileSystemProviders"` section
    * Remove the `sectionGroup name="system.web.webPages.razor"` section
    * Remove the `<FileSystemProviders>` element
    * Remove the `BaseRestExtensions` element
    * Remove the `add key="umbracoUseMediumTrust"` element
    * Remove the `system.web.extensions` element
    * Removes the `xhtmlConformance` element
    * Remove the `system.codedom` element
    * Remove the `compilation` assemblies, `/compilation`
    * Remove the `system.web.webPages.razor` element
    * New: `sectionGroup name="umbracoConfiguration"` section
    * New: `umbracoConfiguration` element
    * Ensure that the `targetFramework="4.5"` is added to the `httpRuntime` element
    * Add `add key="ValidationSettings:UnobtrusiveValidationMode" value="None"` to the `appSettings` element
* `/config/clientdependency.config` changes
  * remove `add name="CanvasProvider"` element
* `/views/web.config` updates
* New `macroscripts/web.config`
* `config/umbracoSettings.config`
  * Umbraco is now shipped with minimal settings but the [full settings](https://our.umbraco.com/documentation/Using-Umbraco/Config-files/umbracoSettings/) are still available
  * `umbracoSettings` is now a true ASP.NET configuration section <https://issues.umbraco.org/issue/U4-58>
  * Remove the `EnableCanvasEditing` element
  * Remove the `webservices` element
* Removed `xsltExtensions.config`
  * <https://issues.umbraco.org/issue/U4-2742>
* `/config/applications.config` and `/config/trees.config` have some icon paths and names updated. You need to merge the new changes into your existing config files.
* `/config/tinyMceConfig.config`
  * The `inlinepopups` is compatible and supported in Umbraco 7. You need to remove these elements: `plugin loadOnFrontend="true"`, `inlinepopups/plugin`;
  * The plugins element that is shipped with Umbraco 7 looks like this:

    ```xml
    <plugins>
        <plugin loadOnFrontend="true">code</plugin>
        <plugin loadOnFrontend="true">paste</plugin>
        <plugin loadOnFrontend="true">umbracolink</plugin>
        <plugin loadOnFrontend="true">anchor</plugin>
        <plugin loadOnFrontend="true">charmap</plugin>
        <plugin loadOnFrontend="true">table</plugin>
        <plugin loadOnFrontend="true">lists</plugin>
    </plugins>
    ```

    * You need to merge the changes from the new `tinyMceConfig` file into yours. The `command` elements that have changed are: `JustifyCenter`, `JustifyLeft`, `JustifyRight`, `JustifyFull`, `umbracomacro`, `umbracoembed`, `mceImage`, `subscript`, `superscript`, `styleselect`
    * Remove the command: `mceSpellCheck`
* `/config/dashboard.config`
  * You need to merge the changes from the new `dashboard.config` into yours. Some of the original dashboard entries that were shipped with Umbraco 6 have been replaced or removed.

## Medium Trust

Umbraco 7+ will no longer support medium trust environments. There are now some assemblies used in the core that do not support medium trust but are used extensively. Plugin scanning now also allows for scanning Umbraco's internal types which requires full trust.

## Events

### Tree events

Content, Media, Members, and Data Type trees will no longer raise the legacy tree events (based on BaseTree). It is recommended to change all tree event handlers to use the new tree events that fire for every tree in Umbraco including legacy trees. The new tree events are static events and are found in the class `Umbraco.Web.Trees.TreeControllerBase`:

* `MenuRendering`
* `RootNodeRendering`
* `TreeNodesRendering`

### Legacy business logic events

The Content, Media, Member, and Data Type editors have been re-created and are solely using the new Umbraco Services data layer. This means that operations performed in the backoffice will no longer raise the legacy business logic events (for example, events based on `umbraco.cms.businesslogic.web.Document`). It is recommended to change your event handlers to subscribe to the new Services data layer events. These are static events and are found in the services. For example: `Umbraco.Core.Services.ContentService.Saved`.

## Property Editors

Legacy property editors (pre-Umbraco 7) will not work with Umbraco 7. During the upgrade installation process, Umbraco will generate a report showing you which legacy property editors are installed. These will all be converted to a `readonly` Label property editor. No data loss will occur but you'll need to re-assign your existing data types to use a new compatible Umbraco 7 property editor.

Most Umbraco core property editors shipped will be mapped to their equivalent Umbraco 7 editors. The Image cropper editor has not been completed for v7.0.

### The Related Links property editor and XSLT

Since the Related Links property is an advanced property editor, the data format has changed from XML to JSON. This should not have any effect when retrieving the data from razor. If you are outputting Related Links data with XSLT you will need to update your XSLT snippet. Making use of the new library method `umbraco.library:JsonToXml` and taking into account that the xml structure has also slightly changed.

### GUID -> Alias mapping

One of the database changes made in Umbraco 7 is the change of referencing a property editor from a GUID to a string alias. In order to map a legacy property editor to a new Umbraco 7 version you can add your custom "GUID -> Alias" map during application startup. To do this you would add your map using this method: `Umbraco.Core.PropertyEditors.LegacyPropertyEditorIdToAliasConverter.CreateMap`

## Parameter Editors

Legacy parameter editors (pre-Umbraco 7) will not work with Umbraco 7. If Umbraco detects legacy parameter editor aliases that do not map to a Umbraco 7 parameter editor it will render a textbox in its place. You will need to update your macros to use a compatible Umbraco 7 parameter editor as those that aren't supported.

Previously, parameter editors were registered in an Umbraco database table: `cmsMacroPropertyType` which no longer exists. Parameter editors in Umbraco 7 are plugins like property editors. During the Umbraco 7 upgrade installation process it will update the new `cmsMacroProperty.editorAlias` column with the previous parameter editor alias. During this process it will look into the `Umbraco.Core.PropertyEditors.LegacyParameterEditorAliasConverter` for a map between a legacy alias to a new Umbraco 7 alias.

Custom legacy parameters can be mapped to new Umbraco 7 parameter editor aliases during installation. This can be done by modifying the mapping during application startup using this method: `Umbraco.Core.PropertyEditors.LegacyParameterEditorAliasConverter.CreateMap`.

## Database changes

All database changes will be taken care of during the upgrade installation process.

For database change details see (including all child tasks):

* [Issue U4-2886](https://issues.umbraco.org/issue/U4-2886)
* [Issue U4-3015](https://issues.umbraco.org/issue/U4-3015)

## Tags

See above for the database updates made for better tag support.

* Tags can now be assigned to a nodes property and not only a node
* Multiple tag controls can exist on one page with different data
  * The legacy API does **not** support this, the legacy API will effectively, add/update/remove tags for the first property found for the document that is assigned a tag property editor.
* There is a new ITagService that can be used to query tags
  * Querying for tags in a view (front-end) can be done via the new TagQuery class which is exposed from the UmbracoHelper. For example: `@Umbraco.TagQuery.GetTagsForProperty`

## Packages

You should check with the package creator for all installed packages to ensure they are compatible with Umbraco 7.

## For package developers

We see common errors that we cannot fix for you, but we do have recommendations you can follow to fix them:

### TypeFinder

```none
Could not load type umbraco.BusinessLogic.Utils.TypeFinder from assembly businesslogic, Version=1.0.5031.21336, Culture=neutral, PublicKeyToken=null.
```

The TypeFinder has been deprecated since 4.10 and is now found under `Umbraco.Core.TypeFinder`.

### JavaScript in menu actions

While you need to have JavaScript inside menu actions to trigger a response, it is highly recommended that you use the recommended `UmbClientMgr` methods. You should not try to override `parent.right.document` and similar tricks to get to the right-hand frame.

### Use the recommended Umbraco uicontrols

If you have a webforms page, it is recommended to use the built-in ASP.NET controls to render panels, properties and so on. If you use the raw HTML or try to style it to match the backoffice, you will get out of sync. Follow the guidelines set by Umbraco's internal editors and use the ASP.NET custom controls for UI.


# Minor Upgrades for Umbraco 7

This article provides details on how to upgrade to the next minor version when using Umbraco 7.

Sometimes there are exceptions to these guidelines, which are listed in the [**version-specific guide**](/umbraco-cms/get-started/upgrading-and-migrating/version-specific).

## Note

It is necessary to run the upgrade installer on each environment of your Umbraco site. If you want to update your staging and live site then you need to repeat the steps below and make sure that you click through the install screens to complete the upgrade.

## Contents

In this article you will find instructions for 2 different ways of upgrading:

* [Upgrade using NuGet](#upgrade-using-nuget)
* [Upgrade manually from a Zip file](#upgrade-manually-from-a-zip-file)

## Upgrade using NuGet

1. Open up the **Package Console** and type: `Update-Package UmbracoCms`
2. Choose **"No to All"** by pressing the **"L"** when prompted.
   * If there are any specific configuration changes required for the version you are upgrading to then they will be noted in the [**version-specific guide**](/umbraco-cms/get-started/upgrading-and-migrating/version-specific).

Alternatively, you can use the Visual Studio **NuGet Package Manager** to upgrade:

1. Open the **NuGet Package Manager** and select the **Updates** pane to get a list of available updates.
2. Choose the package called **UmbracoCms** and select update.

The upgrade will run through all the files and make sure you have the latest changes while leaving the files you have updated.

### Upgrades to versions lower than 7.2.0

If you're not upgrading to 7.2.0 or higher then you should follow these extra instructions. If you are upgrading to 7.2.0+ then you can skip this and go to [Merge UI.xml and language](#merge-uixml-and-language).

You will be asked to overwrite your web.config file and the files in /config, make sure to answer **No** to those questions.

For some inexplicable reason, the installation will fail if you click "No to All" (in the GUI) or answer "L" (in the package manager console) to the question: "File 'Web.config' already exists in project 'MySite'. Do you want to overwrite it?" So make sure to only answer "**No**" (in the GUI) or "**N**" (in the package manager console).

![File conflict dialog with a web.config file in conflict](/files/ssPIzyYPpqRei72PhIf9) ![File conflict console message with multiple files in conflict](/files/0uPqLDPY86bpqWWH49pK)

We will overwrite the `web.config` file. We'll back it up so don't worry. You can find the backup in `App_Data\NuGetBackup\20140320-165450\`. The `20140320-165450` bit is the date and time when the backup occurred, which varies. You can then merge your config files and make sure they're up to date.

## Upgrade manually from a zip file

Download the .zip file for the new version you are upgrading to from <https://our.umbraco.com/download>

Copy the following folders from inside the .zip file over the existing folders in your site:

* `/bin`
* `/Umbraco`
* `/Umbraco_Client`

{% hint style="info" %}
There are hosting providers (we know of one: RackSpace Cloud) that require proper casing of file and folder names. Generally, on Windows, this is not a problem. Is your hosting provider forcing proper casing? You'll then need to verify that folders and files are named in the same casing as the version you're upgrading to.
{% endhint %}

## Merge configuration files

You can expect some changes to the following configuration files:

* Any file in the `/Config` folder
* The `/Global.asax` file
* The `web.config` file in the root of your site **(Important: make sure to copy back the version number, and the connection string as they were.)**
* In rare cases, the `web.config` file in the Views folder

Use a tool like [WinMerge](http://winmerge.org/) to check changes between all of the config files. Depending on when you last did this there may have been updates to a few of them.

There's also the possibility that files in the `/Config` folder are new or have been removed(we note this in the release notes). WinMerge (and other diff tools) is able to compare folders as well so you can spot these differences.

Up until version 6.0.0 it was necessary to change the version number in `ClientDependency.config`. This was to clear the cached HTML/CSS/JS files in the backoffice. Change the current version number to one that's higher than that. Make sure not to skip this step as you might get strange behavior in the backoffice otherwise.

## Merge UI.xml and language

Some packages (like Contour and Umbraco Forms) add dialogs to the `UI.xml`. Make sure to merge those changes back in from your backup during the upgrade so that the packages continue to work. This file can be found in: `/Umbraco/Config/Create/UI.xml`.

Packages like Contour, Umbraco Forms, and Courier also make changes to the language files located in: `/Umbraco/Config/Lang/*.xml` (typically `en.xml`).

## Finalize

After copying the files and making the config changes, you can open your site. You should see the installer which will guide you through the upgrade.

The installer will do two things:

* Update the version number in the `web.config`
* Upgrade your database in case there are any changes

We are aware that, currently, the installer is asking you for the database details of a **blank database** while upgrading. In the near future this will be pre-filled with your existing details and the wording will be updated. So no need to be scared. Enter the details of your existing database and Umbraco will upgrade it to the latest version when necessary.

## Post installation

One important recommendation is to always remove the `install` folder immediately after upgrading Umbraco and never to upload it to a live server.

## Potential issues and gotchas

### Browser cache

Google Chrome has notoriously aggressive caching. If something doesn't seem to work well in the backoffice, make sure to clear cache and cookies thoroughly (for other browsers as well). Normally the browser cache problem is automatically handled in an Umbraco upgrade by modifying the config/ClientDependency.config version number. If you wish to re-force this update you can increment this version number. This will ensure that any server-side cache of JavaScript and stylesheets gets cleared as well.

One way to nudge the cache in Chrome is to open the developer tools (F12) and go to the settings (the cog icon). There will be a checkbox that says "Disable cache (while DevTools is open)". Once this checkbox is on you can refresh the page and the cache should be invalidated. To force it even more, the "reload" button next to your address bar now has extra options when you right-click it. It should have "Normal reload", "Hard reload" and "Empty cache and hard reload" now. The last option is the most thorough and you might want to try that.


# Single Block Migration for Umbraco 18

Learn how to migrate Block List property editors configured in single mode to  the new Single Block property editor.

Version 17 introduced the single block property editor. Its purpose is to replace the "single mode" option that exists in the Block List property editor. This is part of the broader effort to ensure type consistency across core property editors.

## Included migration

Umbraco ships with a migration to:

* Update all block list Data Types that have been properly configured in "single" mode.
* Update all (nested) property data that uses this Data Type.

The migration was added in Umbraco 17 but disabled. It now runs by default during the upgrade to Umbraco 18.

## Pre-running the migration

You can run the migration at any time by using your own migration plan, as shown in the example below. If you run this migration yourself, the default Umbraco migration won't update any data. It only changes data in the old format.

```csharp
using Umbraco.Cms.Core;
using Umbraco.Cms.Core.Composing;
using Umbraco.Cms.Core.Events;
using Umbraco.Cms.Core.Migrations;
using Umbraco.Cms.Core.Notifications;
using Umbraco.Cms.Core.Scoping;
using Umbraco.Cms.Core.Services;
using Umbraco.Cms.Infrastructure.Migrations;
using Umbraco.Cms.Infrastructure.Migrations.Upgrade;
using Umbraco.Cms.Infrastructure.Migrations.Upgrade.V_18_0_0;

namespace SingleBlockMigrationRunner;

public class TestMigrationComposer : IComposer
{
    public void Compose(IUmbracoBuilder builder)
    {
        builder.AddNotificationAsyncHandler<UmbracoApplicationStartingNotification, RunTestMigration>();
    }
}

public class RunTestMigration : INotificationAsyncHandler<UmbracoApplicationStartingNotification>
{
    private readonly IMigrationPlanExecutor _migrationPlanExecutor;
    private readonly ICoreScopeProvider _coreScopeProvider;
    private readonly IKeyValueService _keyValueService;
    private readonly IRuntimeState _runtimeState;

    public RunTestMigration(
        ICoreScopeProvider coreScopeProvider,
        IMigrationPlanExecutor migrationPlanExecutor,
        IKeyValueService keyValueService,
        IRuntimeState runtimeState)
    {
        _migrationPlanExecutor = migrationPlanExecutor;
        _coreScopeProvider = coreScopeProvider;
        _keyValueService = keyValueService;
        _runtimeState = runtimeState;
    }

    public async Task HandleAsync(UmbracoApplicationStartingNotification notification, CancellationToken cancellationToken)
    {
        if (_runtimeState.Level < RuntimeLevel.Run)
        {
            return;
        }

        // One-off migration plan
        var migrationPlan = new MigrationPlan("Single Block Migration");

        // define the step
        migrationPlan.From(string.Empty)
            .To<MigrateSingleBlockList>("test-run-singleBlock-migration");

        // Go and upgrade our site (Will check if it needs to do the work or not)
        // Based on the current/latest step
        var upgrader = new Upgrader(migrationPlan);
        await upgrader.ExecuteAsync(
            _migrationPlanExecutor,
            _coreScopeProvider,
            _keyValueService);
    }
}

```

## Extending the migration

If your non-core property editor nests content and stores it within its own value, you must extend the migration. To do this, create and register a class that implements `ITypedSingleBlockListProcessor` and register it. See how the built-in types are registered at `Umbraco.Cms.Infrastructure.Migrations.Upgrade.V_18_0_0.SingleBlockList.MigrateSingleBlockListComposer`. The interface needs the following properties and methods:

* `IEnumerable<string> PropertyEditorAliases`: The alias of the property editor as defined in its DataEditor attribute. Since a processor can support multiple editors if they use the same model, it takes an IEnumerable rather than a single string. These aliases are used to limit the amount of data fetched from the database.
* `Type PropertyEditorValueType`: The type of value the property editor would return when `valueEditor.ToEditor()` is called.
* `Func<object?, Func<object?, bool>, Func<BlockListValue, object>, bool> Process` The function to run when the main processor detects a value that matches your processor. The function must support the following parameters:
  * `object?`: The value passed in from the outer caller or the top-level processor.
  * `Func<object?, bool>` The function the processor calls when it detects nested content. This is passed in from the top-level processor.
  * `Func<BlockListValue, object>` The function called when the outer layer of the current value is a block list that needs to be converted to a single block. This should only be called from the core processors. It is passed around to make recursion a little easier.


# Upgrade Unattended

Learn how to enable unattended upgrades, allowing your project to upgrade without your interference.

When upgrading your Umbraco project, you can enable the upgrade to run unattended. This means that you will not need to run through the installation wizard when upgrading.

{% hint style="info" %}
Are you running a load-balanced setup with multiple servers and environments?

Check out the section about [Unattended upgrades in a load-balanced setup](#unattended-upgrades-in-a-load-balanced-setup).
{% endhint %}

## Enable the unattended upgrade feature

1. Add the `Umbraco:Cms:Unattended:UpgradeUnattended` configuration key.
2. Set the value of the key to `true`.

{% code title="appsettings.json" %}

```json
{
    "Umbraco": {
        "CMS": {
            "Unattended": {
                "UpgradeUnattended": true
            }
        }
    }
}
```

{% endcode %}

## Run the upgrade

With the correct configuration applied, the project will be upgraded on the next boot.

### Boot order

{% hint style="info" %}
The behavior described below applies to Umbraco 17.3 and later. In earlier versions, migrations ran synchronously before the web server started accepting requests.
{% endhint %}

When the application starts, migrations run in a background service after the web server begins listening. During the migration the RuntimeLevel is `Upgrading`. The web server is reachable during this time, serving health probe responses and maintenance pages.

Once all migrations complete, the RuntimeLevel transitions to `Run` and the site operates normally.

### HTTP behavior during upgrade

While the RuntimeLevel is `Upgrading`, Umbraco responds differently depending on the request surface:

| Surface             | Behavior                              |
| ------------------- | ------------------------------------- |
| Frontend            | HTTP 503 with `Upgrading.cshtml` view |
| Surface controllers | HTTP 503 with `Upgrading.cshtml` view |
| Backoffice          | Upgrade-in-progress screen            |
| Management API      | HTTP 503 JSON ProblemDetails          |
| Delivery API        | HTTP 503 JSON ProblemDetails          |

The [liveness probe](/umbraco-cms/run-in-production/infrastructure-and-ops/server-setup/health-probes) returns HTTP 200 during the upgrade, confirming the process is alive. The [readiness probe](/umbraco-cms/run-in-production/infrastructure-and-ops/server-setup/health-probes) returns HTTP 503, indicating the site is not yet ready to serve normal traffic.

You can customize the maintenance page shown to frontend visitors by setting the `Umbraco:CMS:Global:UpgradingViewPath` configuration key. See [Global Settings](/umbraco-cms/develop-with-umbraco/configuration/globalsettings#upgrading-view-path) for details.

## Unattended upgrades in a load-balanced setup

Follow the steps outlined below to use unattended upgrades in a load-balanced setup.

1. [Upgrade Umbraco via NuGet](/umbraco-cms/get-started/upgrading-and-migrating/upgrade-details#upgrade-to-a-new-major).
2. Deploy to all environments.
3. Set the `Umbraco:CMS:Unattended:UpgradeUnattended` configuration key to `true` for the **Main server** only.
4. Boot the Main server, and the upgrade will run automatically.
5. Wait for the upgrade to complete.
6. Boot the **Read-Only** servers and ensure they do not show the “Upgrade Required” screen.

You can use the [readiness probe](/umbraco-cms/run-in-production/infrastructure-and-ops/server-setup/health-probes) to let your load balancer detect when each server has completed its upgrade and is ready to receive traffic.


# Downgrades and Re-Running Migrations

Discusses the possibility of downgrading to a previous version, along with the related topic of re-running the migrations that have occurred during an upgrade

## Downgrades are not strictly supported

Downgrades are not a supported feature of the Umbraco product.

The primary reason for this is that the Umbraco migration scheme only supports upward migrations.

When updating to a new version, often there are migrations to run that will make changes to the Umbraco schema and data. This is being done to bring the database to a state that will support the functionality of the version being upgraded to.

There isn't an equivalent downward migration that will undo these changes.

Given that, it can't be guaranteed that a database from a later version will work with an earlier one.

If you wish to downgrade to an earlier version of Umbraco, it's best to also revert to a compatible database backup. You will need one from the version you are downgrading to.

Other factors that may preclude downgrading include packages you may be using. They may not be compatible with the lower version or support downgrades themselves.

## Particular downgrades are possible and safe

That said, between some versions, a downgrade may be possible and perfectly safe. There may be no migrations that run between them. Or, as is often the case, migrations are backward compatible (for example, adding a new, nullable field to a database table).

You will need to determine this for yourself, likely via reviewing the changes and migrations between versions and testing.

Once you have done that, this article will explain how to proceed with downgrading.

## Downgrade process

Downgrading the Umbraco application itself is straightforward. In the same way as when upgrading, you update the dependency on Umbraco in your project, you do the same when downgrading:

`dotnet add package Umbraco.Cms --version <VERSION>`

If you try to start Umbraco, it's likely you will find an exception thrown on boot indicating a problem with the migration state. This is because the version of Umbraco you are running now doesn't recognize the state stored by the higher version you were running previously.

To resolve this, you need to query the Umbraco database.

There are two migration states stored for the CMS - for the core migrations and the pre-migrations (which run at different times on start-up).

You can find the current state of these via:

```sql
select value from umbracoKeyValue where [key] = 'Umbraco.Core.Upgrader.State+Umbraco.Core.Premigrations'
select value from umbracoKeyValue where [key] = 'Umbraco.Core.Upgrader.State+Umbraco.Core'
```

You then need to find the latest state for the version of Umbraco you want to downgrade to.

To find the earlier states you have to look in the source code, specifically [here for the pre-migrations](https://github.com/umbraco/Umbraco-CMS/blob/main/src/Umbraco.Infrastructure/Migrations/Upgrade/UmbracoPremigrationPlan.cs) and [here for the core ones](https://github.com/umbraco/Umbraco-CMS/blob/main/src/Umbraco.Infrastructure/Migrations/Upgrade/UmbracoPlan.cs).

Each migration is commented with the version it was added, so you can read off the latest one for the version you wish to run.

Having found the state you need, you set it via a query of the form:

```sql
update umbracoKeyValue
set value = '{state value}'
where [key] = 'Umbraco.Core.Upgrader.State+Umbraco.Core'
```

Then restart Umbraco.

## Re-running Migrations

A related topic is if you want to re-run the migrations from a prior version to the version you are on.

This isn't something that should be needed in normal usage of Umbraco. Umbraco handles running the necessary migrations on start-up and keeps track of its state. However, if investigating an upgrade-related issue or testing an upgrade before running it in production, it's useful to know how to do this.

Again you need to manipulate the migration state stored in the database.

You can update these values to an earlier state, and on start-up Umbraco will recognize that it's not at the latest. It will re-run the migrations from the earlier state to the current one.

For example, let's say you are running 16.2, and want to re-run the core migrations for 15 and 16. Here you would set the core migration state to the latest one from 14, via:

```sql
update umbracoKeyValue
set value = '{EEF792FC-318C-4921-9859-51EBF07A53A3}'
where [key] = 'Umbraco.Core.Upgrader.State+Umbraco.Core'
```

And then restart Umbraco.

Migrations are written to be idempotent, so they can be run multiple times. If the change the migration is making is already detected to be there, it should skip without throwing an exception.


# Backoffice Essentials

Learn the core workflows in the Umbraco backoffice.

Whether you are an editor managing daily content or a developer configuring the system for the first time, understanding the Backoffice is essential. This section covers the fundamental operations of the Umbraco interface from initial login and content creation to advanced node management.

Once you are familiar with the basics, the [Tips and Tricks](/umbraco-cms/get-started/backoffice-essentials/tips-and-tricks) section covers audit trails, notifications, session timeout, and other useful backoffice features.

## What this section covers

* **Content lifecycle**: Create, save, preview, publish, and unpublish content
* **Node management**: Find, edit, sort, move, copy, delete, and restore pages

## Related Resources

* [Publishing and workflow](/umbraco-cms/manage-and-publish-content/publishing-and-workflow)
* [Media and assets](/umbraco-cms/manage-and-publish-content/media-and-assets)
* [Users and members](/umbraco-cms/manage-and-publish-content/users-and-members)
* [The Starter Kit](/umbraco-cms/develop-with-umbraco/tutorials/starter-kit)

***

## Umbraco Training

Umbraco HQ offers training on backoffice workflows, content management, and editorial best practices.

The course is useful for content editors, project managers, and other team members who want a stronger foundation in working with Umbraco.

[Explore the Umbraco Content Management Training Course](https://umbraco.com/training/course-details/content-management/).


# Logging In and Out

Learn how to log in and out of the Umbraco backoffice.

## Logging in

To access the Umbraco Backoffice:

1. Open your web browser and enter your website domain name followed by `/umbraco` (for example: `http://www.company.com/umbraco/`). A login screen appears.
2. Enter your **Email** and **Password** provided by your system administrator.
3. Click **Login**.

{% hint style="info" %}
The address at which you access Umbraco may vary so check with your system administrator.
{% endhint %}

![Login Screen](/files/u94c3MSc97tFhAcCf0GZ)

## Logging Out

To log out of the Umbraco Backoffice:

1. Select the profile picture in the top-right of the screen.
2. Click **Logout**.

![Logout Screen](/files/9GHl0kzd8gZcEvVeMTbt)


# Umbraco Interface

Get an overview of the Umbraco backoffice interface, including the dashboard, sections menu, and content tree.

## Initial View

After logging in to an Umbraco project you will be presented with a dashboard containing a wide array of buttons and features. Let's quickly go through what each feature does.

### The Dashboard

By default, there are two dashboards available:

1. The **Welcome to Umbraco** dashboard provides helpful information about Umbraco.
2. The **Redirect URL Management** dashboard displays the original and redirected links of the published pages which are moved to a new location in your project.

![The Dashboard](/files/CkaibXMefxY6jGq2bfDv)

This dashboard is part of the **Content** section. Each section is described further down the article.

### Search, Help, and Profile Settings

1. The **Search** bar allows you to search for the content in your entire project.
2. The **Help** icon provides different Help options such as Tours, Umbraco Learning Base YouTube videos, Umbraco Documentation, and your System Information.
3. The **profile** icon allows you to edit your profile, change the password, and Logout from the application.

![Search, help and profile](/files/4UrGzkxGYn6NbYd8KRBL)

### The Sections Menu

The following sections are available in the backoffice:

* **Content** - allows you to manage your content.
* **Media** - allows you to manage images and other media files.
* **Library** - allows you to manage your reusable elements.
* **Settings** - allows you to handle your meta data such as Document Types.
* **Packages** - allows you to manage add-on packages.
* **Users** - allows you to manage the users on the project. To learn more about users, see the [Users](/umbraco-cms/manage-and-publish-content/users-and-members/users) article.
* **Members** - allows you to handle the members of the project. If you want to learn more about Members, see the [Members](/umbraco-cms/manage-and-publish-content/users-and-members/members) article.
* **Forms** - allows you to create and manage your forms (only available if Umbraco Forms is installed).
* **Translation** - allows you to manage dictionary items.

![The Sections Menu](/files/MFTWGDANX1l0BNj8kwgT)

The menu list will differ depending on your permissions for the project. For example: if you are an editor, then you will only have access to **Content**, **Media**, **Library**, and **Forms** as per the default settings.

### The Section Tree

The section tree is different depending on the section you are in.

In this example, you are looking at the content section. The section provides an overview of the nodes contained in the tree.

![The Section Tree](/files/fXKUjg2Z8QVnmGJEQWHV)

The **Content** tab allows you to create content nodes and manage your content tree. When you hover over the sections, it is highlighted with a darker color indicating that you are hovering over it. A button with three dots will show up, left-click or click the + icon to view additional options.

The **Recycle Bin** contains the deleted content and is available only in the **Content**, **Library** and the **Media** section.


# Creating, Saving and Publishing Content Options

Learn how to create, save, and publish content pages in the Umbraco backoffice, including scheduling and unpublishing options.

In this article, you get an overview of how to create and save pages. You will also learn more about how to publish and unpublish your content.

If you are a Cloud user, you will also learn how to compare and transfer content between environments. In Umbraco Cloud, an environment is a separate workspace such as Development, Staging, or Live/Production. It lets you preview and test changes before moving them to your live site. For more information about environments, see the [Environments](https://docs.umbraco.com/umbraco-cloud/begin-your-cloud-journey/project-features/environments) article in the Umbraco Cloud documentation.

## Creating a New Page

Select the parent page to create your new page. The parent page can be the home page or any of the sub-pages of the site.

If the parent page allows sub-pages underneath it, follow these steps:

1. Hover over the name of the parent page in the **Content** section and click **•••** to view the types of pages you can create.
2. Select the page type you wish to create. The new page is loaded in the editor on the right-hand side.
3. Enter a **Name** for the page and click **Save**.

![New Page](/files/rUkE6bNOEnb7OvjOFSsT)

## Saving and Publishing Pages

There are three different options for saving and publishing pages. The options vary depending on whether you’re still in the process of editing the page or you’re ready to publish your changes.

![Save and Publish](/files/f5G8Z7OHPmRYKtK2zDcc)

### Option 1: Save and Preview

The **Save and preview** button allows you to save your changes and preview it before publishing the changes to the live site. The **Preview** feature shows you how the page will look once it is published. This **Save and preview** feature only saves your page and does not publish your contents to the live site.

### Option 2: Save

The **Save** button is used for saving the page without publishing the changes to the live site. The Save feature prevents data loss during long-term projects. Use it frequently to protect your ongoing changes.

### Option 3: Save and Publish

The **Save and publish** button is used to publish a previously saved page to the live website or to publish a page without previewing it. The **Save and publish** feature will save and publish the page to your live website.

The **Save and publish** button has three options:

![Schedule](/files/SFJ8CAelposlyNEcnO84)

#### 1: Schedule

The **Schedule** button allows you to set a time and a date for when your page should be published. The Schedule option lets you keep editing your page. The site will automatically publish at your scheduled date and time.

To set up scheduled publishing, follow these steps:

1. Navigate to the page you want to publish.
2. Select the arrow next to the **Save and Publish** button.
3. Select **Schedule publish**.
4. In the **Scheduled Publishing** window, set the date and time in the **Publish at** field.

![Scheduled publishing](/files/PxZkyV3yV03eCspuIyey)

5. Select **Schedule**.

#### 2: Publish with descendants

The **Publish with descendants** button allows you to publish the current page and all the content linked to this page to the live site. Using this option, you can publish the current parent page and its child nodes, previously published, and unpublished content items.

To publish the node with descendants, follow these steps:

1. Navigate to the page you want to publish.
2. Select the arrow next to the **Save and Publish** button.
3. Select **Publish with descendants**.
4. Toggle the option to **Include unpublished content items** if you wish to. This option includes all unpublished content items for the selected page and the descendant pages.

#### 3: Unpublish

The **Unpublish** button allows you to unpublish a page if you do not want a page to be publicly visible.

To unpublish a page, follow these steps:

1. Navigate to the page you want to unpublish.
2. Select the arrow next to the **Save and Publish** button.
3. Select **Unpublish**.

![Unpublish](/files/t4HtdqY9xXLBpSzQSidx)

Take note of any listed items with dependencies on the content your are unpublishing. This will typically be child items published under the content you have selected.

You can also unpublish your page by setting the date and time using the **Schedule** feature.

To set up scheduled unpublishing, follow these steps:

1. Navigate to the page you want to unpublish.
2. Select the arrow next to the **Save and Publish** button.
3. Select **Schedule**.
4. In the **Scheduled Publishing** window, set the date and time in the **Unpublish at** field.

![Schedule Unpublishing](/files/PxZkyV3yV03eCspuIyey)

5. Select **Schedule**.

## Comparing Content between environments

{% hint style="info" %}
**Compare** content is available in all Umbraco Cloud projects running the latest version of Umbraco Deploy for Umbraco versions 8 and 9.
{% endhint %}

Compare Content allows previewing content changes before transferring them to another environment. This is helpful to ensure that the correct updates are transferred when working with content in multiple environments.

The **Summary Information** and **Field Comparison** values show what will change if you transfer the content or restore content to the current environment.

To compare content between environments, follow these steps:

1. Navigate to the page you want to compare.
2. Select the arrow next to the **Save and Publish** button. Alternatively, you can click the **Actions** drop-down.
3. Select **Compare** to open the **Compare** window.

![Compare option](/files/IbHlUFZq5W7LkAJPZs7G)

4. **Choose the workspace** from the drop-down field.
5. View the **Summary information**.
6. In the **Field Comparison** table, view the differences between the versions in the two workspaces at the node level of each field.
7. Proceed to transfer the content using the **Queue for transfer** or **Transfer now** options.
8. Restore the content from the higher environment using the **Partial restore** option.
9. Click **Close** to continue editing the content node.

![Comparing Content](/files/0zGe1ofxdaeuMsLv6FCP)

## Transferring content

{% hint style="info" %}
**Transfer now** is available in all Umbraco Cloud projects running the latest version of Umbraco Deploy for Umbraco versions 8 and 9.
{% endhint %}

You can transfer a specific content node directly to the higher environment without adding it to the **Queue for transfer**.

To transfer content between environments, follow these steps:

1. Navigate to the page you want to transfer.
2. Select the arrow next to the **Save and Publish** button.
3. Select **Transfer now**.

![Transfer Option](/files/GhaPOiC0S2sksOigBW7a)

4. In the **Transfer now** window, a message is displayed that you are about to transfer the content node directly to the higher environment, without adding it to the queue.

![Transfer Content](/files/ZG5bNgG4XxqyFouFTaGy)

5. Click **Transfer now**.


# Finding Content

The Umbraco content tree view allows you to navigate web pages through a logical site hierarchy. You can find a page by navigating through the tree itself if you know where the page is stored.

## Searching in Umbraco

A quicker way to search across all the content, files, or folders in Umbraco is to click the Magnifier icon in the top-right of the screen. Alternatively, you can use the keyboard shortcut **CTRL + SPACE** to access the **Search** bar.

Using the search bar, you can enter a search term and Umbraco will search for pages and media containing the term.

![search.jpg](/files/eplvkB4Is7uwVQW8FNkf)


# Editing Existing Content

Learn how to find and edit existing content pages in the Umbraco backoffice.

## Content Within the Tree View

When you are looking to edit content, locate the ***page*** you want to edit in the Content tree on the left-side of the screen.

![Viewing Pages in Content Section](/files/VcQ2zjTwnfcQ8XQvnK5W)

To edit existing content, follow these steps:

1. Go to the **Content** section.
2. Select the page in the section tree you wish to edit. The content of the page is loaded in the right-side editor.
3. Edit the contents of the page.
4. Click **Save** to save the edits without publishing it.
5. Click **Save and preview** to preview the changes.
6. Click **Save and publish** to publish the changes. For more information, see the [Save and Publishing Pages](/umbraco-cms/get-started/backoffice-essentials/creating-saving-and-publishing-content#saving-and-publishing-pages) article.

## View Page Layout

By default, you can view Page layouts in two ways: in a List or in a Grid (default).

### Grid

When you enable Collection on a page, its child pages are no longer shown as nested items in the content tree. Instead, the parent page appears as a single node in the tree. Selecting it displays all of its child pages in a grid view within the main workspace area. For more information, see the [Collection](/umbraco-cms/model-your-content/property-editors/built-in-umbraco-property-editors/collection) article.

![Grid](/files/d99G2pX6MKQ4ng2ak9z1)

### List

You can switch to a list view by clicking the layout icon in the top-right of the screen:

![List](/files/zLq9D841k535e3pdWihe)


# Sorting Pages

Learn how to change the sort order of pages within the content tree using the Sort function.

The pages in Umbraco are placed in the tree structure according to a predefined sort order. The most recently created page is placed at the bottom of the tree structure. You can change the order of the pages by using the **Sort** function.

You can sort pages in two ways:

## Option 1

1. Go to **Content**.
2. Navigate to the parent node whose child nodes you wish to sort.
3. Click **...** next to the page you wish to sort.
4. Select **Sort children of**.

![Sort Menu 1](/files/wGvrkiEorDk1LFNGmEwO)

5. A window appears on the right-side of the screen. Here, you can arrange the child nodes in the order you want by dragging them up or down.

![Sort Option 1](/files/D4dp2SBFd0xf5mMRk07c)

6. Click **Save** and then **Close**.

## Option 2

1. Go to **Content**.
2. Select the parent node whose child nodes you wish to sort.
3. Click **Actions** in the top-right corner of the screen.
4. Select **Sort children of** from the **Actions** drop-down menu.

![Actions Menu](/files/6rlXoVNaaLe6cfpHEsHi)

A window appears on the right-side of the screen. Here, you can arrange the child nodes in the order you want by dragging them up or down.

5. Click **Save** and then **Close**.


# Moving a Page

Learn how to move pages to a different location within the content tree.

Move pages within the website through the tree view. Not all pages can be moved depending on your set-up or page permissions. If you need clarification, contact your system administrator.

You can move a page in two ways:

## Option 1

1. Go to **Content**.
2. Click **...** next to the page you wish to move.
3. Select **Move to**.

![Move Menu 1](/files/MR9DGz2hjmYOXCG1DMek)

A window appears on the right side of the screen. Here, you can choose where you want to move the page in the tree structure.

![Move Option 1](/files/hKnu5lf5NJYw43doz223)

4. Click **Move**.
5. A confirmation message appears. Click **OK** to dismiss the confirmation message.

## Option 2

1. Go to **Content**.
2. Select the page you wish to move.
3. Click **Actions** in the top-right corner of the screen.
4. Select **Move to** from the **Actions** drop-down menu.

![Actions Menu](/files/sJ5tQ9MJ1l0TqiO9l4fG)

5. A window appears on the right side of the screen. Here, you can choose where you want to move the page in the tree structure.
6. Click **Move**.
7. A confirmation message appears. Click **OK** to dismiss the confirmation message.


# Copying a Page

Learn how to copy a page and its child pages to a different location in the content tree.

Re-use a page or a tree structure you have previously created by copying the parent page and its child pages to a different section within the site structure.

When you copy a parent page all of its child pages are also copied, by default. You can choose if you want to copy the child pages or not. You can also choose whether the links should be automatically updated or continue to link to the original pages.

You can copy a page in two ways:

## Option 1

1. Go to **Content**.
2. Click **...** next to the page you wish to copy.
3. Select **Duplicate to**.

![Copy Menu 1](/files/HtFjGhDNzKPDzajiAj2h)

A window appears on the right side of the screen. Here, you can choose where you want to copy the page in the tree structure.

![Copy Option 1](/files/824V7oHHhtRO1S9R1rcm)

4. Toggle **Relate to original** button if you want to keep the links linked to the original page.
5. Toggle **Include descendants** if you want to copy the child pages alongside the parent page.
6. Click **Copy**.

## Option 2

1. Go to **Content**.
2. Select the page you wish to copy.
3. Click **...** next to the title of the page.
4. Select **Duplicate to**.

![Actions Menu](/files/VUe7OEKQyUORj4KbZOJL)

A window appears on the right side of the screen. Here, you can choose where you want to copy the page in the tree structure.

5. Toggle **Relate to original** button if you want to keep the links linked to the original page.
6. Toggle **Include descendants** if you want to copy the child pages alongside the parent page.
7. Click **Copy**.

{% hint style="info" %}
When you select **Relate to original**, Umbraco will create a relationship between the original and copied page. This relationship can be used to programmatically link the pages - For example, linking two pages in a multilingual setup. This relationship **does not** sync the content between the original and copied page.
{% endhint %}


# Deleting and Restoring Pages

Learn how to delete pages to the Recycle Bin and restore or permanently remove them from your Umbraco project.

If you have pages that are no longer required for your website, you can delete them. Upon deletion, the page is moved to the **Recycle Bin** and is not deleted permanently.

In case you wish to restore the page, you can restore them from the **Recycle Bin**. You also have the option to empty the Recycle Bin which permanently deletes all the items.

## Deleting a Page

To delete a page:

1. Go to **Content**.
2. Click **...** next to the page you wish to delete.
3. Select **Trash**.

![Delete Menu 1](/files/tGdaza75lBmxsjw4Sn56)

Alternatively, click on the **...** next to the title field and select **Trash**.

![Delete Menu 2](/files/5kSXRyC8iprDOM6udKpn)

4. A window appears confirming if you want to delete the page.

![Delete Warning](/files/3EBDubSAbHjYhH1DYat2)

5. Click **OK**.
6. A confirmation message appears. Click **OK** to dismiss the confirmation message.

## Managing the Recycle Bin

The **Recycle Bin** is a separate tree list which can be found at the bottom of the section tree view. Selecting the Recycle Bin page, opens a list view with all deleted content. Clicking the arrow to the left of the Recycle Bin icon in the tree will also list any pages that have been deleted.

![Recycle Bin List](/files/sGpDimLSzgrUQr86brpL)

### Restore Deleted Pages

To restore deleted pages from the Recycle Bin:

1. Click **•••** next to the page in the list and select **Restore**.

You can also click on the **...** next to the page in tree and select **Restore**.

2. A window appears confirming if you want to restore the page.
3. Click **Restore**.
4. A confirmation message appears. Click **OK** to dismiss the confirmation message.

{% hint style="info" %}
To display the page on the website, it must first be **Saved and published**.
{% endhint %}

### Emptying the Recycle Bin

If you are confident you no longer require any pages in the **Recycle Bin**, you can permanently delete it. You can delete pages one by one or empty the Recycle Bin in one go.

{% hint style="info" %}
After deleting the pages from the **Recycle Bin**, you will **not** be able to retrieve any data associated with that page.
{% endhint %}

To empty the Recycle Bin:

1. Select the **Recycle Bin** and click on **Empty recycle bin** above the list.

![Empty Recycle Bin](/files/M8Wj8coRxZv9MIkTE2B2)

2. A message appears confirming if you want to empty the recycle bin.

![Empty Recycle Bin Warning](/files/PxjXXfRwNDMa1noZuY5q)

3. Click **OK**.

Alternatively, click on the **...** when hovering the Recycle Bin, and select **Empty recycle bin...** from the menu.

![Empty Recycle Bin menu](/files/YobSbN4ZpvxhzCg6rnGO)

### Delete Individual Pages from the Recycle Bin

To delete individual pages from the Recycle Bin:

1. Select the Recycle Bin to open the list of deleted items.
2. Click on the trash bin icon next to the content you want to permanently delete.

You can also open the page and click the **...** next to the title field and select **Delete**.

3. A message appears confirming if you want to delete the page.

![Delete Warning](/files/DA3ka3qyRouUyJdkP3Wv)

4. Click **OK**.
5. A confirmation message appears. Click **OK** to dismiss the confirmation message.


# Sections

In this article you can learn more about the various sections you can find within the Umbraco Backoffice.

A section in Umbraco is where you perform specific tasks related to a particular area of Umbraco. For example, Content, Settings, and Users are all sections. You can navigate between the different sections by clicking the corresponding icon in the section menu positioned at the top of the Backoffice.

![The Section menu is the horizontal menu located at the top of the Umbraco Backoffice.](/files/PUL7jmiwdF9LTbuoBnmM)

Below is a short overview of the default sections in Umbraco CMS:

## Content

The Content section contains the content nodes that make up the website. Content is displayed as nodes in the Content tree.

Nodes in Umbraco can display the following content states:

* Grayed-out nodes are not published yet.
* <img src="/files/pICUZ05cJUWUNf6wzWcv" alt="" data-size="line"> Pages that are currently locked using the Public Access feature.
* <img src="/files/JWnSfQCZHqG2QAJYs7e9" alt="" data-size="line"> Pages that contain a collection of pages.

To create content, you must define it using Document Types.

For more information, see the [Defining Content](/umbraco-cms/model-your-content/content-types-and-structure/data/defining-content) article.

## Media

The Media section contains the media for the website. You can create folders and upload media files, such as images and PDFs. Additionally, you can customize the existing Media Types or define your own from the Settings section.

For more information, see the [Creating Media](/umbraco-cms/model-your-content/content-types-and-structure/data/creating-media) article.

## Library

The Library section is a central editorial hub for reusable content. Elements are created and managed here, allowing you to define content once and reuse it across as many pages and documents as needed.

By default, all user groups except **Sensitive Data** and **Translators** have access to the Library section.

For more information, see the [Elements](/umbraco-cms/model-your-content/content-types-and-structure/data/defining-content/elements) article.

## Settings

The Settings section allows you to manage website layout files, languages, media, and content types. It also gives you access to more advanced features such as the Log Viewer and extension insights.

The Settings section consists of:

**Structure**

* Document Types
* Media Types
* Member Types
* Data Types
* Languages
* Document Blueprints

**Templating**

* Templates (`.cshtml` files)
* Partial views (`.cshtml` files)
* Stylesheets (`.css` files)
* Scripts (`.js` files)

**Advanced**

* Relations
* Log Viewer
* Extension Insights
* Webhooks

The **Settings** section in the Umbraco backoffice has its own set of default dashboards.

For more information, see the [Settings Dashboards](/umbraco-cms/model-your-content/content-types-and-structure/backoffice/settings-dashboards) article.

## Packages

In this section, you can browse the different packages available for your Umbraco solution. You can also get an overview of all the packages you have installed or created.

For more information, see the [Packages](/umbraco-cms/extend-your-project/packages) article.

## Users

The Users section allows administrators to manage user accounts, assign permissions, set user roles, and monitor user activity within the backoffice. It provides control over who can access and modify content, media, and settings in the CMS.

For more information, see the [Users](/umbraco-cms/manage-and-publish-content/users-and-members/users) article.

## Members

The Members section allows you to create and manage member profiles and member groups.

For more information, see the [Members](/umbraco-cms/manage-and-publish-content/users-and-members/members) article.

## Translation

The Translation section is where you create and manage Dictionary Items. By managing these dictionary items, you can ensure consistent and efficient content translation and maintenance across different languages.

For more information, see the [Dictionary Items](/umbraco-cms/manage-and-publish-content/publishing-and-workflow/editorial-tools/dictionary-items) article.

## Add-Ons

To enhance Umbraco's functionality, you can integrate plugins and extensions tailored to specific needs. These add-ons expand Umbraco's capabilities, allowing for a more customized and powerful content management experience.

For example, you can start with core Umbraco features and later decide to integrate additional products. Currently, Umbraco supports add-on products like:

* **Forms:** Simplifies the creation and management of Forms.
* **Deploy:** Facilitates smooth deployment processes.
* **Workflow:** Enhances content workflows and approval processes.
* **Commerce:** Adds e-commerce capabilities to your site.
* **UI Builder:** Helps in designing and customizing the user interface.

When you add an add-on product to Umbraco, it appears in the Backoffice as a new section, seamlessly extending your content management capabilities.

![Add-Ons Section](/files/f8TprTahqHEP9CgGyz80)

If you wish to explore the unique features and use cases of Umbraco products, see the [Exploring the Umbraco Products](https://docs.umbraco.com/welcome/getting-started/exploring-the-umbraco-products) article.

For more information about extending the Umbraco platform through packages and integrations, see the [Umbraco DXP](https://docs.umbraco.com/umbraco-dxp) documentation.

## Help Section

The Help section in Umbraco provides documentation and resources to assist in understanding and effectively using the Umbraco CMS. It typically includes the following in the *Welcome to Umbraco* Dashboard:

* **Documentation**: Comprehensive guides, tutorials, and references covering different aspects of Umbraco.
* **Community Forums**: Access to forums where you can ask questions, share knowledge, and seek assistance from other Umbraco community members.
* **Resources**: Stay updated with the latest news, access documentation, watch free video tutorials, and register for live demos.
* **Training**: Learn how to effectively use Umbraco through structured courses, webinars, and hands-on tutorials designed to enhance your proficiency with the CMS.

The Help section serves as a valuable resource hub in navigating and leveraging the capabilities of the Umbraco CMS effectively.

## Custom Sections

Along with the default sections that come with Umbraco, you can create your own [Custom Sections](/umbraco-cms/extend-your-project/backoffice-extensions/extending-overview/extension-types/sections/section).

## Access based on User Group

A User can access a particular section based on the User Group permissions.

Learn more about how to configure the permissions in the article about [backoffice users](/umbraco-cms/manage-and-publish-content/users-and-members/users).


# Sidebar

This section explains how the concept of infinite editing using the Sidebar in the Umbraco backoffice works.

This feature enables you to work with your content without losing the context of what you are doing.

Document Types are in different sections than content but the sidebar enables you to make changes to them directly from the content you are editing.

![Sidebar](/files/a8m6PNZxY6GpocZs9jU9)

In the example showcased above, new options are being added to a Data Type, without losing the context of the content. The example also shows how you can edit images, without being sent to the 'Media' section.

## Customize

The Sidebar can be customized to improve the workflow for editors. For more information, see the [Extending Overview](/umbraco-cms/extend-your-project/backoffice-extensions/extending-overview) article.


# Working with Rich Text Editor

The Umbraco Rich Text Editor (RTE) is a field where you, as an editor, can be creative. You can select how much you want to do yourself. You can work on text content, format the text, or leave it the way it is. If you want to do more, you can insert images, create tables, or create links to other pages/documents.

The functionality varies depending on how the editor is set up. Here, we describe the default editor with all the options enabled. Contact your system administrator for details regarding your editor.

## Editor Buttons

By default, the following editor buttons are available. Your system administrator can determine which buttons are displayed in different templates. You therefore might have access to more or fewer buttons than those shown here.

![Editor Bar](/files/xtBFgfoPVcEAI1hxVNH6)

## Paragraph Break/Line Break

The Rich Text Editor is like any other word-processing program. You write the text and the text wraps around when the line reaches the end. Use the following keyboard shortcuts in the editor to add:

* Space between paragraphs - press `ENTER`.
* Line breaks - press `SHIFT + ENTER`.

## Shortcut Keys

To make your work easier, there are shortcut keys for certain editor functions. Use the following shortcut keys to carry out certain commands:

| Windows/Linux                                     | MacOS                                            | Action                   |
| ------------------------------------------------- | ------------------------------------------------ | ------------------------ |
| <kbd>Ctrl</kbd> + <kbd>A</kbd>                    | <kbd>Cmd</kbd> + <kbd>A</kbd>                    | Select all               |
| <kbd>Ctrl</kbd> + <kbd>B</kbd>                    | <kbd>Cmd</kbd> + <kbd>B</kbd>                    | Bold                     |
| <kbd>Ctrl</kbd> + <kbd>I</kbd>                    | <kbd>Cmd</kbd> + <kbd>I</kbd>                    | Italic                   |
| <kbd>Ctrl</kbd> + <kbd>U</kbd>                    | <kbd>Cmd</kbd> + <kbd>U</kbd>                    | Underline                |
| <kbd>Ctrl</kbd> + <kbd>C</kbd>                    | <kbd>Cmd</kbd> + <kbd>C</kbd>                    | Copy                     |
| <kbd>Ctrl</kbd> + <kbd>V</kbd>                    | <kbd>Cmd</kbd> + <kbd>V</kbd>                    | Paste                    |
| <kbd>Ctrl</kbd> + <kbd>Shift</kbd> + <kbd>V</kbd> | <kbd>Cmd</kbd> + <kbd>Shift</kbd> + <kbd>V</kbd> | Paste without formatting |
| <kbd>Ctrl</kbd> + <kbd>X</kbd>                    | <kbd>Cmd</kbd> + <kbd>X</kbd>                    | Cut                      |
| <kbd>Ctrl</kbd> + <kbd>Z</kbd>                    | <kbd>Cmd</kbd> + <kbd>Z</kbd>                    | Undo                     |
| <kbd>Ctrl</kbd> + <kbd>Shift</kbd> + <kbd>Y</kbd> | <kbd>Cmd</kbd> + <kbd>Shift</kbd> + <kbd>Z</kbd> | Redo                     |

Only a few keyboard shortcuts are listed here. For a detailed list of available shortcuts, see the [Tiptap Documentation](https://tiptap.dev/docs/editor/core-concepts/keyboard-shortcuts).

## View Source Code

![View Source Code](/files/7H0vw22aAqSXX4hRE11K)

If you are proficient in HTML, you can switch to HTML mode to create your page. You can also check the code and make minor adjustments to get the page exactly as you want.

Certain elements such as scripts are not recognized by the HTML view of the Rich Text Editor. You can enter the scripts directly in the text view of the editor.

## Formats

![Format Dropdown](/files/bbdQL9XeogM9N95X1aKd)

You can apply formatting via the **Formats** drop-down list. The Formats drop-down list provides predefined styles that can be applied to text while maintaining a consistent look and feel throughout the site.

These styles incorporate advanced formatting functionality which can be applied to provide a different look for certain elements such as links, headings, and sub-headings. For example, you can use a format style to change a link into a call-to-action button.

To apply pre-defined styles:

1. Select the text you want to apply the style.
2. Choose the style from the **Format** drop-down list.

For more information on how to create styles, see the [Style Menu](https://github.com/umbraco/UmbracoDocs/tree/main/18/model-your-content/property-editors/built-in-umbraco-property-editors/rich-text-editor/style-menu.md) article.

## Text Formatting

You do not normally need to spend much time formatting text because Umbraco takes care of the formatting. However, the editor provides some options for controlling the text styles.

### Formatting Buttons

![Formatting Buttons](/files/Lc9dvs4KN4tmuH83FEII)

The most familiar way to control formatting is by using the formatting buttons. With these buttons, you can apply basic formatting such as Bold, Italic, aligning text, creating bulleted and numbered lists, and applying indents.

To apply a format using the formatting buttons:

1. Select the text you want to apply the formatting.
2. Click the desired format button.

### Copying Content from Other Programs

{% hint style="info" %}
When you write content in another editor and copy it into a Rich Text Editor, you may encounter style issues on your website.
{% endhint %}

While pasting content, the original text styles are preserved which can lead to different font faces, sizes, and colors displaying on the website when viewed.

{% hint style="info" %}
To prevent formatting issues, we recommended pasting the content first into a markdown editor such as Notepad, then copying and pasting it into your Rich Text Editor.
{% endhint %}

### Remove Formatting

![Remove Format Button](/files/wVmoaA764HTR2Lq2C5hQ)

If you have already formatted a paragraph or selection using the formatting buttons, you can remove the formatting rule.

To remove formatting:

1. Select the text you want to remove the style from.
2. Click the relevant formatting button to remove the formatting rule.

You can also add a **Remove format** button in your toolbar. To add the **Remove format** button:

1. Navigate to your Rich Text Editor in the Document Type.
2. Click the cog wheel.
3. Click **Edit** next to the Rich Text Editor Data Type.
4. Select **Remove format** under the **Toolbar Configuration**.
5. Click **Submit**.
6. Click **Save**.

## Links

![Link Button](/files/hwfQTLotE3u3H2Cw8pIW)

The **Insert/Edit Link** button is used to add or update links to internal pages, external pages, media files, email links, and anchors. The process for inserting a hyperlink differs depending on the type of hyperlink you wish to create.

To insert different types of hyperlinks, follow these steps:

<details>

<summary>Link to a Page on Another Website</summary>

<img src="/files/lemVpIKQImwIfhhZkhvc" alt="Link to a Page on another Website" data-size="original">

1. Select the text that will form the hyperlink.
2. Click the **Insert/Edit Link** button to open the link properties slide-out menu.
3. Enter the URL of the web page you wish to link to in the **Link** field.
4. Enter the text that will be displayed as the link title in the **Link Title** field.
   * This is important information for everyone reading the website with different accessibility aids.
5. Select the **Target** field to open the link in a new window or tab.
6. Click **Submit**.

</details>

<details>

<summary>Link to a Page in Umbraco</summary>

<img src="/files/vIecOhzUKKrlod9H5BKE" alt="Link to a Page in Umbraco" data-size="original">

1. Select the text that will form the hyperlink.
2. Click the **Insert/Edit Link** button to open the link properties slide-out menu.
3. Select a page from the **Link to page** field.
   * This will populate the **Link** and **Link Title** fields automatically.
4. Select the **Target** field to open the link in a new window or tab.
5. Click **Submit**.

</details>

<details>

<summary>Link to a Media File in Umbraco</summary>

<img src="/files/284tIHWvzW0GpH1lbCR7" alt="Link to a Media File in Umbraco" data-size="original">

1. Select the text that will form the hyperlink.
2. Click the **Insert/Edit Link** button to open the link properties slide-out menu.
3. Select the **Link to Media** button to select the media item.
4. Click **Select**.
   * This will automatically populate the **Link** and **Link Title** fields with the media item information.
   * By default, the **Link** field contains the media file name and cannot be edited.
5. Select the **Target** field to open the link in a new window or tab.
6. Click **Submit**.

</details>

<details>

<summary>Link to an Email Address in Umbraco</summary>

<img src="/files/wVejs8Cx8xZQ5gLXC4Jl" alt="Link to an Email Address in Umbraco" data-size="original">

1. Select the text that will form the hyperlink.
2. Click the **Insert/Edit Link** button to open the link properties slide-out menu.
3. Enter the text `mailto:` followed by the email address you wish to link to in the **Link** field. For example, `mailto:contact@umbraco.com`.
4. Enter the text that will be displayed as the link title in the **Link Title** field.
5. Select the **Target** field to open the link in a new window or tab.
6. Click **Submit**.

</details>

<details>

<summary>Link to an Anchor on the Same Page</summary>

An anchor allows you to create internal page links that enable users to navigate within a page. There are two parts to setting up an anchor: the anchor itself and the link to the anchor.

**Creating an Anchor**
<img src="/files/JgQYH9Eh8CGf21TjXowG" alt="Creating an Anchor" data-size="original">

1. Click the editor cursor where you wish to create the anchor.
2. Click the **Anchor Button** which will launch the Anchor creation dialog.
3. Enter your anchor name in the **ID** field.
   * You should avoid special characters and spaces.
4. Click **Save**.
   * You will see a small anchor icon where you previously had the editor cursor.

To delete the anchor:

1. Select the anchor icon.
2. Press your **Delete** key.

<img src="/files/C3834c5KDqbUW5HRd3HA" alt="Deleting an Anchor" data-size="original">

**Linking to an Anchor**

<img src="/files/QEOoel5rskHUIWXjoVub" alt="Linking to an anchor" data-size="original">

1. Select the text to which you wish to add the anchor link to.
2. Click the **Insert link** button to open the link properties slide-out menu.
3. Add a hash symbol (#) followed by the name of your anchor in the **Anchor/querystring** field.
4. Enter the text that will be displayed as the link title in the **Link Title** field.
5. Click **Submit**.

</details>

<details>

<summary>Create a Link from an Image</summary>

You can make images into clickable links in Umbraco:
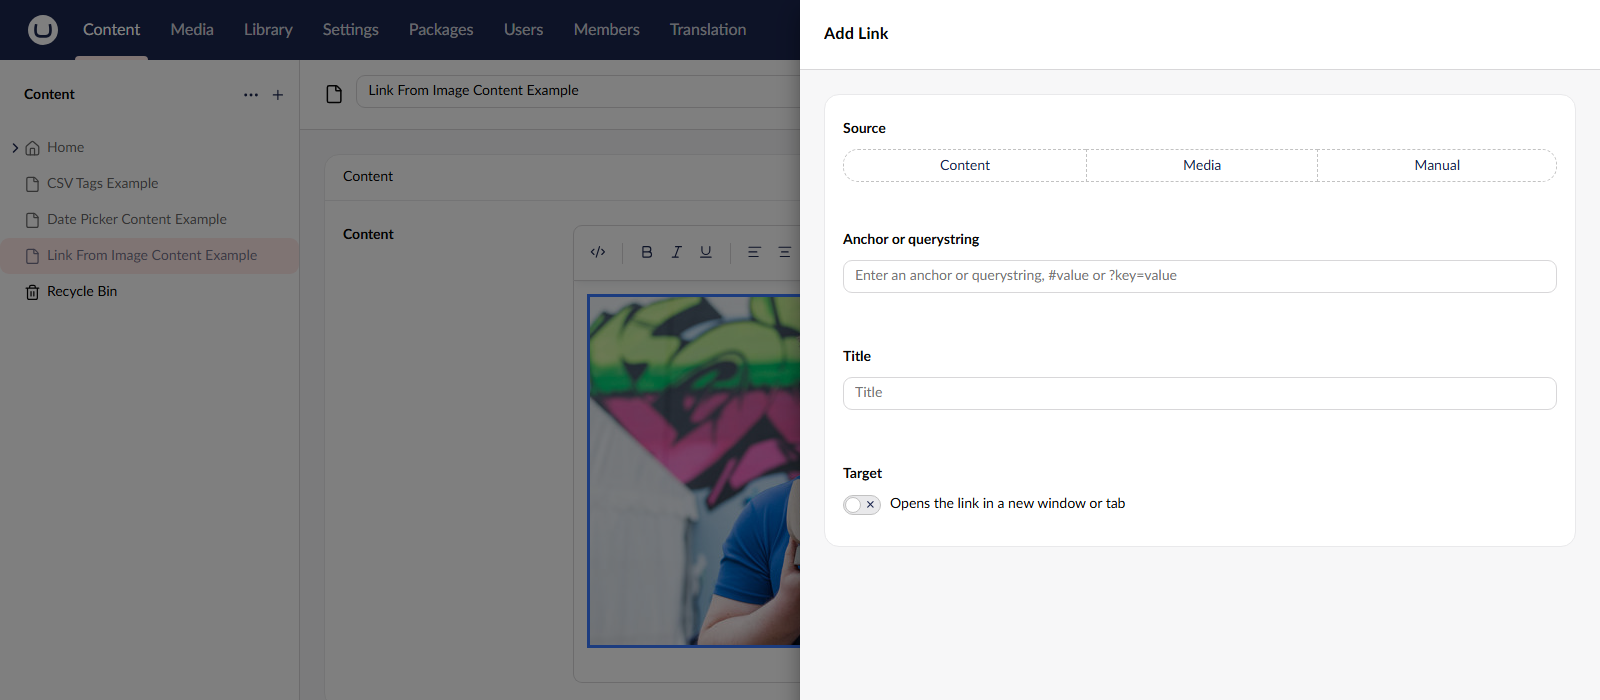
<img src="/files/zmo8HR46JWCanZZwWfjt" alt="Create a Link from an Image" data-size="original">

1. Insert an image into the Rich Text Editor.
   * For more information, see the [Working with Images](#working-with-images) section.
2. Select the image that will form the hyperlink.
3. Enter the URL of the web page you wish to link to in the **Link** field.
4. Enter the text that will be displayed as the link title in the **Link Title** field.
5. Select the **Target** field to open the link in a new window or tab.
6. Click **Submit**.

</details>

<details>

<summary>Removing a Link</summary>

<img src="/files/4DNUBfFsJQ8jhczzxSb9" alt="Remove link Button" data-size="original">

To remove a link:

1. Select the link in the Rich Text Editor.
   * For text links, click the cursor anywhere within the link text. For an image, click the image itself.
2. Click the **Remove Link** button which will remove the hyperlink.
3. Alternatively, you can click the **Insert/Edit Link** button and remove the link from the **Link** field.

</details>

## Working with Images

To display images on a page the images must be uploaded to your Umbraco media library.

Many administrators set up a media library containing images that editors can use on their pages. Others allow their editor's free use of their images. The procedure for uploading an image varies slightly depending on which method your administrators have setup. Check with your system administrator for more information about this.

<details>

<summary>Inserting an Image from the Media Library</summary>

<img src="/files/9L5CIk23hQKycPUD83Bd" alt="Inserting an Image from the Media Library" data-size="original">

1. Place the cursor in the Rich Text Editor where you want to insert your image.
2. Click the **Media Picker** button from the toolbar.
3. Select the folder in which the image is.
4. Click the thumbnail of your chosen image to open the image properties menu.
5. Enter a name/description for the image in the **Caption (optional)** field.
   * It is important to add descriptive titles to images as these are used to assist visually impaired users.
6. Click **Select**.

</details>

<details>

<summary>Inserting an Image from your Computer</summary>

You can upload images directly from the Rich Text Editor on the page you are editing. These images will be stored in the Umbraco Media Library. Therefore, it would be best to ensure the image is placed in the correct location within the library. If you click the plus icon underneath the search bar in the media picker slide-out menu you can create folders in the media library.
<img src="/files/cIAzMYZvYJOJL4d7UPSq" alt="Inserting an Image from your Computer" data-size="original">

1. Place the cursor in the Rich Text Editor where you want to insert your image.
2. Click the **Media Picker** button from the toolbar.
3. Click the **Upload** button which is located in the top right-hand corner of the menu.
4. Select the chosen image from the pop-up window.
5. Enter a name/description for the image in the **Caption (optional)** field.
6. Click **Select**.

</details>

<details>

<summary>Deleting an Image from the Page</summary>

To delete an image from the page:

1. Select the image.
2. Press the **Delete** button on your keyboard.
   * The image disappears from the page but is not deleted from the Umbraco Media library.
</details>

## Tables

![Inserting a Table](/files/QZ0Lj6mXhxqbTEcSikoN)

Tables are used to format information in a grid-based structure. When you insert a table, you select how many rows and columns the table should comprise of. Additionally, you can fill in some optional formatting properties. These values can be changed later, so it is not important to know exactly what your table will look like when you create it.

### Editing an Existing Table

![Editing an Existing Table](/files/LPX3mR1xVocpoRdurDXI)

To edit the table after creating it, click on the table. A pop-up appears with different table properties and options. Alternatively, you can click on the **Table** button in the Rich Text Editor toolbar.

![Table Properties](/files/sjkgVIVATrI78SAXRnhH)

Clicking on **Table Properties** gives you different options for modifying the table’s appearance. However, the developer of the website may have already created table styles for you so you may not need to adjust these settings.

There are other options available for modifying cells, rows, and columns such as width, height, alignment, border, and so on.

## Configuring a Rich Text Editor

The Rich Text Editor in Umbraco can be configured in many different ways.

For more information, see the [Rich Text Editor Configuration](https://github.com/umbraco/UmbracoDocs/tree/main/18/model-your-content/property-editors/built-in-umbraco-property-editors/rich-text-editor/configuration.md) article.


# Tips & Tricks

This section provides a few handy tips to work with your Content using Umbraco:

* [Refreshing the Tree View](https://github.com/umbraco/UmbracoDocs/tree/main/18/umbraco-cms/get-started/backoffice-essentials/tips-and-tricks/working-with-folders.md)
* [Audit Trail](/umbraco-cms/get-started/backoffice-essentials/tips-and-tricks/audit-trail)
* [Notifications](/umbraco-cms/get-started/backoffice-essentials/tips-and-tricks/notifications)
* [Preview Pane Responsive View](/umbraco-cms/get-started/backoffice-essentials/tips-and-tricks/preview-pane-responsive-view)
* [Session Timeout](/umbraco-cms/get-started/backoffice-essentials/tips-and-tricks/session-timeout)


# Refreshing the Tree View

Learn how to manually reload the content tree to reflect changes made by other editors.

When editing content, the content tree will refresh itself when the content is saved.

You can also manually reload parts of or the entire content tree to refresh it or to load changes made by other editors.

To reload the content tree:

1. Click **...** next to the **Content** heading.
2. Choose **Reload children**.

![Reload Tree](/files/B4JG8qhm7YYGFTR6SWKc)

The content is now reloaded and will reflect any new changes.


# Audit Trail

Learn how to use the Audit Trail to view the history of actions performed on a content page.

Within the **Info** content app for pages you can find the **Audit Trail** in the **History** section. Here, you can get a quick overview of the actions performed on that node, by whom, when and any additional comments.

The Audit Trail is useful to find out who made changes on a certain date.

![Audit Trail](/files/R2ZJEg31e91JrS61BKO7)

To view the audit trail:

1. Go to the **Content** section.
2. Navigate to the page you wish to see the audit trail.
3. Go to the **Info** Workspace View.
4. Locate the **History** box.


# Notifications

Learn how to set up email notifications for actions performed on content items in the Umbraco backoffice.

You can set up notifications to receive an email when an action is performed on a given content item. To receive notifications, you need to add your email address to your user profile.

To set up notifications for a content item:

1. Click **...** next to the page or select the page and click **Actions** in the top-right corner of the screen.
2. Choose **Notifications**.

![Notifications Menu](/files/K8icEoc6jz2d5xRl6kbg)

3. Check the actions in which you are interested and you will receive notifications each time the given action occurs.

![notifications.jpg](/files/jA0Ra5Dexk32I1zQRCni)

4. Click **Save**.

{% hint style="info" %}
The notification settings apply to the chosen content item as well as any child items that appear below the item in the content tree.

If the notifications option does not appear, the SMTP settings are probably incorrect. In this case, contact the administrator of your website.
{% endhint %}


# Preview Pane Responsive View

When viewing page content in preview mode you have the option to scale the preview window to various device sizes:

1. Once you have finished editing the page content, click **Save and preview**.
2. Select **Fit browser** to view the different preview modes.

   ![responsivePreview.png](/files/y0JfpNfYCLXLKCAj2kjR)
3. Select the device you would like to scale the preview pane to.


# Session Timeout

Umbraco is set up to automatically log a user out if they have been inactive for over 20 minutes. Don't worry if you are logged out of Umbraco. Log back in using your credentials and continue editing.

## Session Timeout Configuration for Developers

The session timeout can be configured in Umbraco's `appsettings.json` file. You can modify the [`Timeout`](https://docs.umbraco.com/umbraco-cms/reference/configuration/globalsettings#timeout) setting to extend or reduce the timeout duration based on your site's needs.


# Content Types and Structure

Learn how to define and structure content in Umbraco using Document Types, Media Types, Data Types, compositions, and relations.

In Umbraco, all content is defined by a type. Document Types define the fields on a page, Media Types define the properties of media items, and Member Types define user profiles. This section covers how to create and configure these content types and how to build structure through compositions and relations.

* [Backoffice](/umbraco-cms/model-your-content/content-types-and-structure/backoffice) - key backoffice concepts: sections, trees, Document Types, Media Types, Data Types, and Property Editors.
* [Data](/umbraco-cms/model-your-content/content-types-and-structure/data) - define Document Types, create Media Types, configure Data Types, and manage content in the backoffice.
* [Compositions](/umbraco-cms/model-your-content/content-types-and-structure/composing) - share groups of properties across multiple Document Types using compositions.
* [Relations](/umbraco-cms/model-your-content/content-types-and-structure/relations) - define and manage relationships between different content entities.


# Data

This section focuses on how to create data using the Umbraco backoffice

There are four kinds of content in Umbraco:

* The website **content** that make our the pages on your site exists in the Content section.
* **Elements** are reusable content items that are managed from the Library section.
* **Media** content such as images, videos, and PDFs are stored in the Media section.
* Finally, **Members**, are used for user profiles and frontend authentication which you can find in the Members section.

A fundamental principle in Umbraco is that all content types have a definition (Document Types, Media Types, Member Types). These definitions are highly customizable, meaning you can add properties and have complete control over how the data is organized.

## [Defining Content](/umbraco-cms/model-your-content/content-types-and-structure/data/defining-content)

Defining Document Types, adding properties, and creating content.

## [Creating Media](/umbraco-cms/model-your-content/content-types-and-structure/data/creating-media)

Defining Media Types and uploading files to the media section, using upload fields and image cropper.

## [Creating Members](/umbraco-cms/manage-and-publish-content/users-and-members/members)

Defining Member Types and creating members for authentication and user profiles.

## [Customizing Data Types](/umbraco-cms/model-your-content/content-types-and-structure/data/data-types)

Creating and editing Data Types.

## [Scheduled Publishing](/umbraco-cms/manage-and-publish-content/publishing-and-workflow/editorial-tools/scheduled-publishing)

Schedule when content should be published / unpublished automatically.

## [Adding Tabs](/umbraco-cms/model-your-content/content-types-and-structure/data/defining-content/adding-tabs)

Overview of how to add and reorder tabs, convert a group to a tab, and manage the “Generic” tab

## [Users](/umbraco-cms/manage-and-publish-content/users-and-members/users)

Control who has access to the Umbraco backoffice and what permissions they have.

## [Relations](/umbraco-cms/model-your-content/content-types-and-structure/relations)

An introduction to Relations and Relation Types, creating, and managing relationships between different entities in Umbraco.

## [Dictionary Items](/umbraco-cms/manage-and-publish-content/publishing-and-workflow/editorial-tools/dictionary-items)

Using Dictionary Items, you can store a value for each language. Dictionary Items have a unique key that is used to fetch the value of the Dictionary Item.

## [Content Version Cleanup](/umbraco-cms/develop-with-umbraco/configuration/content-version-cleanup)

How to keep the noise down whilst ensuring your important content versions stick around indefinitely.


# Defining Content

Here you'll find an explanation of how content is defined in Umbraco

Before a piece of content can be created in the Umbraco backoffice, first it needs to be defined. That is why, when opening a blank installation of Umbraco, it is not possible to create content in the **Content** section.

All content needs a blueprint that holds information about what kind of data can be stored on the content node or which editors are used.

Additionally, it also needs information on how it is organized, where in the structure it is allowed, and so forth. This blueprint or definition is called a **Document Type**.

## What is a Document Type?

Document Types define what kind of content can be created in the **Content** section and what an end-user sees and can interact with.

It can define entire pages or more limited content that can be reused on other nodes ie. a Search Engine Optimization (SEO) group. This means that you are in complete control of what type of content can be created and where.

Another example is if there is a "`Blog post`" Document Type that has some properties containing a thumbnail, a name, and an author image. Then all blog posts using the "`Blog post`" Document Type, will allow the end user to fill in a thumbnail, author name, and an author image.

A Document Type contains fieldsets (or groups) where you can apply rules about where the content can be created, allowed template(s), backoffice icons, etc.

## 1. Creating a Document Type

A Document Type is created using the Document Type editor in the **Settings** section.

* Go to the **Settings** section in the backoffice.
* On the **Document Types** node click the **+** to bring up the Create menu.
* Here choose **Document Type with Template**. This will create a new Document Type with a template. The Template can be found under **Templates** in the **Settings** section which will be assigned as the default template for the Document Type.

![Create Document Type](/files/jYcQh1iaMpdmuEd0zHte)

You can also choose to create a **Document Type** without a template and create **Folders** to organize your Document Types. Other options are to create Compositions and Element types, which you can read more about in the [Default Document Types](/umbraco-cms/model-your-content/content-types-and-structure/data/defining-content/default-document-types) section.

## 2. Defining the root node

### Name the Document Type

First, we're prompted to give the Document Type a **name**. This first Document Type will be the root node for our content, name it "`Home`".

![Name the Document Type](/files/Zxg8AAMyXPQdtIbZDnwY)

{% hint style="info" %}
The alias of the Document Type is automatically generated based on the property name. If you want to change the auto-generated alias, click the "**lock**" icon. The alias must be in camel case. For example: *`homePage`*.
{% endhint %}

Having a root node lets you quickly query content as you know everything will be under the root node.

### Adding Icons to the Document Type

Choosing appropriate icons for your content nodes is a good way to give editors a better overview of the content tree.

To set an icon for the Document Type click the document icon in the top left corner. This will open the icon select dialog. Search for "`Home"`and select the icon. This icon will be used in the content tree.

![Home icon](/files/vqVsRCsgpC4wXQYLv6mT)

### Setting Permissions

This will allow this Document Type to be created as the first content in the **Content** section.

1. Go to the **Structure** tab
2. Tick the **Allow as root** toggle
3. Save the Document Type by clicking **save** in the bottom right corner.

![Allow as root](/files/ekXIqRnUOrspFm9ENWYQ)

## 3. Creating the content

Now that we have the Document Type in place, we can create the content.

1. Go to the **Content section**
2. Click on **+** next to **Content**.
3. Select the "`Home`" Document Type. Name it "`Home`"

![Choose which Document to use for creating the content item](/files/kP0AvneXTFrjs6jLuZ15)

4. Click **Save and Publish**.

![Create homepage](/files/JvN17eiSGDXK8uSWRYGH)

As we haven't created our properties, all we can see on the "`Home`" node is the Properties tab. This tab contains the default properties that are available on all content nodes in Umbraco.

Let's add some properties of our own.

## 4. Groups and properties

In order to add the option to create different content on the same Document Type, some groups and properties need to be added.

**Groups**

Groups are a way to organize and structure the properties within the content, making it more manageable. It also makes it more user-friendly for content editors when creating or editing content on a website.

A name can be added to the group and after properties can be added.

**Properties**

Each field on a Document Type is called a property. The property is given a **name**, an **alias** (used to output the properties contained in a template), and an **editor**.

The editor determines what type of data the property will store and the input method. There is a wide range of default [property editors available](/umbraco-cms/model-your-content/property-editors/built-in-umbraco-property-editors) and you can [customize additional editors](/umbraco-cms/extend-your-project/backoffice-extensions/property-editors).

Some editors require configuration where a configured editor is saved as a Data Type and can be reused for multiple properties and document types. These can be seen in the **Settings** section under **Data Types**.

1. Go to the **Settings** section.
2. Expand **Document Types** by clicking the arrow to the left.
3. Select the "`Home`" Document Type.

### Adding groups

It is recommended to sort the properties into groups, however this is not a requirement.

Create a group to hold the first properties for the Home Document Type:

* Click **Add group** and name the group "`Content`".

<figure><img src="/files/sKUi0ZyahFsVut4EFGKo" alt="Creating groups"><figcaption><p>Creating groups</p></figcaption></figure>

{% hint style="info" %}
If you have multiple groups and/or properties you can order them with drag and drop or by entering a numeric sort order value. This is done by clicking **Reorder**.
{% endhint %}

To convert a group to a tab, see the [Convert a group to a tab](/umbraco-cms/model-your-content/content-types-and-structure/data/defining-content/adding-tabs#convert-a-group-to-a-tab) section in the [Using Tabs](/umbraco-cms/model-your-content/content-types-and-structure/data/defining-content/adding-tabs) article.

### Adding properties

Now that we have created a group we can start adding properties. Let's add a Rich Text editor to the Content group.

1. Click the **Add property** link in the **Content** group. This opens the property settings dialog. Here you can set the metadata for each property (name, alias, description)
2. **Choose** which Property Editor to use, and add validation if needed.
3. Give the property a **name**. The name will be shown to the editor to make it relevant and understandable. Notice the alias is automatically generated based on the name. We'll name this "`Body Text`".

![Adding a property](/files/BYvyTh1bYxuMm7ajg54r)

#### Property Editors

* Clicking **Select Editor** will open the Select Editor dialog. Here, you can choose between all the available editors on the **Create a new Configuration** tab. This will create a new configuration or already configured editors in the **Available Configurations** tab.
* To make it easier to find what you need use the **search field** to filter by typing "`Rich`". Filtering will display configured properties first (under **Available configurations**) and all available editors under that.
* Select the **Rich Text editor** under **Create new**. This will let you configure the editor settings - the Rich Text editor for this property.

![Choosing the Rich Text editor](/files/OqxdZyUFSEyMeJAy4tc6)

{% hint style="info" %}
The name of the Data Type is based on the name of the Document Type, the name of the property, and the property editor. For example: *Home - Body Text - Rich Text editor*.
{% endhint %}

* Let's **rename** it to "`Basic Rich Text editor`" and only select the most necessary options.
  * `bold`
  * `italic`
  * `alignLeft`
  * `alignCenter`
  * `link`
  * `umbMediaPicker`
* When you are happy with the settings click **Submit**.

{% hint style="info" %}
Selecting the **Mandatory** toggle makes the property mandatory and the content cannot be saved if no value is entered (in this case, the Richtext editor).

You have the option to add additional validation by selecting a predefined validation method under the **Custom validation** dropdown (such as email, number, or URL). Or by selecting a custom validation and adding a regular expression.
{% endhint %}

* **Save** the Document Type.
* If you go to the **Content section** and click on the `Home node` you will now see the `Content`group with the `Body Text` property.

#### Property descriptions

The description of the property is not necessary, but it´s a best practice as it guides the editor to use the property correctly. The property description supports some markdown and one custom collapse syntax:

<details>

<summary><strong>Bold</strong></summary>

You can make text in the description bold by wrapping it with `**`

```md
This is **bold**
```

</details>

<details>

<summary><strong>Italic</strong></summary>

You can make text in the description italic by wrapping it with `*`

```md
This is *italic*
```

</details>

<details>

<summary><strong>Links</strong></summary>

You can make links by using the syntax:

```md
[This is an absolute link](https://umbraco.com/)
[This is a relative link](/umbraco/section/media)
```

**Note**: Links will always have the`target="_blank"` set. This is currently not configurable.

</details>

<details>

<summary><strong>Images</strong></summary>

You can embed images by using this syntax:

```md

![Image alt text](https://media.giphy.com/media/bezxCUK2D2TuBCJ7r5/giphy.gif)
```

</details>

<details>

<summary><strong>Collapsible description</strong></summary>

You can make the description collapsible by using this syntax:

```md
<details>
  <summary>This is displayed</summary>
  This is hidden.
</details>
```

</details>

Now if we put it all together we get something like this:

```md
This is **bold**
This is *italic*
[This is an absolute link](https://umbraco.com/)
[This is a relative link](/umbraco/section/media)
<details>
<summary>Read more</summary>

![Image alt text](https://media.giphy.com/media/bezxCUK2D2TuBCJ7r5/giphy.gif)

</details>
```

![Markdown description example](/files/UFlKHPomgqExwGTcwjTv)

## 5. Defining child nodes

Next up we'll create a text page Document Type that will be used for subpages on the site.

* Go back to the **Settings section**
* **Create** a new Document Type
* **Name** it "`Text Page`".
* Add a **group** called "`Content`"
* This time we'll add two properties:
  * First, make a property called "`Summary`" using the **Textarea** editor
  * Secondly, create a property called "`Body Text`" and reuse the **Rich Text Editor** Data Type.

### Creating child nodes

Before creating a Text Page in **Content** section, allow the Text Page Document Type to be created as a child node to the Home node.

* **Select** the "`Home`" Document Type
* Go to the **Structure** group.
* Click **Choose**
* **Select** "`Text Page`".

<figure><img src="/files/kHL4sOiKskf1ACjh0Dqw" alt="Allow Child page"><figcaption><p>Allow Child page</p></figcaption></figure>

* Go to the **Content** section
* Click the menu icon (•••) next to the "`Home`" node
* **Select** the "`Text page`" Document Type. We'll name the page "`About us`". We now have a basic content structure.

<figure><img src="/files/PsxKrcrqeI4Wkpzda4HI" alt=""><figcaption></figcaption></figure>

Document Types are flexible and can be used for defining pieces of reusable content or an entire page, to act as a container or repository.

## 6. Exporting/Importing the Document Type

You can export Document Types from an already existing project/installation and import them into another project/installation.

* Go to the **Settings** section
* Click **...** next to the **Document type**
* Select **Export**. When you click on the **Export** button, the Document Type is saved as a \*.udt file.

![Exporting a Document Type](/files/X7iJWrAjepipGcXXKrh8)

To import a Document Type:

* Go to the **Settings** section
* Click **...** next to the **Document type**
* Select **Import Document Type**
* Click on the **Import** button and browse to the Document Type you exported. The **Name** and **Alias** of the Document Type are displayed.
* Click **Import** to complete the process.

![Importing a Document Type](/files/2mMY7PIg7ypseddVy0Y4)

{% hint style="info" %}
If your Document Type contains compositions or inherits from another Document Type, then you need to export/import the Composition/Document Type too.

You cannot export/import Document Types on Umbraco Cloud.
{% endhint %}

## More information

* [Rendering Content](/umbraco-cms/develop-with-umbraco/templating-and-rendering/design/rendering-content)
* [Customizing Data Types](/umbraco-cms/model-your-content/content-types-and-structure/data/data-types)

## Related Services

* [ContentService](https://apidocs.umbraco.com/v18/csharp/api/Umbraco.Cms.Core.Services.ContentService.html)
* [ContentTypeService](https://apidocs.umbraco.com/v18/csharp/api/Umbraco.Cms.Core.Services.ContentTypeService.html)

## Tutorials

* [Creating a basic website with Umbraco](/umbraco-cms/develop-with-umbraco/tutorials/creating-a-basic-website)


# Default Document Types

On this page, you will find the default Document Types in Umbraco. If you want to use these document types, you can create them in the Settings section.

On this page, you will find the default Document Types in Umbraco. If you want to use these Document Types, you can create them in the Settings section.

![Create Document Type](/files/yLjv8dOG7M6m2DbcS1sk)

## Document Type

A Document Type defines the content structure and fields that can be used across different content items. When creating a Document Type without a template, you focus solely on structured content without tying it to a specific design or layout. This is ideal for content that doesn’t require direct front-end rendering, such as blocks or items managed within a headless CMS setup.

Use a Document Type without a template for structured, reusable content like metadata schemas, settings, or components such as product details and author profiles.

## Document Type with Template

A Document Type with a Template combines the content structure with a predefined visual presentation. This approach links your structured content with a specific page design, ensuring a consistent and cohesive look and feel across your site. It allows you to manage content and its appearance separately, which makes updates more efficient.

Use a Document Type with a template for pages like blog posts, landing pages, or services that appear directly on the website.

## Element Type

An Element Type is a Document Type *without a template* designed for reusable and repeatable set of properties. These are used for Elements and in editors like the Block List Editor or Block Grid Editor to create structured, nested content.

Element Types cannot render directly on the front end. When **Allow in Library** is enabled, Element Types can be used to create [Elements](/umbraco-cms/model-your-content/content-types-and-structure/data/defining-content/elements) from the Library section.

![Element type](/files/ATxVKULK5jcFSmUaesi2)

Use an Element Type when defining building blocks for complex page layouts, such as grid blocks or reusable sections. They are an essential part of modular content design.

## Folder

The Folder in the Document Types section is used to organize and structure your Document Types within the Settings section. It serves purely as an organizational container, with no impact on the Content section or site functionality.

Use a Folder to create logical groupings, like a folder named **Compositions** to hold all your Composition Document Types. This makes it easier to navigate and manage your Document Types, especially in larger projects.

Folders are a powerful tool to keep your Document Types organized and your backoffice tidy.


# Document Type Localization

Setup localization for Document Types in the Umbraco backoffice.

The Umbraco backoffice is localized to match the [user's configured UI Culture](/umbraco-cms/develop-with-umbraco/tutorials/multilanguage-setup#changing-the-default-backoffice-language-of-a-user).

When defining a Document Type, you can apply localization to:

* Document Type names and descriptions.
* Property names and descriptions.
* Custom property validation messages.
* Tab and group names.

Setting up localization for Document Types is a three-step process:

* Register the Document Type localization files via [a new manifest 'umbraco-package.json' file](/umbraco-cms/extend-your-project/backoffice-extensions/extending-overview/extension-types/localization#registering-localization).
* Create the localizations in [user defined Document Type localization files](/umbraco-cms/extend-your-project/backoffice-extensions/extending-overview/extension-types/localization#the-localization-file).
* Apply the localizations to the Document Type.

{% hint style="info" %}
Everything in this article also applies to defining [Media Types](/umbraco-cms/model-your-content/content-types-and-structure/backoffice#media-types) and [Member Types](/umbraco-cms/model-your-content/content-types-and-structure/backoffice#member-types).
{% endhint %}

## Registering Document Type localization Files

To register Document Type localizations, you must create a new manifest using an `umbraco-package.json` file.

{% hint style="info" %}
The `umbraco-package.json` file is only registered when placed directly in the `/App_Plugins/` or `/App_Plugins/{SubFolderName}` folder. It will not be recognized in nested subfolders.
{% endhint %}

{% code title="umbraco-package.json" %}

```json
{
  "name": "Document Type Localization",
  "extensions": [
    {
      "type": "localization",
      "alias": "DocumentType.Localize.En",
      "name": "English",
      "meta": {
        "culture": "en"
      },
      "js": "/App_Plugins/DocumentTypeLocalization/doctype-en.js"
    }
  ]
}
```

{% endcode %}

## Creating localizations

Once you have registered the Document Type localization, you can add your localization texts for use in Document Types. The following localizations are used for the samples in this article:

{% code title="doctype-en.js" lineNumbers="true" %}

```js
export default {
    contentTypes: {
        article: 'Article page',
        article_desc: 'A textual, article-like page on the site. Use this as the main type of content.',
        landing: 'Landing page',
        landing_desc: 'An inviting, very graphical page. Use this as an entry point for a campaign, and supplement with Article pages.'
    },
    tabs: {
        content: 'Page content',
        seo: 'SEO configuration',
    },
    groups: {
        titles: 'Page titles'
    },
    properties: {
        title: 'Main title',
        title_desc: 'This is the main title of the page.',
        title_message: 'The main title is required for this page.',
        subTitle: 'Sub title',
        subTitle_desc: 'This is the sub title of the page.',
    }
};
```

{% endcode %}

{% hint style="info" %}
Umbraco must be restarted to register the localization manifest. Any subsequent localization text changes will need to be reloaded within the browser.
{% endhint %}

## Applying localizations

The localizations are applied by using the syntax `#{area alias}_{key alias}`.

1. Create a **Document Type with Template** called `#contentTypes_article` with the **alias**: `articlePage`.
2. Under the newly created Document Type, follow these steps:
   * Set the **description** to `#contentTypes_article_desc`.
   * Create a new **tab** called `#tabs_content`.
   * Add a new **group** called `#groups_titles`.
   * Add a **property** called `#properties_title` with **alias** `title`.
     * Set the description to `{#properties_title_desc}`.
     * Use a `TextString` editor.
     * Set the field validation to `mandatory`.
     * Under validation add `{#properties_title_message}`.

{% hint style="info" %}
Property descriptions support [Umbraco Flavored Markdown](/umbraco-cms/model-your-content/property-editors/umbraco-flavored-markdown), which uses a different syntax (wrapped in brackets) to avoid conflicts with Markdown headers.
{% endhint %}

![Applying localization to a property](/files/Tk7RkPt568Y6HZh0fjO6)

3. Add a **property** called `#properties_subTitle` with **alias** `subTitle`.
   * Set the description to `{#properties_subTitle_desc}`.
   * Use a `TextString` editor.
4. Enable `Allow at root` in the **Structure** tab.

![Applying localization to a Document Type](/files/zogc3P7FAFFg9U0XnkNd)

When creating and editing the content, you will see that the backoffice now uses the configured localizations.

5. Create a new "Article" node:

![Localized document editing](/files/6iAVHkJIgKdofZHeeqNe)

6. When trying to save the node without adding the mandatory content, you will see a warning as expected:

![Localized property validation](/files/xMvW6dvE4uDryD5UrR7S)


# Elements

Learn how to use Elements to add reusable content to your website.

Instead of replicating the same content on a per-page basis, Elements allow you to create reusable content. By creating your content once, you can reuse it across as many pages and documents as you need.

Elements are ideal for call-to-action blocks, banners, and other shared content that appears across multiple pages.

## Library

Elements are managed from the Library section in the Umbraco Backoffice.

The Library section is a central editorial hub for reusable content. By default all user groups except Sensitive data and Translators have access to the section.

{% hint style="info" %}
If the project was started on versions before Umbraco 18, only the Administrators user group has access to the Library section.

Manage permissions to the Library section from the Users section in the Umbraco backoffice.
{% endhint %}

## Manage Elements

Elements are configured in the Settings section and managed from the Library section. They are referenced in your content using the Element Picker property.

### Build and Configure Elements

Elements are created as Element Types in the Settings section of the Umbraco backoffice. As with all Element Types, Elements are not routable and are not attached to a Template.

Toggle the **Allow in Library** option on the Structure Workspace View to turn your Element Type into an Element.

![Element Type Structure tab with Allow in Library toggled](/files/r0SylbmeBeBhc8xLPffv)

You can add groups, tabs, and properties like you would to any other Element and Document Type.

Since your project will contain different Document Types, group your Elements into a dedicated folder to keep your workspace organized.

### Create Elements

With your Element configured, you can start using it to create reusable content in the Library section.

1. Click the **+** icon.
2. Select which Element Type you want to base the Element on.
3. Fill in the relevant properties.
4. **Save** or **Save and Publish** once the content is ready.

![The Library section with an Element selected](/files/a4x7Xxdt74gg9oyx8EYG)

To maintain an overview of your reusable content, it can be a good idea to use folders for organizing the content in your Library.

Use the **Info** workspace view to find relevant details about the element, such as history and where the element is used.

![Element Type Structure tab with Allow in Library toggled](/files/DNsM1g5ZyY5RSDzMENbA)

### Use Elements

Once you have created the elements in the Library section, they can be referenced anywhere an Element Picker has been configured.

![Element Type Structure tab with Allow in Library toggled](/files/9IMw8NLBxUf6gM38SXK5)

You can add elements to your content in the Content section using an Element Picker. This needs to be added as a property on the Document Type. Read the [Element Picker](/umbraco-cms/model-your-content/property-editors/built-in-umbraco-property-editors/element-picker) article to learn more about how to use and configure it.

Making changes to an Element in the Library section, will update all instances of the content throughout the project.


# Using Tabs

In this section, an overview is given of how to add and reorder tabs, convert a group to a tab and manage the “Generic” tab.

## Adding a tab

Using tabs, you can organize properties in the backoffice to provide a tailored and efficient workflow for editors creating and maintaining Content, Media and Members.

Tabs allow you to add horizontal organization in your Document Types, Media Types and Member Types. This is handy for types that need a more defined hierarchy or have many properties and groups.

To add a tab, follow these steps:

1. Go to **Settings**.
2. Create or select a **Document Type/Media Type/Member Type** and click **Add tab**.

![Add tab](/files/YPSY9KOorPp3wCbOUp9l)

{% hint style="info" %}
When adding the first tab, all existing groups are automatically added to the tab.
{% endhint %}

## Reordering tabs

To reorder tabs, follow these steps:

1. Go to **Settings**.
2. Select a **Document Type/Media Type/Member Type**.
3. Select **Reorder**.

You can drag the tab where you want, manually add a numeric value next to the tab name or use the arrows to set a value.

This is important when using compositions, as you want to always display a tab/group at a certain position by setting a manual numeric value.

![Reorder tabs](/files/uPODi6ejYBz4zL1ZIq3A)

4. Select **I am done reordering**.
5. Click **Save**.

## Convert a group to a tab

To convert a group to a tab, follow these steps:

1. Go to **Settings**.
2. Select a **Document Type/Media Type/Member Type**.
3. Select **Reorder**.
4. You can drag the group to the **Convert to tab** option.
5. Select **I am done reordering**.
6. Click **Save**.

{% hint style="info" %}
Converting a tab back into a group is not possible, as tabs can contain groups, and nested groups are unsupported. To overcome this, create a new group and transfer all tab properties into it, then delete the empty tab.
{% endhint %}

## Managing the “Generic” tab

Once you start adding tabs, you might see a “Generic” tab appear. This is done to hold groups and properties that are not assigned to a tab. For example, a group of properties coming from a composition that has no tab. In order to display the groups and properties correctly and have a solid data structure, they will be displayed under the “Generic” tab.

![Generic-tab](/files/B6w1WkuFlTjFq07IRY6a)

To manage the **Generic** tab on a **Document Type/Media Type**:

1. Go to the **Composition** Document Type/Media Type.
2. Click **Add tab** and enter the **Name** for the tab. All existing groups and properties are added to the tab.
3. Go to the **Document Type/Media Type**, the **Generic** tab will now be replaced by the tab from the composition.

![Composition Add Tab](/files/bEfOV8h9pllXIE2ADTVM)


# Creating Media

Learn how to work with different types of Media content on your Umbraco website.

Media in Umbraco CMS is handled the same way as content. You define **Media Types** that act as a base for media items. The following default Media Types are available:

* Article - used for uploading and storing documents.
* Audio - used for uploading and storing digital audio files.
* File - used for uploading and storing different types of files in the Media section.
* Folder - a container for organizing media items in the Media section tree.
* Image - used for uploading and storing images.
* Vector Graphics (SVG) - used for uploading and storing Scalable Vector Graphics (SVG) files which are text files containing source code to draw the desired image.
* Video - used for uploading and storing video files.

The default Media Types aim to cover most needs for media on a website. You do not need to define your Media Types to start using the Media section. The tools for organizing and uploading the media are already in place.

{% hint style="info" %}
If you have upgraded from an older version than 8.14 the Media Types listed above are not added automatically. You can add those types manually yourselves by following the steps below ['Creating a new Media Type'](#creating-a-media-type). On the [default media types page](/umbraco-cms/model-your-content/content-types-and-structure/data/creating-media/default-media-types), you will find a detailed overview of all Media Types.
{% endhint %}

## Uploading Media

You can upload media in two different ways:

* [Through the Media section](#add-media-through-the-media-section) and
* [Through the Content section](#add-media-through-the-content-section)

### Add media through the Media section

From the **Media** section in the Umbraco backoffice, you can add new media items by following either of the approaches defined below:

* Use the **Create** dialog to create a new Media item in the Media section
  * The Media item will be created based on the type you choose.
  * Upload the image or file, give the Media item a name, and click **Save**.

![Upload Media - Create Button](/files/dNgiGe2dsykvnZs21yj8)

* Use the Drag and drop feature to add your files to the Media section.
  * Umbraco will automatically detect the Media Type and create the Media item.
  * You can drop entire folder structures to recreate that same structure in the Media section.

![Upload Media - Media section](/files/v3G8ae1AfRFtrwLlX4C5)

### Add media through the Content section

New media items can be added to your site without interrupting the content creation flow. This can be done following either of the two approaches outlined below.

* Drag and drop the image(s) from your file explorer directly into the Media Picker property on the Content page.
  * Images added this way is automatically added to the user's start node in the Media section of the Umbraco backoffice.

![Drag and drop images directly into the content](/files/uvUO2rSZAU9IGW6h1Hp0)

* Select the "+" icon to open the "Select media" dialog where you can add images from your file explorer directly or using drag and drop.

![Add images from the "Select media" dialog](/files/iljZIfUlmCwrLF9kemv8)

## Creating a folder

It is always a good idea to start by creating a folder for your media items. It can be a good idea to align these folders with the content on your website. This will give the editors a better overview of the files and enable them to upload media items in the correct place.

Follow these steps to create a folder in the Media section:

1. Go to the **Media** section.
2. Select **...** next to **Media**.
3. Select **Create**.
4. Select **Folder**.
5. Enter a name for the folder and select **Save** in the bottom-right corner.

## Media Type properties

The **Image** Media Type has 5 properties: **Upload Image**, **Width**, **Height**, **Size**, and **Type**. These are populated once the image is uploaded. The properties can be viewed in the **Media** section and accessed in your Templates.

Except for the **Folder** Media Type, the other Media Types have 3 properties: **Upload Image**, **Type**, and **Size**.

Learn more about each Media Type in [the article about default Media Types](/umbraco-cms/model-your-content/content-types-and-structure/data/creating-media/default-media-types).

## Organizing and editing media items

The default view for the Media section is a card view that lets you preview the different files that have been uploaded.

![Default grid view in the Media section](/files/8n0QONq8n7xRWRX5QKKN)

By selecting multiple media items it is possible to perform bulk operations like moving or deleting the items.

To edit properties on a single media item, click the name of the item, which you will see once you hover over the item.

![Edit media item](/files/OzRNMgnywi1XVRi9bzr9)

From the top-right corner of the Media section, you can toggle between the list and grid view. There is also an option to search for the items in the Media section.

![Media Section - List view](/files/dPPcr9QLfiBExDVLxhdq)

## Using media items in the Content section

By adding a **Media Picker** property to a Document Type the editor will have the ability to select media items when creating content.

## Creating a Media Type

You can create custom Media Types and control the structure of the Media tree as you would with Document Types. This means you can store information that is specific to the media on the item itself.

### Video tutorial

{% embed url="<https://youtu.be/aS39zygmJcQ>" %}
Watch this tutorial and learn how to create your own Media Types in Umbraco CMS.
{% endembed %}

A Media Type is created in the **Settings** section using the Media Type editor.

1. Go to the **Settings** section.
2. Click **...** next to **Media Types**.
3. Click **Create** > **New Media Type**.
4. Name the new Media Type **Employee Image**.
5. Choose an icon by selecting the icon left of the name field.

You will now see the Media Type editor. It is similar to the editor used for creating Document Types.

![Creating a Media Type](/files/AUe1X3XRe2zvhvGCXAPT)

{% hint style="info" %}
Having different folders for different Media Types makes it possible to restrict where media items can be created and added. Only allowing PDF uploads in a certain folder and employee images in another make it easier to keep the Media section organized.
{% endhint %}

### Adding groups

Before we start adding properties to the Media Type we need to add a group to put these in.

1. Click on **Add group**.
2. Call the group *Image*.

### Adding properties

We need to add the same properties as on the default **Image** Media Type. These are:

* `umbracoFile`
* `umbracoWidth`
* `umbracoHeight`
* `umbracoBytes`
* `umbracoExtension`

Follow the steps outlined below to add the properties to the Media Type:

1. Click **Add property**.
2. Name it *Upload image*.
3. Change the alias to *umbracoFile*.
4. Click **Select property editor**.
5. Select **Image cropper**.
6. Rename the editor *Employee Image Cropper*.
7. Add two new crops called *Thumbnail* (200px x 350px) and *wideThumbnail* (350px x 200px).

![Defining crops](/files/OEaB2uz9fuG5diXUDrIT)\
8\. Click **Save**.\
9\. Click **Add**.\
10\. Name the remaining four properties *Width*, *Height*, *Size*, and *Type*, and give them the aliases as mentioned above. They should all use the **Label** editor.

As mentioned before these properties will automatically be populated once an image has been uploaded.

![Adding properties](/files/kxo2CQzEyAUXOyIGOBrO)

## Defining a Media Type folder

Next up, we will create a folder to hold the employee images. We could use the existing **Folder** Media Type but that would mean editors can upload employee images to any folder of that type. If we create a folder specifically for employee images there is only one place to put them.

1. Go back to the **Settings** section and create a new Media Type.
2. Name it *Employee Images*.
3. Select the folder icon by clicking the icon to the left of the name.
4. Navigate to the **Structure** tab.
5. Click **Configure as a Collection** under **Presentation.**
6. Choose **List view - Media.**

![Configure Collection](/files/LTIgJ9mw9fQFd7kC5cGx)

7. Click **Save**.

The new folder is created under the Media Types folder. We also need to only allow the Employee Image Media Type in our new folder. Both of these configurations can be set on the **Structure** tab.

1. Go to the **Structure** tab of the *Employee Images* folder.
2. Toggle the **Allow at root**.
3. Click **Choose** in the **Allowed Child Node Types**.
4. Select **Employee Image**.
5. Click **Choose**.

![Permissions](/files/5m4FVMU5jMDfYzghiyKa)

### Creating the folder and media items

1. Go to the **Media** section.
2. Select **...** next to Media.
3. Click **Create** > **Employee Images** folder.

![Employee Images](/files/9fgyjKrs8Eg4nt1CJdMU)

4. Name it *Employee Images*.
5. Click **Save**.

{% hint style="info" %}
Uncheck the **Allow at root** option on the **Employee Images** Media Type to prevent the creation of multiple folders of this type. This will only disable the creation of new ones and not affect existing folders.
{% endhint %}

### Cropping the images

If you select an image that has been uploaded to the folder you will see the full image and the two defined crops.

Moving the focal point circle on the image will update the crops to focus accordingly. You can also edit the individual crops by selecting them and moving the image or adjusting the slider to zoom.

![Cropping images](/files/1KRwIB0dcZgZUbYoaQy0)

## More information

* [Rendering Media](/umbraco-cms/develop-with-umbraco/templating-and-rendering/design/rendering-media)
* [Customizing Data Types](/umbraco-cms/model-your-content/content-types-and-structure/data/data-types)

## Related Services

* [MediaService](https://apidocs.umbraco.com/v18/csharp/api/Umbraco.Cms.Core.Services.MediaService.html)


# Default Data/Media Types

On this page you will find the media types and Data Types in Umbraco. These types are not created automatically after an upgrade. If you want to use the new types, you can create them yourself.

{% hint style="info" %}
After upgrading, the default media types are not created automatically. If you create them manually, make sure to:

* Set the permission for each of the media types to **Allow at root**.
* Ensure that the **Folder** media type allows the new media types as children.
  {% endhint %}

## Data Types

### UploadArticle

The `UploadArticle` Data Type has the following configuration:

* Property editor: `FileUpload`
* Accepted file extensions: `pdf`, `docx`, `doc`

### UploadAudio

The `UploadAudio` Data Type has the following configuration:

* Property editor: `FileUpload`
* Accepted file extensions: `mp3`, `weba`, `oga`, `opus`

### UploadVectorGraphics

The `UploadVectorGraphics` Data Type has the following configuration:

* Property editor: `FileUpload`
* Accepted file extensions: `svg`

### UploadVideo

The `UploadVideo` Data Type has the following configuration:

* Property editor: `FileUpload`
* Accepted file extensions: `mp4`, `webm`, `ogv`

## Media Types

### UmbracoMediaArticle

The `UmbracoMediaArticle` media type has the following properties:

* `umbracoFile` - Upload File
* `umbracoExtension` - Label (string)
* `umbracoBytes` - Label (bigint)

![MediaArticle](/files/zE1J5z9bxl86tSn2GQS7)

### UmbracoMediaAudio

The `UmbracoMediaAudio` media type has the following properties:

* `umbracoFile` Upload Audio
* `umbracoExtension` Label (string)
* `umbracoBytes` Label (bigint)

![MediaAudio](/files/15e3qOdz8lpYTKvtgSKF)

### UmbracoMediaVectorGraphics

The `UmbracoMediaVectorGraphics` media type has the following properties:

* `umbracoFile` - Upload Vector Graphics
* `umbracoExtension` Label (string)
* `umbracoBytes` Label (bigint)

![MediaVectorGraphics](/files/6Am0sTd9MnPYWEC3ySLX)

### UmbracoMediaVideo

The `UmbracoMediaVideo` media type has the following properties:

* `umbracoFile` - Upload Video
* `umbracoExtension` - Label (string)
* `umbracoBytes` - Label (bigint)

![MediaVideo](/files/UHwzdkAAfqP9ii3TlTrB)

{% hint style="info" %}
You can also create localization files for Media Types. You can read more about this in the [Document Type Localization](/umbraco-cms/model-your-content/content-types-and-structure/data/defining-content/document-type-localization) article.
{% endhint %}


# Data Types

Learn about the data types in Umbraco.

*A Data Type defines the type of input for a property. So when adding a property (on Document Types, Media Types and Members) and selecting the Type you are selecting a Data Type. There are preconfigured Data Types available in Umbraco and more can be added in the Settings section.*

## What is a Data Type?

A Data Type can be something basic such as TextString, Number, True/False and so on. Or it can be more complex such as Multi Node Tree Picker, Image Cropper, Block Grid and so on.

The Data Type references a Property Editor and if the Property Editor has settings these are configured on the Data Type. This means you can have multiple Data Types referencing the same Property Editor.

An example of this could be to have two dropdown Data Types both referencing the same dropdown Property Editor. One configured to show a list of cities, the other a list of countries.

## Creating a new Data Type

Follow these steps to create a new Dropdown Data Type:

1. Go to the **Settings** section within the backoffice.
2. Select the **+** icon to the right of the **Data Types** folder.
3. Choose **New Data Type...**.
4. Name the Data Type.
5. Click on **Select a property editor**.
6. Find and click on the **Dropdown** editor.
7. Click **Select**.
8. Choose whether to enable multiple selections.
9. Add **options**.
10. **Save** the Data Type once you have added the required configuration.

![Dropdown List](/files/Ga1t3hHlBGYZi2DxHRb6)

{% hint style="info" %}
**Data Type configuration**

**Property Editor** This is where you pick the Property Editor UI that the Data Type will be referencing. By default, Umbraco ships with a wide selection to choose from. Learn more about each of them in the [Default Data Types](/umbraco-cms/model-your-content/content-types-and-structure/data/data-types/default-data-types) article.

In the **Settings** box below, the configuration options specific to the chosen Property Editor UI will be available. Some Property Editors have many configuration options while some only have a few.
{% endhint %}

When you're happy with the list press **Save**. It is now possible to select this Data Type for a property on Document Types, Media Types, and Members. Doing this will then create a dropdown list for the editor to choose from and save the choice as a string.

## Customizing Data Types

To customize an existing Data Type go to the **Settings** section, expand the **Data Types** folder and select the **Data Type** you want to edit.

Besides the Data Types that are available out of the box there are some additional **Property Editors**. For example, think of the **Slider** and **Block List**.

## Viewing Data Type References

To view the Data Type reference, go to the **Settings** section and expand the **Data Types** folder. Select the **Data Type** you wish to view the reference for and click the **Info** tab.

![Content Picker References](/files/GFO79ezkDTp4hIhDRtCz)

This gives you an overview of the Types that currently use the Data Type.

Learn more about viewing references or implementing tracking in the [Tracking References](/umbraco-cms/extend-your-project/backoffice-extensions/property-editors/tracking) article.

### More information

* [List of available Data Types](/umbraco-cms/model-your-content/content-types-and-structure/data/data-types/default-data-types)
* [Property Editors](/umbraco-cms/model-your-content/property-editors)

### Related Services

* [DataTypeService](https://apidocs.umbraco.com/v18/csharp/api/Umbraco.Cms.Core.Services.IDataTypeService.html)


# Default Data Types

Learn about the default data types in Umbraco.

Here's a list of the default Data Types that come installed with Umbraco. There are plenty more that you can create based on the installed [Property Editors](/umbraco-cms/model-your-content/property-editors).

## Approved Color

Adds a list of approved colors. The approved colors are added as hex values by using the color picker. Optionally, you can enable labels to give the colors different names.

## Checkbox List

Displays a list of preset options as a list of checkbox controls. The preset options are added when configuring a Property Editor using the Data Type. Alternatively, the options can also be updated in the **Settings** section under **Data Types**. The value saved is a comma-separated string of IDs.

## Content Picker

The Content Picker opens a modal to pick a specific page from the content structure. The value saved is the selected page's ID.

## Date Picker

Displays a calendar UI for selecting date and time. The value saved is a standard DateTime value but does not contain time information.

## Date Picker with time

Displays a calendar UI for selecting date and time. The value saved is a standard DateTime value.

## Dropdown

Displays a list of preset options as a list where only a single value can be selected. The default Data Type does not contain any predefined options. The value saved is the selected value as a string.

## Dropdown multiple

Displays a list of preset options as a list where multiple values can be selected. The default Data Type does not contain any predefined options. The value saved is a comma-separated string of IDs.

## Image Cropper

Allows to upload and crop images by using a focal point. Specific crop definitions can also be added. This Data Type is used by default on the Image Media Type.

## Image Media Picker

The Image Media Picker opens a modal to pick images from the **Media** tree or images from your Computer. The value saved is the selected media node UDI.

## Label

Is a non-editable control and can be used to *only* display the value. It can also be used in the **Media** section to load in values related to the node, such as width, height and file size.

There are six Label Data Types:

* Label (bigint) - Allows to save a big integer value for a Label.
* Label (datetime) - Allows to set a DateTime value for a Label.
* Label (decimal) - Allows to set a decimal value for a Label.
* Label (integer) - Allows to set an integer value for a Label.
* Label (string) - Allows to set a long string value for a Label.
* Label (time) - Allows to set time for a Label

## List View - Content

This Data Type is used by **Document Types** that are set to display as a Collection.

## List View - Media

This Data Type is used by **Media Types** that is set to display as a Collection.

## List View - Members

This Data Type is used by **Member Types** that is set to display as a Collection.

## Media Picker

The picker opens a modal to pick a specific media item from the Media tree. The value saved is the selected media node UDI.

## Member Picker

Displays a dropdown with all the available members. A single member can be selected. The value saved is the ID of the member.

## Multi URL Picker

This Data Type allows an editor to add an array of links. These can either be internal Umbraco pages external URLs or links to media in the Media section. The Data Type can be configured by limited number of links it is possible to add.

## Multiple Image Media Picker

The picker opens a modal to pick multiple images from the **Media** tree. The value saved is a comma separated string of media node UDIs.

## Multiple Media Picker

The picker opens a modal to pick multiple media items from the **Media** tree. The value saved is a comma separated string of media node UDIs.

## Numeric

A textbox to input a numeric value.

## Radiobox

This Data type enables editors to choose from a list of radiobuttons.

## Richtext Editor

A TipTap-based What You See Is What You Get (WYSIWYG) editor. This is the standard editor used to edit a larger amount of text. The editor has a lot of settings, which can be changed on the Richtext editor Data Type in the Settings section.

Learn more about the configuration options in the [Rich Text Editor articles](/umbraco-cms/model-your-content/property-editors/built-in-umbraco-property-editors/rich-text-editor).

## Tags

A textbox that allows you to use multiple tags on a **Document Type**. You can specify a Tag Group for the Data Type, if you need to use Tags on different sections of your site.

## Textarea

A textarea provides a multi-line plain-text editing control. You can set the maximum allowed characters for the textarea and the number of rows, if any.

## Textstring

A normal HTML input text field.

## True/False

A checkbox which saves either 0 or 1, depending on the checkbox being checked or not. A common use is to create a property with the 'umbracoNaviHide' alias and the Data Type True/False. This will provide editors with the option to hide nodes in the navigation menu on the website.

## Upload

Adds an upload field, which allows documents or images to be uploaded to Umbraco. This does not add them to the media library, they are added to the document data.

There are five Upload Data Types:

* Upload Article - Used for uploading and storing documents.
* Upload Audio - Used for uploading and storing digital audio files.
* Upload File - Used for uploading and storing different types of files in the Media section
* Upload Vector Graphics - Used for uploading and storing Scalable Vector Graphics (svg) files which are text files containing source code to draw the desired image.
* Upload Video - Used for uploading and storing video files.


# Composing

This article covers the topic of composing in Umbraco.

Customising the behaviour of an Umbraco Application at 'start up'. for example adding, removing, or replacing the core functionality of Umbraco or registering custom code to subscribe to notifications.

## Overview

An Umbraco application is a `Composition` made of many different 'collections' and single items of specific functionality/implementation logic/components (eg. UrlProviders, ContentFinders - see below for a full list). These collections are populated when the Umbraco Application starts up.

'Composing' is the term used to describe the process of curating which pieces of functionality should be included in a particular collection. The code that implements these choices at start up is called a `Composer`.

A `Component` is a generic wrapper for writing custom code during composition, it has two methods: `Initialize()` and `Terminate()` and these are executed when the Umbraco Application starts up, and when it shuts down, respectively. The functionality of a `Component` is identical to having a class handling both the `UmbracoApplicationStartingNotification` and `UmbracoApplicationStoppingNotification`.

How are the collections populated? - Either by scanning the codebase for c# classes that inherit from a particular base class or implement a particular interface (typed scanned) or by being explicitly registered via a `Composer`.

Umbraco setup the default set of components and collections that deliver the core 'out of the box' Umbraco behaviour. These default collections can be removed, reordered, replaced, etc. by implementing `IComposer`'s and `IComponent`s to customise and extend Umbraco's behaviour.

### Example - Creating a Composer to listen for ContentSavingNotification

This example shows how to create a component and a notification handler for the `ContentSavingNotification`, (perhaps to check for explicit words, or some custom business logic that needs to run before the content item is saved in Umbraco).

We create a new C# class that implements `IComposer` and use it register our notification handler.

```csharp
using System.Linq;
using Umbraco.Cms.Core.Composing;
using Umbraco.Cms.Core.DependencyInjection;
using Umbraco.Cms.Core.Events;
using Umbraco.Cms.Core.Notifications;
using Umbraco.Extensions;

namespace My.Website;

public class SubscribeToContentServiceSavingComposer : IComposer
{
    public void Compose(IUmbracoBuilder builder)
    {
        builder.AddNotificationHandler<ContentSavingNotification, CustomContentSavingNotificationHandler>();
    }
}

public class CustomContentSavingNotificationHandler : INotificationHandler<ContentSavingNotification>
{
    public void Handle(ContentSavingNotification notification)
    {
        foreach (var content in notification.SavedEntities
            // Check if the content item type has a specific alias
            .Where(c => c.ContentType.Alias.InvariantEquals("MyContentType")))
        {
            // Do something if the content is using the MyContentType doctype
        }
    }
}
```

{% hint style="warning" %}
Ordering of composers is important, the last one added can override a previously added composer! Make sure, when overriding, that your composer that is doing the overriding, is 'composing', after the composer has 'composed' the element you wish to override!
{% endhint %}

### Example - Explicitly Registering a new custom OEmbedProvider

This example shows a custom 'Spotify' OEmbed Provider which will allow Spotify URLs to be used via the 'embed' button in the Rich Text Editors. As the collection for OEmbedProviders is not 'typed scanned', we need to explicitly register the provider in the collection of OEmbedProviders. We create a C# class which implements `IComposer` and append our new Spotify OEmbedProvider to the `EmbedProvidersCollection`:

```csharp
using Umbraco.Cms.Core.Media.EmbedProviders;
using Umbraco.Cms.Core.Serialization;

namespace My.Website;

public class SpotifyEmbedProvider : OEmbedProviderBase
{
    public SpotifyEmbedProvider(IJsonSerializer jsonSerializer)
        : base(jsonSerializer)
    {
    }

    public override string ApiEndpoint => "https://embed.spotify.com/oembed/";

    // Playlist
    // https://open.spotify.com/user/spotify/playlist/37i9dQZF1E4sNI4jZloSZr?si=cueBooBfTnqCGriSa4N_Kg
    // spotify:user:spotify:playlist:37i9dQZF1E4sNI4jZloSZr
    // Artist
    // https://open.spotify.com/artist/0iirUbtgwt9jEkc2Grin8C?si=TLeUR2cHR-KPRJJhW6YiVg
    // spotify:artist:0iirUbtgwt9jEkc2Grin8C
    // Album
    // https://open.spotify.com/album/0lvtdqkqIln6uDBBUT7DHL?si=XTVJIEmnS_OVv9l6ktPFiw
    // spotify:album:0lvtdqkqIln6uDBBUT7DHL
    // Track
    // https://open.spotify.com/track/7aCk4XfXIEJM2MecU6Gmf2?si=vESDzI0xTNeA9FQ_dvf1eQ
    // spotify:track:7aCk4XfXIEJM2MecU6Gmf2
    public override string[] UrlSchemeRegex => new[]
    {
        @".*.spotify.com/.*",
        @"spotify:.*"
    };

    public override Dictionary<string, string> RequestParams => new();

    public override string? GetMarkup(string url, int maxWidth = 0, int maxHeight = 0)
    {
        string requestUrl = base.GetEmbedProviderUrl(url, maxWidth, maxHeight);
        OEmbedResponse? oembed = base.GetJsonResponse<OEmbedResponse>(requestUrl);

        return oembed?.GetHtml();
    }
}
```

```csharp
using Umbraco.Cms.Core.Composing;

namespace My.Website;

public class RegisterEmbedProvidersComposer : IComposer
{
    public void Compose(IUmbracoBuilder builder)
    {
        // Change the EmbedProvidersCollection
        // by adding our new EmbedProvider for Spotify
        builder.EmbedProviders().Append<SpotifyEmbedProvider>();
    }
}
```

See a list of collections below to determine which are 'type scanned' and which require explicit registration.

### ComponentComposer

It's an implementation of `IComposer`, that provides a quicker way to add a custom component to the Component's collection. Creating a C# class that inherits from `ComponentComposer<YourComponentType>` will automatically add `YourComponentType` to the collection of Components. In the example above, the `SubscribeToContentServiceSavingComposer` for the `SubscribeToContentServiceSavingComponent` could have been written more conveniently as:

```csharp
public class SubscribeToContentServiceSavingComposer : ComponentComposer<SubscribeToContentServiceSavingComponent>
{ }
```

## Collections

> "Collections of elements", for example, the ContentFinders collection. - Collections are another concept that Umbraco uses to make things simpler, on top of DI. A collection builder builds a collection, allowing users to add and remove types before anything is registered into DI.

Below is a list of collections with their corresponding 'collection type' and how items for this collection 'out of the box' are registered.

| Collection                     | Type     | Registration                                                                                           |
| ------------------------------ | -------- | ------------------------------------------------------------------------------------------------------ |
| Actions                        | Lazy     | Type scanned for `IAction`                                                                             |
| BackOfficeAssets               | Ordered  | Explicit Registration - Empty by default                                                               |
| CacheRefreshers                | Lazy     | Type scanned for `ICacheRefresher`                                                                     |
| Components                     | Ordered  | Explicit Registration                                                                                  |
| ContentApps                    | Ordered  | Package.manifest & Explicit Registration                                                               |
| ContentFinders                 | Ordered  | Explicit Registration                                                                                  |
| ContentIndexHandlers           | Lazy     | Type scanned for `IContentIndexHandler`                                                                |
| Dashboards                     | Weighted | Package.manifest & Explicit Registration                                                               |
| DataEditors                    | Lazy     | Type scanned for `IDataEditor`                                                                         |
| DataValueReferenceFactories    | Ordered  | Explicit Registration - Empty by default                                                               |
| EditorValidators               | Lazy     | Type scanned for `IEditorValidator`                                                                    |
| EmbedProviders                 | Ordered  | Explicit Registration                                                                                  |
| FilterHandlers                 | Lazy     | Type scanned for `IFilterHandler`                                                                      |
| HealthChecks                   | Lazy     | Type scanned for `HealthCheck`                                                                         |
| HealthCheckNotificationMethods | Lazy     | Type scanned for `IHealthCheckNotificationMethod`                                                      |
| ManifestFilters                | Ordered  | Explicit Registration - Empty by default                                                               |
| ManifestValueValidators        | Set      | Explicit Registration                                                                                  |
| MapDefinitions                 | Set      | Explicit Registration                                                                                  |
| Mappers                        | Set      | Explicit Registration                                                                                  |
| MediaUrlGenerators             | Set      | Explicit Registration                                                                                  |
| MediaUrlProviders              | Ordered  | Explicit Registration                                                                                  |
| NPocoMappers                   | Set      | Explicit Registration                                                                                  |
| PackageMigrationPlans          | Lazy     | Type scanned for `PackageMigrationPlan`                                                                |
| PartialViewSnippets            | Lazy     | Explicit Registration. Reads .cshtml files from `Umbraco.Cms.Core.EmbeddedResources.Snippets` assembly |
| PropertyValueConverters        | Ordered  | Type scanned for `IPropertyValueConverter`                                                             |
| RuntimeModeValidators          | Set      | Explicit Registration                                                                                  |
| Sections                       | Ordered  | Package.manifest & Explicit Registration                                                               |
| SelectorHandlers               | Lazy     | Type scanned for `ISelectorHandler`                                                                    |
| SortHandlers                   | Lazy     | Type scanned for `ISortHandler`                                                                        |
| TourFilters                    | Base     | Empty collection                                                                                       |
| Trees                          | Base     | Type scanned. Must inherit `TreeControllerBase` & use `[Tree]`                                         |
| UrlProviders                   | Ordered  | Explicit Registration                                                                                  |
| UrlSegmentProviders            | Ordered  | Explicit Registration                                                                                  |
| Validators                     | Lazy     | Explicit Registration                                                                                  |

### Types of Collections

|          | Method                         | Notes                                                                                                                   |
| -------- | ------------------------------ | ----------------------------------------------------------------------------------------------------------------------- |
| Set      | `SetCollectionBuilderBase`     | The base class for collection builders that do not order their items explicitly.                                        |
| Ordered  | `OrderedCollectionBuilderBase` | The base class for collection builders that order their items explicitly.                                               |
| Weighted | `WeightedCollectionBuilder`    | The base class for collection builders that order their items by the `[Weight]` attribute.                              |
| Lazy     | `LazyCollectionBuilderBase`    | The base class for collection builders that resolve the types at the last moment, only when the collection is required. |

### Example - Modifying Collections

This example shows how to control which Healthchecks are available to run in the Umbraco backoffice. Create a C# class which implements IComposer, the Compose method gives access to the HealthChecks collection of the Umbraco Composition - first we clear all HealthChecks from the collection, then add back in the ones we want to keep:

```csharp
using Umbraco.Cms.Core.Composing;
using Umbraco.Cms.Core.DependencyInjection;
using Umbraco.Cms.Core.HealthChecks.Checks.Permissions;
using Umbraco.Cms.Core.HealthChecks.Checks.Security;

namespace My.Website;

public class MyComposer: IComposer
{
    public void Compose(IUmbracoBuilder builder)
    {
        // Remove all HealthChecks
        builder.HealthChecks().Clear();

        // Explicitly add back the ones we want to use
        builder.HealthChecks().Add<FolderAndFilePermissionsCheck>();
        builder.HealthChecks().Add<ExcessiveHeadersCheck>();
    }
}
```

## Attributes

Umbraco has some useful C# attributes to decorate your composer classes or Types used in collections, to give you further control on how and when your Composers will 'compose'.

### ComposeBefore and ComposeAfter

A finer-grain mechanism can then be used to refine the order of composition. Each composer can specify that it should compose before or after another composer, using the ComposeBefore and ComposeAfter attributes. For instance:

```csharp
[ComposeBefore(typeof(ThatOtherComposer))]
public class ThisComposer : IComposer
{
    public void Compose(IUmbracoBuilder builder)
    {
    }
}
```

`ThisComposer` will 'compose' before `ThatOtherComposer`.

{% hint style="warning" %}
If you create a circular dependency then Umbraco will fail to boot and will report the conflicting/circular dependency.
{% endhint %}

### Weight

This attribute is used only for `WeightedCollectionBuilders` (see list above). It specifies an integer ordinal value for each item to be added to the weighted collection which controls their sort order. The weighting attribute is not applied to the Composers.

```csharp
using System;
using Umbraco.Core;
using Umbraco.Core.Composing;
using Umbraco.Core.Dashboards;

namespace Umbraco.Web.Dashboards;

[Weight(10)]
public class FormsDashboard : IDashboard
{
    public string Alias => "formsInstall";
    public string[] Sections => new [] { Constants.Applications.Forms };
    public string View => "views/dashboard/forms/formsdashboardintro.html";
    public IAccessRule[] AccessRules => Array.Empty<IAccessRule>();
}
```

### HideFromTypeFinder

This is used to hide a type from being auto-scanned/added to a collection as in some cases certain items/types may need to be added to a collection manually. For example, a Search package may make it optional whether to replace the 'backoffice search' with an ISearchableTree implementation. Type scanning would make this change automatically at start up if the custom implementation was detected via type scanning. This attribute could hide the class from the scanner.

### DisableComposer & Disable

These attributes allow you to disable a particular implementation of a composer or class - Let's say Umbraco ships with two different ways of doing "something" (for instance, two front-end caches). Each way has its own composer, which registers all the relevant elements. Keep in mind that if both composers are detected, there will be some sort of collision. Ideally, we want to disable one of them. That can be achieved with the Disable attribute:

```csharp
[Disable]
public class Way2Composer : IComposer
{
    //...
}
```

When used without arguments, these attributes apply to the composer they are marking. But, and this is where it becomes interesting, they can be used with an argument to act on another component. Therefore, should a user want to replace our "something" with theirs, they would write the following code:

```csharp
[Disable(typeof(Way1Composer))]
public class MyComposer : IComposer
{
    public void Compose(IUmbracoBuilder builder)
    {
        // ...
    }
}
```

But maybe they want to swap our two "something" implementations? In this case, assembly-level attributes can be used:

```csharp
[assembly:DisableComposer(typeof(Way1Composer))]
[assembly:EnableComposer(typeof(Way2Composer))]
```

{% hint style="info" %}
Umbraco also has `[Enable]` & `[EnableComposer]` attributes but all composers are enabled by default.
{% endhint %}

## Runtime Levels

The `Umbraco.Cms.Core.RuntimeLevel` enum contains the following values:

`BootFailed`

The runtime has failed to boot and cannot run.

`Unknown`

The level is unknown.

`Boot`

The runtime is booting.

`Install`

The runtime has detected that Umbraco is not installed at all, ie. there is no database, and is currently installing Umbraco.

`Upgrade`

The runtime has detected an Umbraco install which needed to be upgraded, and is currently upgrading Umbraco.

`Run`

The runtime has detected an up-to-date Umbraco install and is running.

| Level        | Description                                                                                                                   |
| ------------ | ----------------------------------------------------------------------------------------------------------------------------- |
| `BootFailed` | The runtime has failed to boot and cannot run.                                                                                |
| `Unknown`    | The level is unknown.                                                                                                         |
| `Boot`       | The runtime is booting.                                                                                                       |
| `Install`    | The runtime has detected that Umbraco is not installed at all, ie. there is no database, and is currently installing Umbraco. |
| `Upgrade`    | The runtime has detected an Umbraco install that needed to be upgraded and is currently upgrading Umbraco.                    |
| `Run`        | The runtime has detected an up-to-date Umbraco install and is running.                                                        |

## Example of using Ordered Collections and adding types explicitly

You may wish to create an Umbraco package that allows package consumers to extend and add additional functionality. In this example, we show how you can use the `OrderedCollectionBuilderBase`.

```csharp
using Microsoft.AspNetCore.Mvc;
using Umbraco.Cms.Api.Management.Controllers;
using Umbraco.Cms.Api.Management.Routing;
using Umbraco.Cms.Core.Composing;

namespace UmbracoDocs.Samples;

public interface IDoThing
{
    string DoTheThing(string message);
}

public class FirstThing : IDoThing
{
    public string DoTheThing(string message)
        => $"First: {message}";
}

public class SecondThing : IDoThing
{
    public string DoTheThing(string message)
        => $"Second: {message}";
}

public class ThirdThing : IDoThing
{
    public string DoTheThing(string message)
        => $"Third: {message}";
}

// OrderedCollection - use when order of items is important (You may want to execute them in order)
public class DoThingsCollectionBuilder : OrderedCollectionBuilderBase<DoThingsCollectionBuilder, DoThingsCollection, IDoThing>
{
    protected override DoThingsCollectionBuilder This => this;
}

public class DoThingsCollection : BuilderCollectionBase<IDoThing>
{
    public DoThingsCollection(Func<IEnumerable<IDoThing>> items)
        : base(items)
    {
    }
}

public class DoThingsComposer : IComposer
{
    public void Compose(IUmbracoBuilder builder)
    {
        // Explicitly add to the collection a Type in a specific order
        builder
            .WithCollectionBuilder<DoThingsCollectionBuilder>()
            .Append<FirstThing>()
            .Append<SecondThing>()
            .Append<ThirdThing>();
    }
}

// An Umbraco Management API Controller - used in a Dashboard or Property Editor, perhaps?
[ApiExplorerSettings(GroupName = "Do things")]
[VersionedApiBackOfficeRoute("do/things")]
public class DoThingsController : ManagementApiControllerBase
{
    private readonly DoThingsCollection _doThings;

    public DoThingsController(DoThingsCollection doThings)
        => _doThings = doThings;

    [HttpGet]
    [ProducesResponseType<string[]>(StatusCodes.Status200OK)]
    public IActionResult DoAllThings(string message)
    {
        var allThingsDone = _doThings
            .Select(doThing => doThing.DoTheThing(message))
            .ToArray();

        return Ok(allThingsDone);
    }
}
```

## Example of using Lazy Collections with Type Scanning

You may wish to create an Umbraco package that allows package consumers to extend and add additional functionality. In this example, we show how you can use the `LazyCollectionBuilderBase` to scan assemblies that implement your interface by using the `TypeLoader`

{% hint style="warning" %}
Don't use type scanning if you can avoid it. Type scanning increases the Umbraco boot time.

If your use case requires type scanning, ensure your interface implements `IDiscoverable`. This marker interface ensures that types are scanned once and then cached by Umbraco. This way, we save time by not having to re-scan for types repeatedly.
{% endhint %}

```csharp
using Microsoft.AspNetCore.Mvc;
using Umbraco.Cms.Api.Management.Controllers;
using Umbraco.Cms.Api.Management.Routing;
using Umbraco.Cms.Core.Composing;

namespace UmbracoDocs.Samples;

// Implement `IDiscoverable` to boost scanning performance
public interface IDoThing : IDiscoverable
{
    string DoTheThing(string message);
}

public class FirstThing : IDoThing
{
    public string DoTheThing(string message)
        => $"First: {message}";
}

public class SecondThing : IDoThing
{
    public string DoTheThing(string message)
        => $"Second: {message}";
}

public class ThirdThing : IDoThing
{
    public string DoTheThing(string message)
        => $"Third: {message}";
}

public class DoThingsCollectionBuilder : LazyCollectionBuilderBase<DoThingsCollectionBuilder, DoThingsCollection, IDoThing>
{
    protected override DoThingsCollectionBuilder This => this;
}

public class DoThingsCollection : BuilderCollectionBase<IDoThing>
{
    public DoThingsCollection(Func<IEnumerable<IDoThing>> items)
        : base(items)
    {
    }
}

public class DoThingsComposer : IComposer
{
    public void Compose(IUmbracoBuilder builder)
    {
        // Add types from assemblies. Be conscious of using type scanning, as this adds to the Umbraco boot time.
        // If you need to use type scanning, ensure that your interface implements `IDiscoverable`.
        builder
            .WithCollectionBuilder<DoThingsCollectionBuilder>()
            .Add(() => builder.TypeLoader.GetTypes<IDoThing>());
    }
}

// An Umbraco Management API Controller - used in a Dashboard or Property Editor, perhaps?
[ApiExplorerSettings(GroupName = "Do things")]
[VersionedApiBackOfficeRoute("do/things")]
public class DoThingsController : ManagementApiControllerBase
{
    private readonly DoThingsCollection _doThings;

    public DoThingsController(DoThingsCollection doThings)
        => _doThings = doThings;

    [HttpGet]
    [ProducesResponseType<string[]>(StatusCodes.Status200OK)]
    public IActionResult DoAllThings(string message)
    {
        var allThingsDone = _doThings
            .Select(doThing => doThing.DoTheThing(message))
            .ToArray();

        return Ok(allThingsDone);
    }
}
```


# Backoffice

Learn more about the Umbraco backoffice which is the admin side of your Umbraco website

In this article you can learn more about the common terms and concepts that are used throughout the Umbraco backoffice.

## [Login screen](/umbraco-cms/model-your-content/content-types-and-structure/backoffice/login)

When you go to the backoffice for the first time, you're presented with the login screen.

![Login screen](/files/H6s8653vY7zzGgCp3gfF)

[Read more about the login screen](/umbraco-cms/model-your-content/content-types-and-structure/backoffice/login).

## [Section](/umbraco-cms/get-started/backoffice-essentials/sections)

A section in Umbraco is where you do specific tasks related to that section. For example Content, Settings and Users. You can navigate between the different sections of the backoffice by clicking the corresponding icon in the section menu.

*The **Section menu** is the horizontal menu located on the top of the backoffice.*

![Section](/files/PUL7jmiwdF9LTbuoBnmM)

[Read more about the section menu](/umbraco-cms/get-started/backoffice-essentials/sections).

## [Trees](/umbraco-cms/extend-your-project/backoffice-extensions/extending-overview/extension-types/tree)

A tree is a hierarchical list of items related (and usually restricted) to a specific concept, like for example content or media.

You can expand trees by clicking the side arrow ![Expand Node](/files/ESfLmryqhiSfBaugmpmh) to the left of the node.

![Tree](/files/POk8YsyAtd707yNjt0d9)

[Read more about trees](/umbraco-cms/extend-your-project/backoffice-extensions/extending-overview/extension-types/tree)

## Node

A node is an item in a tree. Media section items appear as nodes in the Media tree, while pages and content are displayed in the Content tree, and so on.

![Node](/files/wyEagfQj7VcAtRZeddES)

## [Dashboards](/umbraco-cms/extend-your-project/backoffice-extensions/extending-overview/extension-types/dashboard)

A dashboard is the main view you are presented with when entering a section within the backoffice. It can be used to show valuable information to the users of the system.

![Default dashboard in the Content section](/files/SiyOOnXjc2nWsbfXZwZT)

[Read more about Dashboards](/umbraco-cms/extend-your-project/backoffice-extensions/extending-overview/extension-types/dashboard)

## Editor

An editor is what you use to edit different items within the backoffice. There are editors specific to editing stylesheets, there are editors for editing Partial Views, and so forth.

## [Content](/umbraco-cms/model-your-content/content-types-and-structure/data/defining-content)

Content is what you find in the Content section. Each item in the tree is called a **content node**. Each content node in the content tree consists of different fields, and each of them is defined by a Document Type.

![Content](/files/p6NAkIwXJFr021E6TVfL)

[Read more about Content](/umbraco-cms/model-your-content/content-types-and-structure/data/defining-content)

## Document Type

Document Types define the types of content nodes that backoffice users can create in the content tree. Each Document Type contains different properties. Each property has a specific Data Type for example text or number.

![Document Types](/files/TVcj7TX8eIEesFYKmpmO)

### Properties

Every Document Type has properties. These are the fields that the content editor is allowed to edit for the content node.

![Document Type Properties](/files/m39N2QrRf1P0HdAsrnut)

### [Data Type](/umbraco-cms/model-your-content/content-types-and-structure/data/data-types)

Each Document Type property has a Data Type that defines the type of input of that property. Data Types reference a Property Editor and are configured in the Umbraco backoffice in the Settings section. A Data Type can be something basic (text string, number, true/false) or more complex (multi-node tree picker, image cropper, etc).

![Data Types](/files/rL4d7EqQWsfbwNLJZE9M)

[Read more about Data Types](/umbraco-cms/model-your-content/content-types-and-structure/data/data-types)

### [Property Editors](/umbraco-cms/model-your-content/property-editors)

A property editor is a view used by Data Types to insert content into Umbraco. An example of a property editor is the *Textarea*. It's possible to have many Textarea Data Types with different settings that all use the Textarea property editor.

![Property Editor](/files/hFXI8Y2v7Yy3sKwofIoV)

[Read more about Property Editors](/umbraco-cms/model-your-content/property-editors)

## [Media](/umbraco-cms/model-your-content/content-types-and-structure/data/creating-media)

Media items are used to store assets like images and video within the Media section and can be referenced from your content.

![Media](/files/1cMLUwzP8XZZvvJqiJXs)

[Read more about Media](/umbraco-cms/model-your-content/content-types-and-structure/data/creating-media)

### Media Types

Media Types are similar to Document Types in Umbraco, except they are specifically for media items in the Media section.

Umbraco includes the following default Media Types - **Article**, **Audio**, **File**, **Folder**, **Image**, **Vector Graphics (SVG)**, and **Video**.

![Media Types](/files/uf5zjgz9Zytm4TWDeCc7)

## [Members](/umbraco-cms/manage-and-publish-content/users-and-members/members)

A member is someone who has access to signup, register, and login into your **public website** and is not to be confused with Users.

![Members](/files/SHZoeWqDqAjd9iziGU7G)

[Read more about Members](/umbraco-cms/manage-and-publish-content/users-and-members/members)

### Member Types

Similar to a Document Type and a Media Type. You are able to define custom properties to store on a member such as Twitter username or website URL.

![Member Types](/files/0m8rwfdquxZ4lI7aIWyz)

## [Templates](/umbraco-cms/develop-with-umbraco/templating-and-rendering/templates)

A Template is where you define the HTML markup of your website and also where you output the data from your content nodes.

![Templates](/files/oZOc5P4dciJwNXjUwpRD)

[Read more about Templates](/umbraco-cms/develop-with-umbraco/templating-and-rendering/templates)

## Packages

A package is the Umbraco term for an add-on or plugin used to extend the core functionalities in Umbraco. The packages can be found on the [Umbraco Marketplace](https://marketplace.umbraco.com/), and the can also be browsed directly in the backoffice of the Umbraco CMS.

![Packages](/files/JUdnMbwa1FL3i25QCuIn)

## Users

A user is someone who has access to the **Umbraco backoffice** and is not to be confused with Members. When Umbraco has been installed a user will automatically be generated with the login (email) and password entered during installation. Users can be created, edited, and managed in the User section.

![Users](/files/a2BfD9mVJafCK9birbio)

## [Document Blueprints](/umbraco-cms/model-your-content/content-types-and-structure/backoffice/document-blueprints)

Document Blueprint provide a blueprint for content nodes based on an existing node.

![Document Blueprint](/files/6lBTLlo9sj0XA7BAlQOt)


# Login

In this article you can learn the various ways of customizing the Umbraco backoffice login screen and form.

To access the backoffice, you will need to login. You can do this by adding `/umbraco` at the end of your website URL, for example `http://mywebsite.com/umbraco`.

You will be presented with a login form similar to this:

![Login screen](/files/H6s8653vY7zzGgCp3gfF)

The **login** screen contains a short greeting, a **login form** and an optional **Forgotten password** link.

Below, you will find instructions on how to customize the login screen.

## Greeting

The login screen features a greeting text: The "Welcome" headline. This can be personalized by overriding the existing language translation keys.

1. Register a 'localization' manifest for the default language of your Umbraco site (default: en-US).
2. Provide the new strings inline under `meta.localizations`:

{% code title="App\_Plugins/Login/umbraco-package.json" lineNumbers="true" %}

```json
{
    "alias": "login.extensions",
    "name": "Login extensions",
    "version": "1.0.0",
    "allowPublicAccess": true,
    "extensions": [
        {
            "type": "localization",
            "alias": "Login.Localize.EnUS",
            "name": "English",
            "meta": {
                "culture": "en-US",
                "localizations": {
                    "login": {
                        "instruction": "Log in again to continue",
                        "greeting0": "Happy super Sunday",
                        "greeting1": "Happy manic Monday",
                        "greeting2": "Happy tubular Tuesday",
                        "greeting3": "Happy wonderful Wednesday",
                        "greeting4": "Happy thunderous Thursday",
                        "greeting5": "Happy funky Friday",
                        "greeting6": "Happy Caturday"
                    }
                }
            }
        }
    ]
}
```

{% endcode %}

Adding the code above will override the default greetings with the ones you provide. The login screen will now display "Happy super Sunday" on Sundays instead of "Welcome".

{% hint style="info" %}
For larger overrides, declare the strings in a separate JavaScript file referenced from the manifest (for example `/App_Plugins/Login/en-us.js`). The file should export a default object with the same `{ group: { key: value } }` shape.
{% endhint %}

{% hint style="info" %}
**`culture` must match the active UI locale.** The default is `en-US` (`GlobalSettings.DefaultUILanguage`), so on a default install your override extension must declare `culture: "en-US"` to affect the login screen. The keys themselves live in the canonical `en.ts` dictionary under the `login` group, but that does not change which override file is selected at runtime. An override declared with `culture: "en"` only applies when `en` is the active locale, or if locale fallback resolution uses it; it does not replace an active `en-US` override.
{% endhint %}

{% hint style="info" %}
**Renamed: `auth.*` → `login.*`.** The login screen previously had its own dictionary under an `auth` group (`auth.greeting0`, `auth.instruction`, …). It now reuses the shared backoffice dictionary, with keys moved to a `login` group. Existing translation packages that still ship with `auth.greeting*` overrides will continue to work through version 19, with a deprecation warning in the console. The legacy fallback will eventually be removed. New packages should target `login.*` directly.
{% endhint %}

You can customize other text on the login screen as well. Grab the default values and keys from the [`en.ts`](https://github.com/umbraco/Umbraco-CMS/blob/main/src/Umbraco.Web.UI.Client/src/assets/lang/en.ts) dictionary in the Umbraco CMS GitHub repository — look under the `login` group. Then copy the ones you want to translate into your `en-us.js` file.

## Password reset

The **Forgotten password?** link allows your backoffice users to reset their password. To use this feature, you will need to add the following key to the `Umbraco.Cms.Security` section in the `appsettings.json` file:

```json
"Umbraco": {
    "CMS": {
      "Security": {
        "AllowPasswordReset": true
      }
   }
}
```

Set it to `true` to enable the password reset feature, and `false` to disable the feature.

You will also need to configure a Simple Mail Transfer Protocol (SMTP) server in your `appsettings.json` file. When you get a successful result on the SMTP configuration when running a health check in the backoffice, you are good to go!

An example:

```json
"Umbraco": {
    "CMS": {
      "Global": {
        "Id": "xxxxxxxx-xxxx-xxxx-xxxx-xxxxxxxxxxxx",
        "Smtp": {
          "From": "noreply@test.com",
          "Host": "127.0.0.1",
          "Username": "username",
          "Password": "password"
        }
      }
    }
}
```

## Custom background image and logo

It is possible to customize the background image and the logo for the backoffice login screen by adding the `"Content"` section in the `appsettings.json` file:

```json
"Umbraco": {
    "CMS": {
      "Content": {
        "LoginBackgroundImage": "../myImagesFolder/myLogin.jpg",
        "LoginLogoImage": "../myImagesFolder/myLogo.svg",
        "LoginLogoImageAlternative": "../myImagesFolder/myLogo.svg"
      }
   }
}
```

The `LoginBackgroundImage`, `LoginLogoImage`, and `LoginLogoImageAlternative` are referenced from the `/wwwroot/umbraco/` folder.

The `LoginLogoImage` is displayed on top of the `LoginBackgroundImage` and the `LoginLogoImageAlternative` is displayed when the `LoginLogoImage` is not available, for example on small resolutions.

## Custom CSS

You can also customize the login screen by adding a custom CSS file. To do this, you will need to add a new file inside the `~/App_Plugins` folder, for example `~/App_Plugins/Login/my-custom-login-screen.css`.

You can then add your custom CSS to the file:

```css
:root {
    --umb-login-curves-color: rgba(0, 0, 0, 0.1);
}
```

This will change the color of the SVG graphics (curves) shown on the login screen. You can also hide the curves by adding the following CSS:

```css
:root {
    --umb-login-curves-display: none;
}
```

### Load the custom CSS file

To tell Umbraco about your custom CSS file, you will need to add a `umbraco-package.json` file. The `umbraco-package.json` file should look like this:

```json
{
    "alias": "login.extensions",
    "name": "Login extensions",
    "version": "1.0.0",
    "allowPublicAccess": true,
    "extensions": [
        {
            "type": "appEntryPoint",
            "alias": "MyCustomLoginScreen",
            "name": "My Custom Login Screen",
            "js": "/App_Plugins/Login/my-custom-login-screen.js"
        }
    ]
}
```

Next add a JavaScript file, for example `~/App_Plugins/Login/my-custom-login-screen.js`, and add the following code to load the custom CSS file:

```javascript
const link = document.createElement('link');
link.rel = 'stylesheet';
link.href = '/App_Plugins/Login/my-custom-login-screen.css';
document.head.appendChild(link);
```

This will load the custom CSS file into Umbraco.

{% hint style="warning" %}
Be aware that the custom CSS file will be loaded on all Umbraco screens, not only the login screen.
{% endhint %}

### Custom CSS properties reference

The following CSS properties are available for customization:

| CSS Property                             | Description                                    | Default Value                                                                      |
| ---------------------------------------- | ---------------------------------------------- | ---------------------------------------------------------------------------------- |
| `--umb-login-background`                 | The background of the layout                   | `#f4f4f4`                                                                          |
| `--umb-login-primary-color`              | The color of the headline                      | `#283a97`                                                                          |
| `--umb-login-text-color`                 | The color of the text                          | `#000`                                                                             |
| `--umb-login-header-font-size`           | The font-size of the headline                  | `3rem`                                                                             |
| `--umb-login-header-font-size-large`     | The font-size of the headline on large screens | `4rem`                                                                             |
| `--umb-login-header-secondary-font-size` | The font-size of the secondary headline        | `2.4rem`                                                                           |
| `--umb-login-image`                      | The background of the image wrapper            | The value of the [LoginBackgroundImage](#custom-background-image-and-logo) setting |
| `--umb-login-image-display`              | The display of the image wrapper               | `flex`                                                                             |
| `--umb-login-image-border-radius`        | The border-radius of the image wrapper         | `38px`                                                                             |
| `--umb-login-content-background`         | The background of the content wrapper          | `none`                                                                             |
| `--umb-login-content-display`            | The display of the content wrapper             | `flex`                                                                             |
| `--umb-login-content-width`              | The width of the content wrapper               | `100%`                                                                             |
| `--umb-login-content-height`             | The height of the content wrapper              | `100%`                                                                             |
| `--umb-login-content-border-radius`      | The border-radius of the content wrapper       | `0`                                                                                |
| `--umb-login-align-items`                | The align-items of the main wrapper            | `unset`                                                                            |
| `--umb-login-button-border-radius`       | The border-radius of the buttons               | `45px`                                                                             |
| `--umb-login-curves-color`               | The color of the curves                        | `#f5c1bc`                                                                          |
| `--umb-login-curves-display`             | The display of the curves                      | `inline`                                                                           |

The CSS custom properties may change in future versions of Umbraco. You can always find the latest values in the [login layout element](https://github.com/umbraco/Umbraco-CMS/blob/v17/dev/src/Umbraco.Web.UI.Login/src/components/layouts/auth-layout.element.ts) in the Umbraco CMS GitHub repository.

## The Time Out Screen

![Time out screen](/files/1dYL8lZwoa43lhs4JkdJ)

The time out screen is displayed when the user has been inactive for a certain amount of time. The screen resembles the login screen in many ways and the two are sometimes confused. The most notable difference is that the time out screen does not have a login form. It only has a message and a button to log in again with Umbraco.

If you have added more than one login provider, the users will also see this screen first. This is because they need to choose which provider to use first. In that case, the screen is also referred to as the **Choose provider screen**.

You can customize the timeout screen in the same way as the login screen. Both screens share the same backoffice localization dictionary. The `login.*` keys you override for the login screen automatically apply to the timeout screen as well.

### Greeting

The greeting on the time out screen uses the same `login.greeting0..6` and `login.instruction` keys as the login screen — override them as shown in the [Greeting](#greeting) section above. The `instruction` key is shown when the user has timed out, and the `greeting0..6` keys are shown when the user has to choose a login provider.

### Image

You can update the image on the time out screen through a custom CSS variable. The default value is `--umb-login-image` and it is set to the same value as the login screen. You can override this value in your custom CSS file:

```css
:root {
    --umb-login-image: url(../myImagesFolder/myTimeout.jpg);
}
```


# Document Blueprints

Learn how to create and use Document Blueprints in Umbraco.

{% hint style="info" %}
Document Blueprints were previously called Content Templates.
{% endhint %}

## Document Blueprints Overview

A Document Blueprint allows editors to preconfigure a content node. It serves as a reusable starting point when creating new content.

### Method 1 – Create a Document Blueprint from the Content Section

{% hint style="warning" %}
Before using this method, make sure you have already [created some content](/umbraco-cms/model-your-content/content-types-and-structure/data/defining-content#3-creating-the-content).
{% endhint %}

1. Go to the **Content** section and select an existing content node.
2. Click the **...** menu next to the node and choose **Create Document Blueprint**.

![Action Button](/files/XPCOQafgge47FJFNDKB8)

3. Enter a **Name** for the new blueprint.

![Document Blueprint Name Field](/files/PCxRicszyUqWrCDZ634K)

4. Click **Save**.

The new blueprint will appear under the **Document Blueprints** folder in the **Settings** section.

![New Document Blueprint](/files/8HZI4LW3i7NfwFMJA155)

{% hint style="info" %}
If you don’t see the new blueprint, try refreshing your browser.
{% endhint %}

### Method 2 – Create a Document Blueprint from the Settings Section

1. Go to the **Settings** section.
2. Click the **...** menu next to the **Document Blueprints** tree.
3. Select **Create...**.

![Create Document Blueprint](/files/AWdHt5PLdiLhMt2tw6Qz)

4. Choose the Document Type you want to base the blueprint on.

![Select Content Type](/files/hgDlvJ6Tmiceva6QL5gV)

{% hint style="warning" %}
You can only create Document Blueprints from **Document Types** or **Document Types with Templates**.
{% endhint %}

5. Enter a **Name** for the blueprint.
6. Click **Save**.

The new blueprint will appear under the **Document Blueprints** folder in the **Settings** section.

### Edit a Document Blueprint

To edit an existing document blueprint, follow these steps:

1. Go to the **Settings** section.
2. Open the **Document Blueprints** folder.
3. Select the blueprint you want to edit.
4. Make your changes.
5. Click **Save**.

### Use a Document Blueprint

Once you have created a document blueprint, you can use it to create new content nodes.

{% hint style="info" %}
Document Blueprints can only be selected when creating a new content node. They cannot be applied to existing content.
{% endhint %}

To use a document blueprint, follow these steps:

1. Go to the **Content** section.
2. Click **+** on the root node and select **Create**.

![Create From Template](/files/7uTkhSUtKutGJG0KJk8O)

3. Select the **Document Type** that has an associated blueprint.
4. Choose how to create the new content:
   * Use the Document Blueprint
   * Start with a blank node

![Select Template](/files/BDnrX6d98OOWqMn7wzSp)


# Language Variants

Learn how to use language variants to output your content in multiple languages.

Language Variants allows you to vary content by culture, so you can allow a content node to exist in multiple languages.

This article will cover the different aspects of enabling and working with language variants on your Umbraco website.

## Contents

* [Video tutorial](#video-tutorial)
* [How to enable Language Variants](#how-to-enable-language-variants)
* [Enabling Language Variants on Document Types](#enabling-language-variants-on-document-types)
* [Working with Language Variants on content](#working-with-language-variants-on-content)
* [Test your language variants](#test-your-language-variants)
* [Control User Group permissions on language variants](#control-user-group-permissions-on-language-variants)
* [Related Links](#related-links)

## Video tutorial

{% embed url="<https://www.youtube.com/watch?ab_channel=UmbracoLearningBase&v=TWLqt-jVdyQ>" %}
How to use Language Variants in Umbraco
{% endembed %}

## How to enable Language Variants

To work with Language Variants you need to have more than one language enabled. This can be done from the `Settings` section:

![Adding a language](/files/4XomXI5i0tA2jOwTFq1B)

{% hint style="info" %}
You will always have one default language but each language can be set to mandatory.
{% endhint %}

## Enabling Language Variants on Document Types

Now that there are two languages to vary the content with, it needs to be enabled on the Document Types. To do so:

1. Go to the Document Type in the **structure** section.
2. Open the **settings** page.
3. Toggle **Allow vary by culture**.

![Allowing Variance on Document Types](/files/Kxh3nx6hw9oK5p0fXQyV)

All new properties on a Document Type were **Allow vary by culture** is enabled, will inherit the ability to be varied by culture.

It is also possible to make the properties shared across cultures. This means that the value added to the default language, will also be applied to all other languages.

Set up property sharing, by enabling **Shared across cultures** in the Variation group when defining your properties:

![Allowing Variance on properties](/files/aq7yU7I58oIfkZp5xEEO)

## Working with Language Variants on content

When you return to your content node you will notice two things:

1. At the top of the Content tree there will now be a dropdown so you can show the Content tree in the language of your choice.
2. To the right of the content name there is now a dropdown where you can select a language. You can also open a split view so you can see two languages at once.

![Allowing Variance on properties](/files/IMeZrOuBq4nNcChoA2Wy)

To read about how you render variant content in Templates, check out the [rendering content section](/umbraco-cms/develop-with-umbraco/templating-and-rendering/design/rendering-content).

## Test your language variants

Culture and hostnames must be added to your language sites before the content can be tested for variants:

1. Click **...** next to the Home node and select **Culture and Hostnames**.
2. Add a specific URL per language and save. For eg: An English language variant with English (United States) as the language can be given a specific URL `https://yourwebsite.com/en-us` and a Danish language variant can be given a specific URL `https://yourwebsite.com/dk`.

The Info content app should now show specific URLs for your language variants.

## Control User Group permissions on language variants

When you are working with a multilingual site you might want to control who can edit the different variations of the content on the website.

This can be controlled on a User Group level. All default User Groups, except the Sensitive data group, have access to all languages out of the box.

When "Allow access to all languages" is not checked, languages can be added and/or removed. This is to determine which variants the users in the user group have access to.

![Assign access to all or individual languages on the User Group](/files/dJ8dStkyj1vIBAOCgGyx)

{% hint style="info" %}
Even though the language permissions have been set, a user will still be able to view and browse all the language variations. The permission setting will ensure that only the added languages are editable by users of the User Group.
{% endhint %}

## Related Links

* [Language variations](/umbraco-cms/develop-with-umbraco/templating-and-rendering/language-variation)
* [Render varied content in Templates](/umbraco-cms/develop-with-umbraco/templating-and-rendering/design/rendering-content)


# Log Viewer

Information on using the Umbraco log viewer

Umbraco ships with a built-in Log Viewer feature. This allows you to filter, view log entries, perform complex search queries, and analyze logs for debugging. You can find the Log viewer in the **Settings** section of the Umbraco backoffice.

## Benefits

Umbraco's Log Viewer uses structured logging and a query language, so you can search for specific scenarios instead of scanning raw text. For example, finding every log entry tied to one request ID, or every entry where `Duration` exceeds `1000ms`. This makes debugging and pattern-spotting easier.

## Example Queries

Here are some example queries to help you get started. For more details on the syntax, see the [serilog-filters-expressions](https://github.com/serilog/serilog-filters-expressions) project.

* **Find all logs that are from the namespace 'Umbraco.Core'** `StartsWith(SourceContext, 'Umbraco.Core')`
* **Find all logs that have the property 'Duration' and the duration is greater than 1000ms** `Has(Duration) and Duration > 1000`
* **Find all logs where the message has localhost in it with SQL like** `@Message like '%localhost%'`

## Saved Searches

If you frequently use a custom query, you can save it for quick access. Type your query in the search box and click the heart icon to save it with a friendly name. Saved queries are stored in the `umbracoLogViewerQuery` table in the database.

## Implementing Your Own Log Viewer Source

Umbraco allows you to implement a custom `ILogViewerRepository` and `ILogViewerService` to fetch logs from alternative sources, such as **Azure Table Storage**.

### Creating a Custom Log Viewer Repository

To fetch logs from Azure Table Storage, extend the `LogViewerRepositoryBase` class from `Umbraco.Cms.Infrastructure.Services.Implement`.

{% hint style="info" %}
This implementation requires the `Azure.Data.Tables` NuGet package.
{% endhint %}

{% code title="AzureTableLogsRepository.cs" %}

```csharp
using Azure;
using Azure.Data.Tables;
using Serilog.Events;
using Serilog.Formatting.Compact.Reader;
using Umbraco.Cms.Core.Composing;
using Umbraco.Cms.Core.Logging.Viewer;
using Umbraco.Cms.Core.Serialization;
using Umbraco.Cms.Core.Services;
using Umbraco.Cms.Infrastructure.Logging.Serilog;
using Umbraco.Cms.Infrastructure.Services.Implement;
using LogLevel = Umbraco.Cms.Core.Logging.LogLevel;

namespace My.Website;

public class AzureTableLogsRepository : LogViewerRepositoryBase
{
    private readonly IJsonSerializer _jsonSerializer;

    public AzureTableLogsRepository(UmbracoFileConfiguration umbracoFileConfig, IJsonSerializer jsonSerializer) : base(
        umbracoFileConfig)
    {
        _jsonSerializer = jsonSerializer;
    }

    protected override IEnumerable<ILogEntry> GetLogs(LogTimePeriod logTimePeriod, ILogFilter logFilter)
    {
        // This example uses a connection string compatible with the Azurite emulator
        // https://learn.microsoft.com/en-us/azure/storage/common/storage-use-azurite
        var client =
            new TableClient(
                "UseDevelopmentStorage=true",
                "LogEventEntity");

        // Filter by timestamp to avoid retrieving all logs from the table, preventing memory and performance issues
        IEnumerable<AzureTableLogEntity> results = client.Query<AzureTableLogEntity>(
            entity => entity.Timestamp >= logTimePeriod.StartTime.Date &&
                      entity.Timestamp <= logTimePeriod.EndTime.Date.AddDays(1).AddSeconds(-1));

        // Read the data and apply logfilters
        IEnumerable<LogEvent> filteredData = results.Select(x => LogEventReader.ReadFromString(x.Data))
            .Where(logFilter.TakeLogEvent);

        return filteredData.Select(x => new LogEntry
        {
            Timestamp = x.Timestamp,
            Level = Enum.Parse<LogLevel>(x.Level.ToString()),
            MessageTemplateText = x.MessageTemplate.Text,
            Exception = x.Exception?.ToString(),
            Properties = MapLogMessageProperties(x.Properties),
            RenderedMessage = x.RenderMessage(),
        });
    }

    private IReadOnlyDictionary<string, string?> MapLogMessageProperties(
        IReadOnlyDictionary<string, LogEventPropertyValue>? properties)
    {
        var result = new Dictionary<string, string?>();

        if (properties is not null)
        {
            foreach (KeyValuePair<string, LogEventPropertyValue> property in properties)
            {
                string? value;

                if (property.Value is ScalarValue scalarValue)
                {
                    value = scalarValue.Value?.ToString();
                }
                else if (property.Value is StructureValue structureValue)
                {
                    var textWriter = new StringWriter();
                    structureValue.Render(textWriter);
                    value = textWriter.ToString();
                }
                else
                {
                    value = _jsonSerializer.Serialize(property.Value);
                }

                result.Add(property.Key, value);
            }
        }

        return result;
    }

    public class AzureTableLogEntity : ITableEntity
    {
        public required string Data { get; set; }

        public required string PartitionKey { get; set; }

        public required string RowKey { get; set; }

        public DateTimeOffset? Timestamp { get; set; }

        public ETag ETag { get; set; }
    }
}
```

{% endcode %}

Azure Table Storage requires entities to implement the `ITableEntity` interface. Since Umbraco's default log entity does not implement this, a custom entity (`AzureTableLogEntity`) must be created to ensure logs are correctly fetched.

{% hint style="warning" %}
The connection string above must match the one used by the Serilog sink configured in [Configuring Logging to Azure Table Storage](#configuring-logging-to-azure-table-storage). If the two point at different storage accounts, this repository queries a table that was never written to. The Log Viewer then fails with an error stating the table does not exist. Read the connection string from configuration rather than hardcoding it, so both sides always agree.
{% endhint %}

### Creating a custom log viewer service

Create a new implementation of `ILogViewerService`. Amongst other things, this is responsible for figuring out whether a provided log query is allowed. Again a base class is available.

{% code title="AzureTableLogsService.cs" %}

```csharp
using System.Collections.ObjectModel;
using Umbraco.Cms.Core;                                
using Umbraco.Cms.Core.Logging.Viewer;                 
using Umbraco.Cms.Core.Persistence.Repositories;      
using Umbraco.Cms.Core.Scoping;                       
using Umbraco.Cms.Core.Services;                       
using Umbraco.Cms.Core.Services.OperationStatus;      
using LogLevel = Umbraco.Cms.Core.Logging.LogLevel;   

namespace My.Website;

public class AzureTableLogsService : LogViewerServiceBase
{
    public AzureTableLogsService(
        ILogViewerQueryRepository logViewerQueryRepository,
        ICoreScopeProvider provider,
        ILogViewerRepository logViewerRepository)
        : base(logViewerQueryRepository, provider, logViewerRepository)
    {
    }

    protected override string LoggerName => "AzureTableStorage";

    // Change this to what you think is sensible.
    // As an example, check whether more than 5 days of logs are requested.
    public override Task<Attempt<bool, LogViewerOperationStatus>> CanViewLogsAsync(LogTimePeriod logTimePeriod)
    {
        return logTimePeriod.EndTime - logTimePeriod.StartTime < TimeSpan.FromDays(5)
            ? Task.FromResult(Attempt.SucceedWithStatus(LogViewerOperationStatus.Success, true))
            : Task.FromResult(Attempt.FailWithStatus(LogViewerOperationStatus.CancelledByLogsSizeValidation, false));
    }

    public override ReadOnlyDictionary<string, LogLevel> GetLogLevelsFromSinks()
    {
        var configuredLogLevels = new Dictionary<string, LogLevel>
        {
            { "Global", GetGlobalMinLogLevel() },
            { "AzureTableStorage", LogViewerRepository.RestrictedToMinimumLevel() },
        };

        return configuredLogLevels.AsReadOnly();
    }
}
```

{% endcode %}

### Register implementations

Umbraco needs to be made aware that there is a new implementation of an `ILogViewerRepository` and an `ILogViewerService`. These need to replace the default ones that are shipped with Umbraco.

{% code title="AzureTableLogsComposer.cs" %}

```csharp
using Umbraco.Cms.Core.Composing;
using Umbraco.Cms.Infrastructure.DependencyInjection;
using Umbraco.Cms.Core.Services;

namespace My.Website;

public class AzureTableLogsComposer : IComposer
{
    public void Compose(IUmbracoBuilder builder)
    {
        builder.Services.AddUnique<ILogViewerRepository, AzureTableLogsRepository>();
        builder.Services.AddUnique<ILogViewerService, AzureTableLogsService>();
    }
}
```

{% endcode %}

### Configuring Logging to Azure Table Storage

With the above three classes, the setup is in place to view logs from an Azure Table. However, logs are not yet persisted into the Azure Table Storage account. To enable persistence, configure the Serilog logging pipeline to store logs in Azure Table Storage.

1. Install `Serilog.Sinks.AzureTableStorage` from NuGet.
2. Add a new sink to `appsettings.json` with credentials to persist logs to Azure.

The following sink needs to be added to the [`Serilog:WriteTo`](https://github.com/serilog/serilog-sinks-azuretablestorage#json-configuration) array.

{% code title="appsettings.json" %}

```json
{
"Name": "AzureTableStorage",
"Args": {
    "storageTableName": "LogEventEntity",
    "formatter": "Serilog.Formatting.Compact.CompactJsonFormatter, Serilog.Formatting.Compact",
    "connectionString": "UseDevelopmentStorage=true"
    }
}
```

{% endcode %}

This example uses the same Azurite-compatible connection string as the repository above, so the two stay in sync for local testing.

Replace it with your real Azure Storage connection string when deploying, for example: `DefaultEndpointsProtocol=https;AccountName=ACCOUNT_NAME;AccountKey=KEY;EndpointSuffix=core.windows.net`. Update the repository's connection string to match.

For more in-depth information about logging and how to configure it, see the [Logging](/umbraco-cms/develop-with-umbraco/testing-and-debugging/logging) article.

### Compact Log Viewer - Desktop App

[Compact Log Viewer](https://www.microsoft.com/store/apps/9N8RV8LKTXRJ?cid=storebadge\&ocid=badge). A desktop tool is available for viewing and querying JSON log files in the same way as the built-in Log Viewer in Umbraco.


# Settings Dashboards

A guide displaying the options available in the Settings section in Umbraco CMS backoffice.

The **Settings** section of the Umbraco backoffice has its own set of default dashboards. In this article, you can get an overview of each dashboard available in the **Settings** section:

<details>

<summary>Welcome</summary>

The Welcome dashboard is the first dashboard in the Settings section. Like all dashboards, it has a customizable view and links to different resources for developing your Umbraco website.

For more information about creating custom dashboards, see the [Dashboards](/umbraco-cms/extend-your-project/backoffice-extensions/extending-overview/extension-types/dashboard) article.

</details>

<details>

<summary>Examine Management</summary>

The Examine Management dashboard provides an overview of the Examine functionality available directly within the Umbraco backoffice. The Umbraco backoffice allows you to view details about your Examine indexes and searchers - all in one place. You can see which fields are being indexed and rebuild the indexes if there's a problem. You can also test keywords to see what results will be returned.

For more information about Examine Management, see the [Examine Management](/umbraco-cms/develop-with-umbraco/application-code/examine/examine-management) article.

</details>

<details>

<summary>Published Status</summary>

The Published Status dashboard displays the status of your site in the Published Cache Status section alongside the Content and Media nodes value. The Caches section provides three options: Memory Cache, Database Cache, and Internals.

* Memory Cache - Reloads the in-memory cache by entirely reloading it from the database cache. Use it when you think that the memory cache has not been properly refreshed.
* Database Cache - Rebuilds the database cache that is the content of the `cmsContentNu` table. Use it when reloading the Memory Cache is not enough and you think that the database cache has not been properly generated.
* Internals - Lets you trigger a NuCache snapshots collection.

{% hint style="info" %}
As of Umbraco 15 `IPublishedSnapshot`, `IPublishedSnapshotAccessor`, and `SnapshotCache` are all obsolete.
{% endhint %}

</details>

<details>

<summary>Models Builder</summary>

Models builder is a tool that can generate a complete set of strongly-typed published content models for Umbraco. Models are available in both controllers and views. When using the Models Builder, the content cache does not return `IPublishedContent` objects anymore but returns strongly typed models implementing `IPublishedContent`.

The Models Builder dashboard displays the following information:

* Details on how Models Builder is configured, that is: `InMemoryAuto`, `Nothing`, `SourceCodeAuto`, and `SourceCodeManual`.
* Provides a button to generate models (if the models mode is `SourceCodeManual` mode only).
* Reports the last error (if any) that would have prevented models from being properly generated.

For more information about Models Builder, see the [Models Builder](/umbraco-cms/develop-with-umbraco/templating-and-rendering/templating/modelsbuilder) article.

</details>

<details>

<summary>Health Check</summary>

Health Checks are used to determine the status of your Umbraco project. It is a handy list of checks to see if your Umbraco installation is configured according to best practices. It's possible to add your custom-built health checks.

For more information about Health Checks, see the [Health Check](/umbraco-cms/run-in-production/infrastructure-and-ops/health-check) articles.

</details>

<details>

<summary>Profiling</summary>

You can use the built-in performance profiler to assess the performance when rendering pages. To activate the profiler for a specific page rendering, add `umbDebug=true` to the querystring when requesting the page.

The Profiling dashboard provides a toggle option - `Activate the profiler by default` to keep the profiler active by default for all page renderings. You can use this option without having to set `umbDebug=true` on each page request. The toggle button sets a cookie named `UMB-DEBUG` in your browser, which then activates the profiler automatically.

For more information about MiniProfiler, see the [MiniProfiler](/umbraco-cms/develop-with-umbraco/testing-and-debugging#miniprofiler) section in the [Testing and Debugging](/umbraco-cms/develop-with-umbraco/testing-and-debugging) article.

</details>

<details>

<summary>Telemetry Data</summary>

The Telemetry Data dashboard is a consent screen that is used for collecting system and usage information from your installation. Here, you can see what type of data is being collected and even adjust the level of reporting. Currently, there are three levels available: **Minimal**, **Basic**, and **Detailed**.

**Detailed** is the default option where the data sent contains:

* Anonymized site ID, Umbraco version, and packages installed.
* Number of: Root nodes, Content nodes, Media, Document Types, Templates, Languages, Domains, User Group, Users, Members, and Property Editors in use.
* System information: Webserver, server OS, server framework, server OS language, and database provider.
* Configuration settings: Modelsbuilder mode, if custom Umbraco path exists, ASP environment, and if you are in debug mode.

**Basic** contains:

* Anonymized site ID, Umbraco version, and packages installed.

**Minimal** contains:

* Anonymized site ID only

You can see the specific data being sent on each of the levels directly in the **Telemetry Data** Dashboard.

Additionally, Telemetry Data also sends anonymized, analytical data on package usage in Umbraco. Having solid data on package usage is important for both package developers and the Umbraco ecosystem.

For more information about Package Telemetry, see the [Package Telemetry](https://umbraco.com/blog/umbraco-92-release/) section in the Umbraco 9.2 Release Blog Post.
</details>


# Relations

Learn about relations and how to create and manage them.

Umbraco sections are built around the concept of 'trees' and there is an implicit relationship between items in a section tree.

![Parent, Siblings & Children](/files/6Qm1yTJG9jGE9qLzvEKw)

We refer to these relationships in the manner of a 'Family Tree'. One content item might be the 'Parent' of some content items, and those items would be referred to as the 'Children' of that parent. Items within the same branch of the tree can also be described as 'Ancestors' or 'Descendants' of an item.

There are methods available to support querying content items by their relative position to the current page. This is possible using the following concepts: `Model.Ancestors()`, `Model.Children()`, or `Model.Descendants()`.

In some cases there are no direct relationships between two items in a tree, but they are still somehow 'related'. This could be the alternate language translation pages of a content page.

In other cases there is a 'relation' between different types of entities. This could be a relation between Content and Member, or Member and MediaFolder. You might need to be able to retrieve and display the uploaded images from a specific logged-in Member.

These are the scenarios where the concept of **Umbraco Relations** provides a solution.

## The Concept of Umbraco Relations

Umbraco Relations allow you to relate almost any object in Umbraco to almost any other Umbraco object. This is done by defining a new *Relation Type*.

### How is this different to pickers?

With a Content, Member, or Media picker the relationship only works as a 1-way street. The content item knows it has 'picked' another content item but that other content item does not know where it has been picked.

Umbraco Relations works as a 2-way street. When creating a relation between two different types of entities, it will be possible to find one entity from the other and vice versa. As an example this provides the option to list out all the pages that a content banner had been picked on.

## Relation Types

A Relation Type specifies how two types of entities are related. Two items might be related under multiple Relation Types, and you might only be interested in your 'Related Language Page' Relation Type.

## Viewing Relations

It is possible to view the existing Relation Types from the Umbraco backoffice:

1. Access the Umbraco Backoffice.
2. Navigate to the **Settings** section.
3. Locate the **Advanced** group in the sidebar.
4. Select **Relations**.

![View Relations](/files/hBqbzgdKAApkmznzw1J2)

On the dashboard all defined relations will be listed. Select a Relation to view a list of all the objects that have been related for that specific Relation Type.

## Creating Relations

You can create Relations using the RelationService API via code.

[Some examples are provided here in the RelationService Documentation Page](/umbraco-cms/extend-your-project/server-side-extensions/management/using-services/relationservice)

## Use cases

You might want to create a 'Relation' between two objects either as:

* A response to a backoffice event. For example, a content item being published that has picked other content items. Storing a relationship between these items would make querying between them easier. Perhaps show all the pages on which a particular 'banner' has been picked.
* A logged-in member on the front end of an Umbraco website might have the facility to upload images. In response, the implementation could store the photos programmatically in the Media Section and at the same time, create a Relation to record the relationship between the member and their uploaded pictures. On an image gallery page, it would be possible to display all the gallery images for the current logged-in Member using the relations.

## Community Packages

Some of the community packages that use Relations are listed below:

* ['Relations Picker'](https://our.umbraco.com/packages/backoffice-extensions/relations-picker/) - a content picker that automatically creates Relations.
* ['ContentRelations'](https://our.umbraco.com/packages/backoffice-extensions/contentrelations/) - allows you to relate two items via the Backoffice.
* ['LinkedPages'](https://our.umbraco.com/packages/backoffice-extensions/linked-pages/) - Provides a LinkedPages context item to show, edit, and add relations between content pages.


# Property Editors

Overview of Property Editors in Umbraco, how they work, the built-in editors available, and how to create custom ones.

A Property Editor is what content editors use to input data on a Document Type. When you create a Data Type in the backoffice, you choose a Property Editor and configure it. Umbraco ships with a wide range of built-in Property Editors, and you can create custom ones.

{% hint style="info" %}
**Are you looking for the Grid Layout or Nested Content?**

These Property Editors were removed in Umbraco version 14:

* Grid Layout
* Nested content

Use the [Block Editor](/umbraco-cms/model-your-content/property-editors/built-in-umbraco-property-editors/block-editor) or [Rich Text Editor blocks](/umbraco-cms/model-your-content/property-editors/built-in-umbraco-property-editors/rich-text-editor/blocks) instead.
{% endhint %}

## In this section

* [Built-in Property Editors](/umbraco-cms/model-your-content/property-editors/built-in-umbraco-property-editors) - the full list of Property Editors that ship with Umbraco.
* [Umbraco Flavored Markdown](/umbraco-cms/model-your-content/property-editors/umbraco-flavored-markdown) - a Markdown dialect with Umbraco-specific extensions for rich content editing.

## Related Resources

* [Customizing Data Types](/umbraco-cms/model-your-content/content-types-and-structure/data/data-types)
* [Creating a custom Property Editor](/umbraco-cms/extend-your-project/tutorials/creating-a-property-editor)


# Built-in Property Editors


# Block Editors

The Block Editors are property editors that enabled you to build advanced editor tools using a set of predefined Document Types.

Umbraco CMS currently ships with two Block Editors: the Block List and the Block Grid.

## [Block List](/umbraco-cms/model-your-content/property-editors/built-in-umbraco-property-editors/block-editor/block-list-editor)

## [Block Grid](/umbraco-cms/model-your-content/property-editors/built-in-umbraco-property-editors/block-editor/block-grid-editor)

## Customizing Block Editors

### [Creating custom views for blocks](/umbraco-cms/extend-your-project/tutorials/creating-custom-views-for-blocklist)

Learn how to create custom views for the blocks used in your Block Grid or Block List property editors.


# Block Grid

`Schema Alias: Umbraco.BlockGrid`

`UI Alias: Umb.PropertyEditorUi.BlockGrid`

`Returns: BlockGridModel`

The **Block Grid** property editor enables editors to layout their content in the Umbraco backoffice. The content is made of Blocks that can contain different types of data.

## Configuring the Block Grid

The Block Grid property editor is configured via the **Data Types** backoffice interface.

To set up the Block Grid property editor, follow these steps:

1. Navigate to the **Settings** section in the Umbraco backoffice.
2. Click **...** next to the **Data Types** folder.
3. Select **Create** -> **New Data Type**.
4. Select **Block Grid** from the list of available property editors.

You will see the configuration options for adding Block Types to the Grid as shown below.

![Block Grid - Blocks Configuration](/files/A7PtcdtJhUTJxa2V8txX)

You will also see the following additional configuration options.

![Block Grid - Additional Data Type Configuration Options](/files/cygJkp7E3v6YyyythPvK)

The Data Type editor allows you to configure the following properties:

* **Blocks** - Defines the Block Types available for use in the property. For more information, see [Setup Block Types](#setup-block-types). Blocks can also be grouped. This is then visible to editors in the Block Catalogue when populating content, and can also be used to allow a group of Blocks in an Area.
* **Amount** - Sets the minimum and/or the maximum number of Blocks that should be allowed at the root of the layout.
* **Live editing mode** - Enabling this option will allow you to see the changes as you are editing them.
* **Editor width** - Overwrites the width of the property editor. This field takes any valid CSS value for "max-width". For example: 100% or 800px.
* **Create Button Label** - Overwrites the label on the Create button.
* **Grid Columns** - Define the number of columns in your Block Grid. The default is 12 columns.
* **Layout Stylesheet** - Replaces the built-in Layout Stylesheet. Additionally, you can retrieve the default layout stylesheet to use as a base for your own inspiration or for writing your own stylesheet.

## Setup Block Types

Block Types are based on [**Element Types**](/umbraco-cms/model-your-content/content-types-and-structure/data/defining-content/default-document-types#element-type). These can be created beforehand or while setting up your Block Types.

Once you have added an Element Type as a Block Type on your Block Grid Data Type you have the option to configure it.

![Block Grid - Data Type Block Configuration](/files/YW6ing48PMvaawv16d09)

## Block Configuration Settings

Each Block has a set of properties that are optional to configure. These are described below.

### General

Customize the user experience for your content editors when they work with the Blocks in the Content section.

* **Label** - Defines a label for the appearance of the Block in the editor. The label can use [Umbraco Flavoured Markdown](/umbraco-cms/model-your-content/property-editors/umbraco-flavored-markdown) to display values of properties. The label is also used for search in the **Add Block** dialog during content editing. If no label is defined, the block will not be searchable. The search does not fall back to the block’s name.
* **Content model** - Presents the Element Type used as model for the Content section of this Block. This cannot be changed but you can open the Element Type to perform edits or view the properties available. Useful when writing your Label.
* **Settings model** - Adds a Settings section to your Block based on a given Element Type. When selected you can open the Element Type or choose to remove the Settings section again.

### Permissions

* **Allow in root** - Determines whether the Block can be created at the root of your layout. Turn this off if you only want a Block to appear within Block Areas.
* **Allow in areas** - Determines whether the Block can be created inside Areas of other Blocks. If this is turned off it can still be allowed in Block Areas by defining specific allowed Blocks.

### Size options

Customize the Blocks size in the Grid. If you define multiple options, the Block becomes scalable.

By default, a Block takes up the available width.

A Block can be resized in two ways:

1. When a Block is placed in an Area, it will fit to the Areas width. Learn more about [Areas](#areas).
2. A Block can have one or more Column Span options defined.

A Column Span option is used to define the width of a Block. With multiple Column Span options defined, the Content Editor can scale the Block to fit specific needs.

Additionally, Blocks can be configured to span rows, this enables one Block to be placed next to a few rows containing other Blocks.

* **Available column spans** - Defines one or more columns, the Block spans across. For example: in a 12 columns grid, 6 columns is equivalent to half width. By enabling 6 columns and 12 columns, the Block can be scaled to either half width or full width.
* **Available row spans** - Defines the amount of rows the Block spans across.

See the [scaling blocks](#scaling-blocks) section of this article for an example of how scaling works.

## Areas

Blocks can nest other Blocks to support specific compositions. These compositions can be used as a layout for other Blocks.

To achieve nesting, a Block must have one or more Areas defined. Each Area can contain one or more Blocks.

Each Area has a size, defined by column and rows spans. The grid for the Areas are based on the same amount of columns as your root grid, unless you choose to change it.

To scale an Area, click and drag the scale-button in the bottom-right corner of an Area.

* **Grid Columns for Areas** - Overwrites the amount of columns used for the Area grid.
* **Areas** - Determines whether the Block can be created inside Areas of other Blocks.

![Block Grid - Areas](/files/5zfQbyhsAJfzHGWGS92j)

### Area configuration

![Block Grid - Area Configuration](/files/mf0MDK5FLRnEYf54B2vD)

* **Alias** - The alias is used to identify this Area. It is being printed by `GetBlockGridHTML()` and used as name for the Area slot in Custom Views. The alias is also available for CSS Selectors to target the HTML-Element representing an Area.
* **Create Button Label** - Overwrites the Create Button Label of the Area.
* **Number of blocks** - Determines the total number of Blocks in an Area.
* **Allowed block types** - When this is empty, all Blocks with Permissions for creation in Areas, will be available. This can be overwritten by specifying the allowed Blocks. Define the types of Blocks or Groups of Blocks that are allowed. Additionally, you can also set how many Blocks of each type/group should be present.

When allowing a Group of Blocks, you might want to require a specific amount for a certain Block of that Group. This can be done by adding that Block Type to the list as well, and setting the requirements accordingly.

## Advanced

Advanced properties are also available for each Block, as shown below.

![Block Grid - Advanced Block Configuration](/files/qBGjRrUFGmEDWja52VQD)

### Advanced

* **Overlay editor size** - Sets the size for the Content editor overlay for editing this block.
* **Inline editing mode** - Enabling this will change editing experience to inline, meaning that editing the data of blocks happens at sight as accordions.
* **Hide content editor** - Hides the UI for editing the content in a Block Editor. This is only relevant if you made a custom view that provides the UI for editing of content.

### Custom View

* **Custom view** - Overwrites the view for the block presentation in the Content editor. Building Custom Views for Block representations in Backoffice is the same for all Block Editors. [Read about building a Custom View for Blocks here](/umbraco-cms/extend-your-project/backoffice-extensions/extending-overview/extension-types/block-custom-view)

### Catalogue appearance

These properties refer to how the Block is presented in the Block catalogue, when editors choose which Blocks to use for their content.

* **Background color** - Define a background color to be displayed beneath the icon or thumbnail. Eg. `#424242`.
* **Icon color** - Change the color of the Element Type icon. Eg. `#242424`.
* **Thumbnail** - Pick an image or SVG file to replace the icon of this Block in the catalogue.

The thumbnails for the catalogue are displayed at a maximum height of 150px and will scale proportionally to maintain their original aspect ratio. Any standard image format (PNG, JPG, SVG) will work effectively.

{% hint style="info" %}
Configuring the catalogue appearance improves the content editor experience. A well-designed block catalogue with colors and thumbnails makes it easier for editors to quickly identify and select the right blocks for their content.
{% endhint %}

## Editing Blocks

When viewing a **Block Grid** property editor in the **Content** section for the first time, you will be presented with the option to **Add content**.

![Block Grid - Add Content](/files/PjhbobUDYBleN6jkTHLs)

Clicking the **Add content** button opens up the **Block Catalogue**.

![Block Grid - Block Catalogue](/files/0kcfxOXxHT4EdZHVIdZj)

The Block Catalogue looks different depending on the amount of available Blocks and their catalogue appearance.

![Block Grid - Block Catalogue with Example Block using Catalogue Appearance features](/files/KDVHz6lUT8XEoCrL36mK)

Click the Block Type you wish to create and a new Block will appear in the layout.

More Blocks can be added to the layout by clicking the Add content button. Alternatively, use the Add content button that appears on hover to add new Blocks between, besides, or above the existing Blocks.

![Block Grid - Add Content Inline](/files/yFd30sjrtAEYKRsj9Kda)

To delete a Block, click the trash icon which appears on the mouse hover.

![Block Grid - Delete Content](/files/SD3hyL8Sj8JPR7c6JlBa)

## Sorting Blocks

Blocks can be rearranged using the click and drag feature. Move them up or down to place them in the desired order.

Moving a Block from one Area to another is done in the same way. If a Block is not allowed in the given position, the area will display a red color and not allow the new position.

![Block Grid - Sorting Blocks](/files/GbpfKsb8qNJEjwDuPOtH)

## Scaling Blocks

If a Block has multiple size options it can be scaled via the UI. This appears in the bottom left corner of the Block.

The Block is resized using a click-and-drag feature. Moving the mouse will change the size to the size options closest to the mouse pointer.

<figure><img src="/files/QVoDu1yQVKzxDWFVnfUS" alt=""><figcaption><p>Scale blocks in the grid by dragging from the bottom-right corner.</p></figcaption></figure>

## Rendering Block Grid Content

Rendering the stored value of your **Block Grid** property editor can be done in two ways:

1. [Default rendering](#1-default-rendering)
2. [Build your own rendering](#2-build-custom-rendering)

### 1. Default rendering

You can choose to use the built-in rendering mechanism for rendering Blocks using a Partial View for each block.

The default rendering method is named `GetBlockGridHtmlAsync()` and comes with a few options - for example:

```csharp
@await Html.GetBlockGridHtmlAsync(Model, "myGrid")
```

In the sample above `"myGrid"` is the alias of the Block Grid editor.

If you are using ModelsBuilder, the example will look like this:

```csharp
@await Html.GetBlockGridHtmlAsync(Model.MyGrid)
```

To use the `GetBlockGridHtmlAsync()` method, you will need to create a Partial View for each Block Type. The Partial View must be named using the alias of the Element Type that is being used as Content Model for the Block Type.

These Partial View files need to go into the `Views/Partials/blockgrid/Components/` folder.

Example: `Views/Partials/blockgrid/Components/MyElementTypeAliasOfContent.cshtml`.

The Partial Views will receive a model of type `Umbraco.Cms.Core.Models.Blocks.BlockGridItem`. This model contains `Content` and `Settings` from your block, as well as the configured `RowSpan`, `ColumnSpan`, and `Areas` of the Block.

#### Rendering the Block Areas

The Partial View for the Block is responsible for rendering its own Block Areas. This is done using another built-in rendering mechanism:

```csharp
@await Html.GetBlockGridItemAreasHtmlAsync(Model)
```

Here you will need to create a Partial View for each Block Type within the Block Area. For the name, use the alias of the Element Type that is being used as Content Model for the Block Type.

These Partial Views must be placed in the same folder as before, (`Views/Partials/blockgrid/Components/`), and will receive a model of type `Umbraco.Cms.Core.Models.Blocks.BlockGridItem`.

#### Putting it all together

The following is an example of a Partial View for a Block Type of type `MyElementTypeAliasOfContent`.

{% code title="MyElementTypeAliasOfContent.cshtml" %}

```csharp
@inherits Umbraco.Cms.Web.Common.Views.UmbracoViewPage<Umbraco.Cms.Core.Models.Blocks.BlockGridItem>;

@* Render the value of field with alias 'heading' from the Element Type selected as Content section *@
<h1>@Model.Content.Value("heading")</h1>

@* Render the block areas *@
@await Html.GetBlockGridItemAreasHtmlAsync(Model)
```

{% endcode %}

If you are using ModelsBuilder, you can make the property rendering strongly typed by letting your view accept a model of type `BlockGridItem<T>`. For example:

{% code title="MyElementTypeAliasOfContent.cshtml" %}

```csharp
@inherits Umbraco.Cms.Web.Common.Views.UmbracoViewPage<Umbraco.Cms.Core.Models.Blocks.BlockGridItem<ContentModels.MyElementTypeAliasOfContent>>;
@using ContentModels = Umbraco.Cms.Web.Common.PublishedModels;

@* Render the Heading property from the Element Type selected as Content section *@
<h1>@Model.Content.Heading</h1>

@* Render the block areas *@
@await Html.GetBlockGridItemAreasHtmlAsync(Model)
```

{% endcode %}

#### Stylesheet

Using the default rendering together with your layout stylesheet will provide what you need for rendering the layout.

To use the Default Layout Stylesheet, copy the stylesheet to your frontend. You can download the default layout stylesheet from the link within the DataType, we recommend putting the file in the `css` folder, example: `wwwroot/css/umbraco-blockgridlayout.css`.

```csharp
<link rel="stylesheet" href="@Url.Content("~/css/blockgridlayout.css")" />
```

{% hint style="info" %}
A set of built-in Partial Views are responsible for rendering the Blocks and Areas in a Block Grid. If you want to tweak or change the way the Block Grid is rendered, you can use the built-in Partial Views as a template:

1. Clone the views from [GitHub](https://github.com/umbraco/Umbraco-CMS). They can be found in `/src/Umbraco.Web.UI/Views/Partials/blockgrid/`.
2. Copy the cloned views to the local folder `Views/Partials/blockgrid/` .
3. Make changes to your copied views. The entry point for `GetBlockGridHtmlAsync()` is the view `default.cshtml` .
   {% endhint %}

### 2. Build custom rendering

The built-in value converter for the Block Grid property editor lets you use the block data as you like. Call the `Value<T>` method with a type of `BlockGridModel` to have the stored value returned as a `BlockGridModel` instance.

`BlockGridModel` contains the Block Grid configuration (like the number of columns as `GridColumns`) whilst also being an implementation of `IEnumerable<BlockGridItem>` (see details for `BlockGridItem` above).

The following example mimics the built-in rendering mechanism for rendering Blocks using Partial Views:

{% code title="View\.cshtml" %}

```csharp
@inherits Umbraco.Cms.Web.Common.Views.UmbracoViewPage
@using Umbraco.Cms.Core.Models.Blocks
@{
    var grid = Model.Value<BlockGridModel>("myGrid");

    // get the number of columns defined for the grid
    var gridColumns = grid.GridColumns;

    // iterate the block items
    foreach (var item in grid)
    {
        var content = item.Content;

        @await Html.PartialAsync("PathToMyFolderOfPartialViews/" + content.ContentType.Alias, item);
    }
}
```

{% endcode %}

If you do not want to use Partial Views, you can access the block item data directly within your rendering:

{% code title="View\.cshtml" %}

```csharp
@inherits Umbraco.Cms.Web.Common.Views.UmbracoViewPage
@using Umbraco.Cms.Core.Models.Blocks
@{
    var grid = Model.Value<BlockGridModel>("myGrid");

    // get the number of columns defined for the grid
    var gridColumns = grid.GridColumns;

    // iterate the block items
    foreach (var item in grid)
    {
        // get the content and settings of the block
        var content = item.Content;
        var settings = item.Settings;
        // get the areas of the block
        var areas = item.Areas;
        // get the dimensions of the block
        var rowSpan = item.RowSpan;
        var columnSpan = item.ColumnSpan;

        // render the block data
        <div style="background-color: #@(settings.Value<string>("color"))">
            <h2>@(content.Value<string>("title"))</h2>
            <span>This block is supposed to span <b>@rowSpan rows</b> and <b>@columnSpan columns</b></span>
        </div>
    }
}
```

{% endcode %}

## Using Block Grid with the Delivery API

When using Block Grid in a headless scenario with the [Content Delivery API](/umbraco-cms/develop-with-umbraco/headless-and-apis/content-delivery-api), the property outputs a structured JSON representation instead of rendered HTML.

The JSON structure includes:

* `gridColumns` - The number of columns configured for the grid (typically 12)
* `items` - An array of block items, each containing:
  * `content` - The block's content data
  * `settings` - The block's settings data (if configured)
  * `rowSpan` and `columnSpan` - Layout dimensions for the block
  * `areaGridColumns` - Number of columns for nested areas
  * `areas` - Array of nested areas within the block, each containing their own items

Your frontend application is responsible for:

* Parsing the grid layout structure
* Implementing CSS Grid or an equivalent layout system
* Rendering blocks recursively to handle nested areas
* Handling responsive behavior

For detailed information about the JSON structure and property expansion options, see [Property expansion and limiting](/umbraco-cms/develop-with-umbraco/headless-and-apis/content-delivery-api/property-expansion-and-limiting#block-grid).

## Write a Custom Layout Stylesheet

The default layout stylesheet is using CSS Grid. This can be modified to fit your implementation and your project.

### Adjusting the Default Layout Stylesheet

To make additions or overwrite parts of the default layout stylesheet, import the default stylesheet at the top of your own file.

```css
@import 'css/umbblockgridlayout.css';
```

You need to copy the Default Layout Stylesheet to your frontend. You can download the default layout stylesheet from the link within the DataType, we recommend putting the file in the `css` folder, example: `wwwroot/css/umbraco-blockgridlayout.css`.

### Write a new Layout Stylesheet

In this case, you would have to write the layout from scratch.

You are free to pick any style, meaning there is no requirement to use CSS Grid. It is, however, recommended to use CSS Grid to ensure complete compatibility with the Umbraco backoffice.

### CSS Class structure and available data

When extending or writing your own layout, you need to know the structure and what data is available.

For example: You can use the below HTML structure:

```html
<div class="umb-block-grid"
     style="--umb-block-grid--grid-columns: 12;"
>

    <!-- Notice this is the same markup used every time we will be printing a list of blocks: -->
    <div class="umb-block-grid__layout-container">

        <!-- repeated for each layout entry -->
        <div
            class="umb-block-grid__layout-item"
            data-content-element-type-alias="MyElementTypeAlias"
            data-content-element-type-key="00000000-0000-0000-0000-000000000000"
            data-element-udi="00000000-0000-0000-0000-000000000000"
            data-col-span="6"
            data-row-span="1"
            style="
            --umb-block-grid--item-column-span: 6;
            --umb-block-grid--item-row-span: 1;
            "
        >

            <!-- Here the Razor View or Custom View for this block will be rendered. -->

            <!-- Each razor view must render the 'area-container' them self.
            This can be done by the Razor helper method:

            @await Html.GetBlockGridItemAreasHtmlAsync(Model)

            The structure will be as printed below,
            Do notice targeting the 'area-container' needs a double selector as markup will be different in Backoffice.
            Here is an example of the CSS selector:
                .umb-block-grid__area-container, umb-block-grid-areas-container::part(area-container) {
                    position: relative;
                }
            -->
            <div
                class="umb-block-grid__area-container"
                style="--umb-block-grid--area-grid-columns: 9;"
            >

                <!-- repeated for each area for this block type. -->
                <div
                    class="umb-block-grid__area"
                    data-area-col-span="3"
                    data-area-row-span="1"
                    data-area-alias="MyAreaAlias"
                    style="
                    --umb-block-grid--grid-columns: 3;
                    --umb-block-grid--area-column-span: 3;
                    --umb-block-grid--area-row-span: 1;
                    ">

                        <!-- Notice here we print the same markup as when we print a list of blocks(same as the one in the root of this structure..):
                        <div class="umb-block-grid__layout-container">
                            ...
                        </div>
                        End of notice.  -->
                </div>
                <!-- end of repeat -->

            </div>


        </div>
        <!-- end of repeat -->

    </div>

</div>
```

## Build a Custom Backoffice View

Building Custom Views for Block representations in Backoffice is based on the same API for all Block Editors.

[Read about building a Custom View for Blocks here](/umbraco-cms/extend-your-project/backoffice-extensions/extending-overview/extension-types/block-custom-view)

## Creating a Block Grid programmatically

In this example, we will be creating content programmatically for a "spot" Blocks in a Block Grid.

1. Create an element type to represent block content called **Spot Element** with the following properties:

* A property called **title** with the editor of **Textstring**
* A property called **text** with the editor of **Textstring**

2. Create an element type to represent block content called **Spot Settings** with the following properties:

* A property called **featured** with the editor of **True/false**.

3. Add a property called **blockGrid** in a Document Type.
4. Select **Block Grid** as the property editor.
5. Click **Add** in the **Blocks** Settings and select **Spot Element**.
6. Select **Spot Settings** in the **Settings model** field.

![Block Grid - Block Configuration](/files/QHHmmILScrbwvpbENBU7)

The raw input data for the spots looks like this:

```csharp
new[]
{
    new { Title = "Item one", Text = "This is item one", Featured = false, ColumnSpan = 12, RowSpan = 1 },
    new { Title = "Item two", Text = "This is item two", Featured = true, ColumnSpan = 6, RowSpan = 2 }
}
```

The resulting JSON object stored for the Block Grid will look like this:

```json
{
   "contentData":[
      {
         "contentTypeKey":"fd01539a-5bcf-48f7-aee5-8ad925c75902",
         "udi":null,
         "key":"019f2a7a-35b4-45b3-b867-910b3f340f25",
         "values":[
            {
               "editorAlias":"Umbraco.TextBox",
               "culture":null,
               "segment":null,
               "alias":"title",
               "value":"Item one"
            },
            {
               "editorAlias":"Umbraco.TextBox",
               "culture":null,
               "segment":null,
               "alias":"text",
               "value":"This is item one"
            }
         ]
      },
      {
         "contentTypeKey":"fd01539a-5bcf-48f7-aee5-8ad925c75902",
         "udi":null,
         "key":"063f8062-8610-441a-97f1-ea6d73fe2678",
         "values":[
            {
               "editorAlias":"Umbraco.TextBox",
               "culture":null,
               "segment":null,
               "alias":"title",
               "value":"Item two"
            },
            {
               "editorAlias":"Umbraco.TextBox",
               "culture":null,
               "segment":null,
               "alias":"text",
               "value":"This is item two"
            }
         ]
      }
   ],
   "settingsData":[
      {
         "contentTypeKey":"03c43074-a4ba-4bd2-92b1-c3a35a0eed4d",
         "udi":null,
         "key":"5b2d74bc-3e85-4aa3-b684-4b1f11522d7c",
         "values":[
            {
               "editorAlias":"Umbraco.TrueFalse",
               "culture":null,
               "segment":null,
               "alias":"featured",
               "value":0
            }
         ]
      },
      {
         "contentTypeKey":"03c43074-a4ba-4bd2-92b1-c3a35a0eed4d",
         "udi":null,
         "key":"1c6599fc-6558-4a0b-9da8-4f002925f59f",
         "values":[
            {
               "editorAlias":"Umbraco.TrueFalse",
               "culture":null,
               "segment":null,
               "alias":"featured",
               "value":1
            }
         ]
      }
   ],
   "expose":[
      {
         "contentKey":"019f2a7a-35b4-45b3-b867-910b3f340f25",
         "culture":null,
         "segment":null
      },
      {
         "contentKey":"063f8062-8610-441a-97f1-ea6d73fe2678",
         "culture":null,
         "segment":null
      }
   ],
   "Layout":{
      "Umbraco.BlockGrid":[
         {
            "columnSpan":12,
            "rowSpan":1,
            "areas":[

            ],
            "contentUdi":null,
            "settingsUdi":null,
            "contentKey":"019f2a7a-35b4-45b3-b867-910b3f340f25",
            "settingsKey":"5b2d74bc-3e85-4aa3-b684-4b1f11522d7c"
         },
         {
            "columnSpan":12,
            "rowSpan":1,
            "areas":[

            ],
            "contentUdi":null,
            "settingsUdi":null,
            "contentKey":"063f8062-8610-441a-97f1-ea6d73fe2678",
            "settingsKey":"1c6599fc-6558-4a0b-9da8-4f002925f59f"
         }
      ]
   }
}
```

For each item in the raw data, we need to create:

* One `contentData` entry with the *title* and *text*.
* One `settingsData` entry with the *featured* value (the checkbox expects `"0"` or `"1"` as data value).
* One `layout` entry with the desired column and row spans.

All `contentData` and `layoutData` entries need their own unique `Udi` as well as the ID (key) of their corresponding Element Types. In this sample, we only have one Element Type for content (`spotElement`) and one for settings (`spotSettings`). In a real life scenario, there could be any number of Element Type combinations.

7. Create a class called **Model.cs** containing the following to transform the raw data into Block Grid-compatible JSON:

{% code title="Models.cs" lineNumbers="true" %}

```csharp
using System.Text.Json.Serialization;

namespace My.Site.Models;

// this is the "root" of the block grid data
public class BlockGridData
{
    public BlockGridData(BlockGridElementData[] contentData, BlockGridElementData[] settingsData, BlockGridExposeData[] expose, BlockGridLayout layout)
    {
        ContentData = contentData;
        SettingsData = settingsData;
        Expose = expose;
        Layout = layout;
    }

    [JsonPropertyName("contentData")]
    public BlockGridElementData[] ContentData { get; }

    [JsonPropertyName("settingsData")]
    public BlockGridElementData[] SettingsData { get; }

    [JsonPropertyName("expose")]
    public BlockGridExposeData[] Expose { get; }

    [JsonPropertyName("Layout")]
    public BlockGridLayout Layout { get; }
}

// this represents an item in the block grid content or settings data collection
public class BlockGridElementData
{
    public BlockGridElementData(Guid contentTypeKey, Guid key, BlockGridValueData[] values)
    {
        ContentTypeKey = contentTypeKey;
        Key = key;
        Values = values;
    }

    [JsonPropertyName("contentTypeKey")]
    public Guid ContentTypeKey { get; }

    [JsonPropertyName("key")]
    public Guid Key { get; }

    [JsonPropertyName("values")]
    public BlockGridValueData[] Values { get; }
}

public class BlockGridValueData
{
    public BlockGridValueData(string alias, string editorAlias, object? value)
    {
        Alias = alias;
        EditorAlias = editorAlias;
        Value = value;
    }

    [JsonPropertyName("alias")]
    public string Alias { get; }

    [JsonPropertyName("editorAlias")]
    public string EditorAlias { get; }

    [JsonPropertyName("value")]
    public object? Value { get; }
}

// this represents an item in the block grid expose data collection
public class BlockGridExposeData
{
    public BlockGridExposeData(Guid contentKey) => ContentKey = contentKey;

    [JsonPropertyName("contentKey")]
    public Guid ContentKey { get; }
}

// this is a wrapper for the block grid layout, purely required for correct serialization
public class BlockGridLayout
{
    public BlockGridLayout(BlockGridLayoutItem[] layoutItems) => LayoutItems = layoutItems;

    [JsonPropertyName("Umbraco.BlockGrid")]
    public BlockGridLayoutItem[] LayoutItems { get; }
}

// this represents an item in the block grid layout collection
public class BlockGridLayoutItem
{
    public BlockGridLayoutItem(int columnSpan, int rowSpan, Guid contentKey, Guid settingsKey)
    {
        ColumnSpan = columnSpan;
        RowSpan = rowSpan;
        ContentKey = contentKey;
        SettingsKey = settingsKey;
    }

    [JsonPropertyName("columnSpan")]
    public int ColumnSpan { get; }

    [JsonPropertyName("rowSpan")]
    public int RowSpan { get; }

    [JsonPropertyName("contentKey")]
    public Guid ContentKey { get; }

    [JsonPropertyName("settingsKey")]
    public Guid SettingsKey { get; }

    [JsonPropertyName("areas")]
    // areas are omitted from this sample for abbreviation
    public object[] Areas { get; } = [];
}
```

{% endcode %}

9. By injecting [ContentService](https://apidocs.umbraco.com/v18/csharp/api/Umbraco.Cms.Core.Services.ContentService.html) and [ContentTypeService](https://apidocs.umbraco.com/v18/csharp/api/Umbraco.Cms.Core.Services.ContentTypeService.html) into an API controller, we can transform the raw data into Block Grid JSON. It can then be saved to the target content item. Create a class called **BlockGridTestController.cs** containing the following:

{% code title="BlockGridTestController.cs" lineNumbers="true" %}

```csharp
using Microsoft.AspNetCore.Mvc;
using My.Site.Models;
using Umbraco.Cms.Core.Models;
using Umbraco.Cms.Core.Serialization;
using Umbraco.Cms.Core.Services;

namespace My.Site.Controllers;

[ApiController]
[Route("/umbraco/api/blockgridtest")]
public class BlockGridTestController : Controller
{
    private readonly IContentService _contentService;
    private readonly IContentTypeService _contentTypeService;
    private readonly IJsonSerializer _serializer;

    public BlockGridTestController(IContentService contentService, IContentTypeService contentTypeService, IJsonSerializer serializer)
    {
        _contentService = contentService;
        _contentTypeService = contentTypeService;
        _serializer = serializer;
    }

    // POST: /umbraco/api/blockgridtest/create
    [HttpPost("create")]
    public ActionResult Create()
    {
        // get the item content to modify
        IContent? content = _contentService.GetById(Guid.Parse("7ed0bd1f-2a52-4b45-9811-2560b907fe48"));
        if (content == null)
        {
            return NotFound("Could not find the content item to modify");
        }

        // get the element types for spot blocks (content and settings)
        IContentType? spotContentType = _contentTypeService.Get("spotElement");
        IContentType? spotSettingsType = _contentTypeService.Get("spotSettings");
        if (spotContentType == null || spotSettingsType == null)
        {
            return NotFound("Could not find one or more content types for block data");
        }

        // this is the raw data to insert into the block grid
        var rawData = new[]
        {
            new { Title = "Item one", Text = "This is item one", Featured = false, ColumnSpan = 12, RowSpan = 1 },
            new { Title = "Item two", Text = "This is item two", Featured = true, ColumnSpan = 6, RowSpan = 2 }
        };

        // build the individual parts of the block grid data from the raw data
        var contentData = new List<BlockGridElementData>();
        var settingsData = new List<BlockGridElementData>();
        var exposeData = new List<BlockGridExposeData>();
        var layoutItems = new List<BlockGridLayoutItem>();
        foreach (var data in rawData)
        {
            // generate new keys for block content and settings
            var contentKey = Guid.NewGuid();
            var settingsKey = Guid.NewGuid();

            // create new content data
            var contentValues = new BlockGridValueData[]
            {
                new("title", "Umbraco.TextBox", data.Title),
                new("text", "Umbraco.TextBox", data.Text),
            };
            contentData.Add(new BlockGridElementData(spotContentType.Key, contentKey, contentValues));

            // create new settings data
            var settingValues = new BlockGridValueData[]
            {
                new("featured", "Umbraco.TrueFalse", data.Featured ? "1" : "0"),
            };
            settingsData.Add(new BlockGridElementData(spotSettingsType.Key, settingsKey, settingValues));

            // create a new expose item
            exposeData.Add(new BlockGridExposeData(contentKey));

            // create a new layout item
            layoutItems.Add(new BlockGridLayoutItem(data.ColumnSpan, data.RowSpan, contentKey, settingsKey));
        }

        // construct the block grid data from layout, content and settings
        var blockGridData = new BlockGridData(
            [.. contentData],
            [.. settingsData],
            [.. exposeData],
            new BlockGridLayout([.. layoutItems]));

        // serialize the block grid data as JSON and save it to the "blockGrid" property on the content item
        var propertyValue = _serializer.Serialize(blockGridData);
        content.SetValue("blockGrid", propertyValue);
        _contentService.Save(content);

        return Ok("Saved");
    }
}
```

{% endcode %}

For the above code `IContent? content = _contentService.GetById(Guid.Parse("efba7b97-91b6-4ddf-b2cc-eef89ff48c3b"));` change the id with your content node that is using the Block Grid.

10. To test this implementation, run the project and send a `POST` request to `/umbraco/api/blockgridtest/create` after your domain name. If the result shows as **Saved**, then check your content node, and you will see the 2 spotElement contents.

![Block Grid - Result](/files/R1mig9D7xtbutSVPYhV6)

*This can also be tested via Postman as well if preferred.*


# Block Level Variance

An intro to achieving content variance at block level.

In a variant context, a Block Editor behaves like any other Umbraco property editor by default. The Blocks contained within the editor "belong" to the Document variant, and there is no connection between Blocks across variants.

In other words, both Block content and structure can vary between each Document variant.

![Default Block Editor behavior in the backoffice](/files/6iqDd9sEEDaZkTcp62Gy)

This is the desired behavior for many cases. However, in some cases it is preferable to have a shared Block structure across all variants, where only the Block content varies.

This is known as Block Level Variance:

![Block Level Variance in the backoffice](/files/LjZGfPvSbDUyQ3ilbIT5)

Block Level Variance is achieved when:

* The [Document Type](/umbraco-cms/model-your-content/content-types-and-structure/data/defining-content/default-document-types#document-type) is configured for variance, and
* The Block Editor property is *not* configured for variance, and
* The Block Editor property editor is configured to use [Element Types](/umbraco-cms/model-your-content/content-types-and-structure/data/defining-content/default-document-types#element-type) that *do* vary.

## The "unexposed" Block state

When adding a new *variant* Block to one Document variant, it is automatically added to all variants of the Document.

The Block will start out in an "unexposed" state for all other Document variants than the one where it was added. It will remain like that for each variant until it is edited in that variant.

The "unexposed" state is visualized by a dimmed-down icon and title (or likely a missing title, if [Umbraco Flavored Markdown](/umbraco-cms/model-your-content/property-editors/umbraco-flavored-markdown) is used):

![Block Level Variance in the backoffice - with an unexposed block](/files/b2Npv1gkbdh2m4rHEDXX)

{% hint style="info" %}
"Unexposed" Blocks are omitted from the published Document output. So, you do not need to worry about defensive coding to avoid rendering these Blocks.
{% endhint %}

## Invariance vs. Block Level Variance

It is entirely possible to mix and match variance and invariance within the scope of Block Level Variance. Invariance is fully supported, both at Block level and at Block property level.

Invariance within Block Level Variance follows the same rules as invariance at Document level:

* Invariant content is added to and updated across all Document variants.
* Invariant content is explicitly published for all published Document variants when one or more variants are published.

### Examples

Consider a Document with English and Danish language variants, which is published in both languages.

* An editor opens the English variant.
* They add an invariant Block, and
* They re-publish the English variant.

**Result:** The new block will appear in both the English and Danish published content.

* An editor opens the Danish variant.
* They update an invariant property value in a variant Block, and
* They re-publish the Danish variant.

**Result:** The updated property value appears in both the English and Danish published content.

## Structure vs. Block Level Variance

The Block Editor structure is *invariant* for Block Level Variance. This means that the structure follows the same rules for invariance as outlined in the section above.

In other words: If an editor changes the order of the Blocks in one Document variant, it changes for all Document variants. The change is applied to all published Document variants, as soon as one or more variants are published.


# Block List

`Schema Alias: Umbraco.BlockList`

`UI Alias: Umb.PropertyEditorUi.BlockList`

`Returns: IEnumerable<BlockListItem>`

**Block List** is a list editing property editor, using [Element Types](/umbraco-cms/model-your-content/content-types-and-structure/data/defining-content/default-document-types#element-type) to define the list item schema.

{% hint style="info" %}
The single-mode Block List migration now runs by default when upgrading to v18. If you have custom property editors that nest Block List values, you must implement and register `ITypedSingleBlockListProcessor` before upgrading. See the [Single block migration](/umbraco-cms/get-started/upgrading-and-migrating/find-your-upgrade-path/single-block-migration) article for details.
{% endhint %}

## Configure Block List

The Block List property editor is configured in the same way as any standard property editor, via the *Data Types* admin interface.

To set up your Block List Editor property, create a new *Data Type* and select **Block List** from the list of available property editors.

Then you will see the configuration options for a Block List as shown below.

![Block List - Data Type Definition](/files/AxE8ngnR0Uw7e43QyUcx)

The Data Type editor allows you to configure the following properties:

* **Available Blocks** - Here you will define the Block Types to be available for use in the property. For more information, see [Setup Block Types](#setup-block-types).
* **Amount** - Sets the minimum and/or maximum number of blocks that should be allowed in the list.
* **Live editing mode** - Enabling this will make editing of a block happening directly to the document model, making changes appear as you type.
* **Inline editing mode** - Enabling this will change editing experience to inline, meaning that editing the data of blocks happens at sight as accordions.
* **Property editor width** - Overwrite the width of the property editor. This field takes any valid css value for "max-width".
* **Create modal size**- Controls the size of the overlay dialog that appears when an editor clicks to create or edit a block.
* **Single block mode** - When enabled, the Block List is restricted to a single block and the property returns a `BlockListItem<>` instead of `BlockListModel`

{% hint style="warning" %}
Single block mode is deprecated. Use the Single Block property editor instead.
{% endhint %}

## Setup Block Types

Block Types are **Element Types** which need to be created before you can start configuring them as Block Types. This can be done directly from the property editor setup process. You can also set them up beforehand and add them to the block list after.

Once you have added an element type as a Block Type on your Data Type you will have the option to configure it further.

![Block List - Data Type Block Configuration](/files/rFW5c3MhYJntFCvUEjdj)

Each Block has a set of properties that are optional to configure. They are described below.

### Editor Appearance

You can configure the properties in the group to customize the user experience for your content editors. This helps them to quickly identify and select the right blocks for their content.

* **Label** - Define a label for the appearance of the Block in the editor. The label uses [Umbraco Flavored Markdown](/umbraco-cms/model-your-content/property-editors/umbraco-flavored-markdown) to display values of properties. The label is also used for search in the **Add Block** dialog during content editing. If no label is defined, the block will not be searchable. The search does not fall back to the block’s name.
* **Overlay editor size** - Set the size for the Content editor overlay for editing this block.

### Data Models

It is possible to use two separate Element Types for your Block Types. Its required to have one for Content and optional to add one for Settings.

* **Content model** - This presents the Element Type used as model for the content section of this Block. This cannot be changed, but you can open the Element Type to perform edits or view the properties available. Useful when writing your Label.
* **Settings model** - Add a Settings section to your Block based on a given Element Type. When picked you can open the Element Type or choose to remove the settings section again.

### Catalogue appearance

These properties refer to how the Block is presented in the Block catalogue, when editors choose which Blocks to use for their content.

* **Background color** - Define a background color to be displayed beneath the icon or thumbnail. For example, `#424242`.
* **Icon color** - Change the color of the Element Type icon. For example, `#242424`.
* **Thumbnail** - Pick an image or SVG file to replace the icon of this Block in the catalogue.

The thumbnails for the catalogue are displayed at a maximum height of 150px and will scale proportionally to maintain their original aspect ratio. Any standard image format (PNG, JPG, SVG) will work effectively.

{% hint style="info" %}
Configuring the catalogue appearance improves the content editor experience. A well-designed block catalogue with colors and thumbnails makes it easier for editors to quickly identify and select the right blocks for their content.
{% endhint %}

### Advanced

These properties are relevant when you work with custom views.

* **Force hide content editor** - If you made a custom view that enables you to edit the content part of a block and you are using default editing mode (not inline) you might want to hide the content-editor from the block editor overlay.

## Editing Blocks

When viewing a **Block List** editor in the Content section for the first time, you will be presented with the option to add content.

![Block List - Create new](/files/2HTSIcHTdMfEfOVK5ds5)

Clicking the "Create new" button brings up the Block Catalogue. If you only have a single block configured, this button will display "Add {block type name}".

![Block List - Setup](/files/ecsawm8qbKLT8jcONDp5)

The Block Catalogue looks different depending on the amount of available Blocks and their catalogue appearance.

![Block List - example setup from Umbraco.com](/files/sWbIwxVq76Y87Cw8Q7gJ)

Click the Block Type you wish to create and a new Block will appear in the list.

Depending on whether your Block List Editor is setup to use default or inline editing mode you will see one of the following things happening:

In default mode you will enter the editing overlay of that Block:

![Block List - Overlay editing](/files/zFeCHWilacLmR4ydqJye)

In inline editing mode the new Blocks will expand to show its inline editor:

![Block List - Inline editing](/files/dNKtHB8k6jcUpC2DyLw9)

More Blocks can be added to the list by clicking the "Create new" button. You can also use the inline Add button that appears on hover between or above existing Blocks.

![Block List - Create new](/files/2SYdRTiT5NGTRUK4DV2o)

To reorder the Blocks, click and drag a Block up or down to place in the desired order.

To delete a Block click the trash-bin icon appearing on hover.

## Rendering Block List Content

Rendering the stored value of your **Block List** property can be done in two ways.

### 1. Default rendering

You can choose to use the built-in rendering mechanism for rendering blocks via a Partial View for each block.

The default rendering method is named `GetBlockListHtml()` and comes with a few options to go with it. The typical use could be:

```csharp
@Html.GetBlockListHtml(Model, "MyBlocks")
```

"MyBlocks" above is the alias for the Block List editor.

If using ModelsBuilder the example can be simplified:

Example:

```csharp
@Html.GetBlockListHtml(Model.MyBlocks)
```

To make this work you will need to create a Partial View for each block. The partial view should be named by the alias of the Element Type that is being used as Content Model.

These partial views must be placed in this folder: `Views/Partials/BlockList/Components/`. Example: `Views/Partials/BlockList/Components/MyElementTypeAliasOfContent.cshtml`.

A Partial View will receive the model of `Umbraco.Core.Models.Blocks.BlockListItem`. This gives you the option to access properties of the Content and Settings section of your Block.

In this example of a Partial view for a Block Type, the `MyElementTypeAliasOfContent` and `MyElementTypeAliasOfSettings` should correspond with the selected Element Type Alias for the given model.

Example:

```csharp
@inherits Umbraco.Cms.Web.Common.Views.UmbracoViewPage<Umbraco.Cms.Core.Models.Blocks.BlockListItem>;
@using ContentModels = Umbraco.Cms.Web.Common.PublishedModels;
@{
    var content = (ContentModels.MyElementTypeAliasOfContent)Model.Content;
    var settings = Model.Settings as ContentModels.MyElementTypeAliasOfContent; // Cast Model.Settings safely using 'as' to avoid null reference exceptions
}

@* Output the value of field with alias 'heading' from the Element Type selected as Content section *@
<h1>@content.Value("heading")</h1>
```

`ContentModels.MyElementTypeAliasOfContent` must be replaced with the PascalCase version of your Element Type alias, as generated by ModelsBuilder. For example, an Element Type with alias `exampleBlock` becomes `ContentModels.ExampleBlock`.

With ModelsBuilder:

```csharp
@* Output the value of field with alias 'heading' from the Element Type selected as Content section *@
<h1>@content.Heading</h1>
```

### 2. Build your own rendering

A built-in value converter is available to use the data as you like. Call the `Value<T>` method with a generic type of `IEnumerable<BlockListItem>` and the stored value will be returned as a list of `BlockListItem` entities.

Example:

```csharp
@using Umbraco.Cms.Core.Models.Blocks
@using Umbraco.Cms.Web.Common.PublishedModels;
@inherits Umbraco.Cms.Web.Common.Views.UmbracoViewPage<ContentModels.TestBlockPage>
@using ContentModels = Umbraco.Cms.Web.Common.PublishedModels;
@{
    var blocks = Model.Value<IEnumerable<BlockListItem>>("myBlocksProperty");
    foreach (var block in blocks)
    {
        var content = block.Content;

        @Html.Partial("MyFolderOfBlocks/" + content.ContentType.Alias + ".cshtml", block)
    }
}
```

Replace `MyFolderOfBlocks/` with the path to your partial views folder. If using the default location, this should be `~/Views/Partials/BlockList/Components/`.

Each item is a `BlockListItem` entity that contains two main properties `Content` and `Settings`. Each of these is a `IPublishedElement` which means you can use all the value converters you are used to using.

Example:

```csharp
@using Umbraco.Cms.Core.Models.Blocks
@using Umbraco.Cms.Web.Common.PublishedModels;
@inherits Umbraco.Cms.Web.Common.Views.UmbracoViewPage<ContentModels.TestBlockPage>
@using ContentModels = Umbraco.Cms.Web.Common.PublishedModels;
@{
    var blocks = Model.Value<IEnumerable<BlockListItem>>("myBlocksProperty");
    foreach (var block in blocks)
    {
        var content = (ContentModels.MyAliasOfContentElementType)block.Content;
        var settings = (ContentModels.MyAliasOfSettingsElementType)block.Settings;

        <h1>@content.MyExampleHeadlinePropertyAlias</h1>
    }
}
```

## Extract Block List Content data

Sometimes, you might want to use the Block List Editor to hold some data and not necessarily render a view. This applies when the data should be presented in different areas on a page. An example could be a product page with variants stored in a Block List Editor.

In this case, you can extract the variant's data using the following, which returns `IEnumerable<IPublishedElement>`.

Example:

```csharp
@using Umbraco.Cms.Core.Models.Blocks
@using Umbraco.Cms.Web.Common.PublishedModels;
@inherits Umbraco.Cms.Web.Common.Views.UmbracoViewPage<ContentModels.TestBlockPage>
@using ContentModels = Umbraco.Cms.Web.Common.PublishedModels;
@{
    var variants = Model.Value<IEnumerable<BlockListItem>>("variants").Select(x => x.Content);
    foreach (var variant in variants)
    {
        <h4>@variant.Value("variantName")</h4>
        <p>@variant.Value("description")</p>
    }
}
```

`.Select(x => x.Content)` strips away the BlockListItem wrapper and returns the IPublishedElement content data, discarding the settings.

If using ModelsBuilder the example can be simplified:

Example:

```csharp
@using Umbraco.Cms.Core.Models.Blocks
@using Umbraco.Cms.Web.Common.PublishedModels;
@inherits Umbraco.Cms.Web.Common.Views.UmbracoViewPage<ContentModels.TestBlockPage>
@using ContentModels = Umbraco.Cms.Web.Common.PublishedModels;
@{
    var variants = Model.Variants.Select(x => x.Content).OfType<ProductVariant>();
    foreach (var variant in variants)
    {
        <h4>@variant.VariantName</h4>
        <p>@variant.Description</p>
    }
}
```

Replace the following:

* `Model.Variants` with the ModelsBuilder-generated property name for your Block List property, for example `Model.BlockListPropertyExample`.
* `<ProductVariant>` with the ModelsBuilder-generated class name for your element type, for example `QuoteBlock`.

If your Block List Editor only uses a single block, you can cast the collection to a specific type. Supply a type `T` using `.OfType<T>()`, otherwise the return value will be `IEnumerable<IPublishedElement>`.

## Build a Custom Backoffice View

Building Custom Views for Block representations in Backoffice is the same for all Block Editors. [Read about building a Custom View for Blocks here](/umbraco-cms/extend-your-project/backoffice-extensions/extending-overview/extension-types/block-custom-view)

## Working with Block Lists Programmatically

Sometimes you need to create or update Block List content via code, for example, during content migrations, data imports, or automated workflows. This section explains how to achieve this using `IContentService` and `IContentTypeService`.

### Understanding the Block List JSON Format

Block List data is stored as a JSON string. Understanding this structure is essential before writing any import code.

* `layout`: Defines the order blocks appear in and links each block to its content through a `contentKey` (a GUID). If the block has a Settings model, the layout entry also holds a `settingsKey`.
* `contentData`: Holds the property values for each block. Every entry must include a `key` matching a `contentKey` in the layout, a `contentTypeKey` matching the GUID of the Element Type, and a `values` array of `{ "alias", "value" }` pairs.
* `settingsData`: Holds settings values if your Block Type has a Settings model configured. It follows the same shape as `contentData`.
* `expose`: Lists which blocks are visible, per culture and segment. A block is only rendered if it has a matching `expose` entry. For invariant content, use `null` for both `culture` and `segment`.

{% hint style="warning" %}
Before Umbraco 14, Block List data used a different format. Blocks were referenced by UDI (`umb://element/...`), property values were stored as flat keys, and there was no `expose` array. That legacy format is no longer supported in Umbraco 18, so always write new content in the format shown below.
{% endhint %}

```json
{
  "layout": {
    "Umbraco.BlockList": [
      { "contentKey": "abc123cd-0000-0000-0000-000000000000" }
    ]
  },
  "contentData": [
    {
      "key": "abc123cd-0000-0000-0000-000000000000",
      "contentTypeKey": "faeccfe7-ebea-4461-9caa-cc9e3541c969",
      "values": [
        { "alias": "myTextProperty", "value": "Hello world" }
      ]
    }
  ],
  "settingsData": [],
  "expose": [
    { "contentKey": "abc123cd-0000-0000-0000-000000000000", "culture": null, "segment": null }
  ]
}
```

{% hint style="info" %}
You do not need to build this JSON by hand. Umbraco exposes strongly-typed models — `BlockListValue`, `BlockListLayoutItem`, `BlockItemData`, `BlockPropertyValue`, and `BlockItemVariation` — that serialize to exactly this structure through `IJsonSerializer`. The examples below use these models.
{% endhint %}

### Creating a Block List Programmatically

The following example shows how to build a Block List and save it to an existing content node. It assumes you have:

* A Document Type with a Block List property aliased `timelineItems`.
* An Element Type aliased `timelineItem` with two properties: `eventName` (Textstring Data Type) and `period` (Textstring Data Type).

#### Controller

Create a `TimelineImportController.cs` file in `MyProject/Controllers`.

{% code title="TimelineImportController.cs" %}

```csharp
using Microsoft.AspNetCore.Mvc;
using Umbraco.Cms.Core;
using Umbraco.Cms.Core.Models.Blocks;
using Umbraco.Cms.Core.Serialization;
using Umbraco.Cms.Core.Services;

[ApiController]
[Route("/umbraco/api/timelineimport")]
public class TimelineImportController : ControllerBase
{
    private readonly IContentService _contentService;
    private readonly IContentTypeService _contentTypeService;
    private readonly IJsonSerializer _jsonSerializer;

    public TimelineImportController(
        IContentService contentService,
        IContentTypeService contentTypeService,
        IJsonSerializer jsonSerializer)
    {
        _contentService = contentService;
        _contentTypeService = contentTypeService;
        _jsonSerializer = jsonSerializer;
    }

    [HttpPost("import")]
    public IActionResult Import([FromBody] ImportModel importModel)
    {
        try
        {
            if (!Guid.TryParse(importModel.PageGuid, out var pageId))
                return BadRequest("Invalid pageGuid value.");

            var page = _contentService.GetById(pageId);
            if (page == null)
                return NotFound("Page not found.");

            if (!page.Properties.Contains(importModel.BlockListAlias))
                return BadRequest($"Property '{importModel.BlockListAlias}' does not exist.");

            var elementType = _contentTypeService.Get(importModel.ElementTypeAlias);
            if (elementType == null)
                return NotFound($"Element Type '{importModel.ElementTypeAlias}' not found.");

            var layout = new List<BlockListLayoutItem>();
            var contentData = new List<BlockItemData>();
            var expose = new List<BlockItemVariation>();

            foreach (var item in importModel.Items)
            {
                // Generate a unique key (GUID) for each block. Never reuse or hardcode these.
                var contentKey = Guid.NewGuid();

                layout.Add(new BlockListLayoutItem(contentKey));

                contentData.Add(new BlockItemData(contentKey, elementType.Key, elementType.Alias)
                {
                    Values =
                    {
                        new BlockPropertyValue { Alias = "eventName", Value = item.Name },
                        new BlockPropertyValue { Alias = "period", Value = $"{item.StartDate} - {item.EndDate}" }
                    }
                });

                // A block is only rendered if it is exposed.
                // Invariant content uses null for both culture and segment.
                expose.Add(new BlockItemVariation(contentKey, culture: null, segment: null));
            }

            var blockListValue = new BlockListValue(layout)
            {
                ContentData = contentData,
                Expose = expose
            };

            page.SetValue(importModel.BlockListAlias, _jsonSerializer.Serialize(blockListValue));

            // Calling Publish() alone without Save() first will not persist changes.
            _contentService.Save(page);
            var publishResult = _contentService.Publish(page, ["*"]);

            if (!publishResult.Success)
                return BadRequest($"Failed to publish page: {publishResult.Result}");

            return Ok("Items imported and published successfully.");
        }
        catch (Exception ex)
        {
            return StatusCode(500, $"Import failed: {ex.Message}");
        }
    }
}
```

{% endcode %}

#### Request Models

{% code title="MyProject/Controllers/ImportModel.cs" %}

```csharp
public class ImportModel
{
    public string PageGuid { get; set; } = string.Empty;
    public string BlockListAlias { get; set; } = string.Empty;
    public string ElementTypeAlias { get; set; } = string.Empty;
    public List<TimelineItemModel> Items { get; set; } = new();
}

public class TimelineItemModel
{
    public string Name { get; set; } = string.Empty;
    public string StartDate { get; set; } = string.Empty;
    public string EndDate { get; set; } = string.Empty;
}
```

{% endcode %}

#### Testing the Import

1. Rebuild and run your project.
2. Make a POST request to:

```
POST https://localhost:{port}/umbraco/api/timelineimport/import
Content-Type: application/json
```

With this body, substituting your actual GUID from the **Info** tab:

```json
{
  "pageGuid": "YOUR-GUID-FROM-INFO-TAB",
  "blockListAlias": "timelineItems",
  "elementTypeAlias": "timelineItem",
  "items": [
    { "name": "Project launched", "startDate": "2021", "endDate": "2022" },
    { "name": "First release", "startDate": "2022", "endDate": "2023" }
  ]
}
```

You can use Postman, Bruno, or the browser's fetch console to make the call. If you get a 401 back, the endpoint needs authentication. In that case, the quickest fix for local testing is to add `[AllowAnonymous]` to the controller temporarily.

3. Open your content node in the Backoffice.
4. Check the `timelineItems` Block List property. You should see the imported blocks populated with your data.

![Block List created programmatically displayed in the Backoffice](/files/TLT8rFMwTjQxSVbzhs1m)

5. Create a Partial View for the `timelineItem` element type to render the imported blocks on the frontend at: `Views/Partials/BlockList/Components/timelineItem.cshtml`.

**Example partial:**

{% code title="timelineItem.cshtml" %}

```cshtml
@inherits Umbraco.Cms.Web.Common.Views.UmbracoViewPage<Umbraco.Cms.Core.Models.Blocks.BlockListItem>
@{
    var eventName = Model.Content.Value("eventName")?.ToString();
    var period = Model.Content.Value("period")?.ToString();
}
<div class="timeline-item">
    <h3>@eventName</h3>
    <p>@period</p>
</div>
```

{% endcode %}

6. Render the Block List in your page template using:

```cshtml
@Html.GetBlockListHtml(Model, "timelineItems")
```

7. Browse to your page on the frontend (for example, `https://localhost:{port}`) and you should see each imported block rendered.

### Appending to an Existing Block List

By default, calling `SetValue()` with a new JSON structure overwrites all existing blocks. Use this approach instead if you need to preserve existing content.

To append new blocks to an existing list without losing current content, read and deserialize the existing value first. Then append to those collections before saving. Update the `Import` method in your controller:

```csharp
[HttpPost("import")]
public IActionResult Import([FromBody] ImportModel importModel)
{
    try
    {
        if (!Guid.TryParse(importModel.PageGuid, out var pageId))
            return BadRequest("Invalid pageGuid value.");

        var page = _contentService.GetById(pageId);
        if (page == null)
            return NotFound("Page not found.");

        if (!page.Properties.Contains(importModel.BlockListAlias))
            return BadRequest($"Property '{importModel.BlockListAlias}' does not exist.");

        var elementType = _contentTypeService.Get(importModel.ElementTypeAlias);
        if (elementType == null)
            return NotFound($"Element Type '{importModel.ElementTypeAlias}' not found.");

        // Read the existing value and deserialise it, or start from an empty Block List.
        var existingJson = page.GetValue<string>(importModel.BlockListAlias);
        var blockListValue = string.IsNullOrWhiteSpace(existingJson)
            ? new BlockListValue()
            : _jsonSerializer.Deserialize<BlockListValue>(existingJson) ?? new BlockListValue();

        // Copy the existing layout so new items can be appended to it.
        var layout = blockListValue.GetLayouts()?.ToList() ?? new List<BlockListLayoutItem>();

        // Append new blocks to the existing collections
        foreach (var item in importModel.Items)
        {
            var contentKey = Guid.NewGuid();

            layout.Add(new BlockListLayoutItem(contentKey));

            blockListValue.ContentData.Add(new BlockItemData(contentKey, elementType.Key, elementType.Alias)
            {
                Values =
                {
                    new BlockPropertyValue { Alias = "eventName", Value = item.Name },
                    new BlockPropertyValue { Alias = "period", Value = $"{item.StartDate} - {item.EndDate}" }
                }
            });

            blockListValue.Expose.Add(new BlockItemVariation(contentKey, culture: null, segment: null));
        }

        // Write the updated layout back to the Block List.
        blockListValue.Layout[Constants.PropertyEditors.Aliases.BlockList] = layout;

        page.SetValue(importModel.BlockListAlias, _jsonSerializer.Serialize(blockListValue));
        _contentService.Save(page);
        var publishResult = _contentService.Publish(page, ["*"]);

        if (!publishResult.Success)
            return BadRequest($"Failed to publish page: {publishResult.Result}");

        return Ok("Items appended and published successfully.");
    }
    catch (Exception ex)
    {
        return StatusCode(500, $"Import failed: {ex.Message}");
    }
}
```

### Using Settings Models

If your Block Type has a Settings model configured, each block needs a `settingsKey` referenced in both `layout` and `settingsData`. A Settings model is the optional second Element Type you can attach to a block. It is commonly used to let editors control things like background color, padding, or visibility toggles separately from the block's content.

To use settings, fetch both Element Types and generate a separate key for each block's settings entry. Declare a `settingsData` list alongside the other collections and pass it when constructing the value: `new BlockListValue(layout) { ContentData = contentData, SettingsData = settingsData, Expose = expose }`.

```csharp
var contentElementType = _contentTypeService.Get("timelineItem");
var settingsElementType = _contentTypeService.Get("timelineItemSettings");

var contentKey  = Guid.NewGuid();
var settingsKey = Guid.NewGuid();

// Layout entry references both keys
layout.Add(new BlockListLayoutItem(contentKey, settingsKey));

// Content entry uses the content key and content Element Type
contentData.Add(new BlockItemData(contentKey, contentElementType.Key, contentElementType.Alias)
{
    Values =
    {
        new BlockPropertyValue { Alias = "eventName", Value = "Project launched" },
        new BlockPropertyValue { Alias = "period", Value = "2021 - 2022" }
    }
});

// Settings entry uses the settings key and settings Element Type
settingsData.Add(new BlockItemData(settingsKey, settingsElementType.Key, settingsElementType.Alias)
{
    Values =
    {
        new BlockPropertyValue { Alias = "isHighlighted", Value = "1" }
    }
});

// The block still needs an expose entry, which references the content key only
expose.Add(new BlockItemVariation(contentKey, culture: null, segment: null));
```

{% hint style="info" %}
Settings do not need their own `expose` entry — `expose` only references a block's `contentKey`. If your block type has no Settings model, leave `SettingsData` empty (its default).
{% endhint %}

### Handling Multilingual (Variant) Content

If your site uses multiple languages and your Document Type is configured to vary by culture, pass the target culture string to `SetValue()` and `GetValue()`.

Ensure **Allow vary by culture** is enabled on your Document Type in the Settings tab. The Block List property's **Variation** ("Shared across cultures") should be disabled. The **Variation** option on the Block List property editor only appears once the Document Type is set to vary by culture.

```csharp
string targetCulture = "da-DK";

// Read the existing value for the correct culture
var existingJson = page.GetValue<string>(importModel.BlockListAlias, culture: targetCulture);
var blockListValue = string.IsNullOrWhiteSpace(existingJson)
    ? new BlockListValue()
    : _jsonSerializer.Deserialize<BlockListValue>(existingJson) ?? new BlockListValue();

// ... build or append blocks ...
// For culture-variant blocks, each expose entry must use the target culture instead of null:
// blockListValue.Expose.Add(new BlockItemVariation(contentKey, culture: targetCulture, segment: null));

page.SetValue(importModel.BlockListAlias, _jsonSerializer.Serialize(blockListValue), culture: targetCulture);
_contentService.Save(page);
_contentService.Publish(page, new[] { targetCulture });
```

{% hint style="warning" %}
Always pass the same culture string to both `GetValue()` and `SetValue()`. Omitting the culture from `GetValue()` reads the invariant slot, which is empty on a culture-variant property, causing existing blocks to be overwritten instead of appended.
{% endhint %}


# Checkbox List

`Schema Alias: Umbraco.CheckBoxList`

`UI Alias: Umb.PropertyEditorUi.CheckBoxList`

`Returns: IEnumerable<string>`

Displays a list of preset values as a list of checkbox controls. The text saved is an IEnumerable collection of the text values.

{% hint style="info" %}
Unlike other property editors, the Option IDs are not directly accessible in Razor.
{% endhint %}

## Data Type Definition Example

![True/Checkbox List Definition](/files/OzLns3hNy6clnEuYKGHF)

{% hint style="info" %}
You can use dictionary items to translate the options in a Checkbox List property editor in a multilingual setup. For more details, see the [Creating a Multilingual Site](/umbraco-cms/develop-with-umbraco/tutorials/multilanguage-setup#translating-multi-value-property-editors) article.
{% endhint %}

## Content Example

![Checkbox List Example](/files/a6QoK5wcqZlqyzRejsEZ)

## MVC View Example

### Without Models Builder

```csharp
@{
    if (Model.HasValue("superHeros"))
    {
        <ul>
            @foreach (var item in Model.Value<IEnumerable<string>>("superHeros"))
            {
                <li>@item</li>
            }
        </ul>
    }
}
```

### With Models Builder

```csharp
@{
    if (Model.SuperHeros.Any())
    {
        <ul>
            @foreach (var item in Model.SuperHeros)
            {
                <li>@item</li>
            }
        </ul>
    }
}
```

## Add values programmatically

See the example below to see how a value can be added or changed programmatically. To update a value of a property editor you need the [Content Service](https://apidocs.umbraco.com/v18/csharp/api/Umbraco.Cms.Core.Services.ContentService.html).

{% hint style="info" %}
The example below demonstrates how to add values programmatically using a Razor view. However, this is used for illustrative purposes only and is not the recommended method for production environments.
{% endhint %}

```csharp
@using Umbraco.Cms.Core.Serialization
@using Umbraco.Cms.Core.Services
@inject IContentService ContentService
@inject IJsonSerializer Serializer
@{
    // Create a variable for the GUID of the page you want to update
    var guid = Guid.Parse("32e60db4-1283-4caa-9645-f2153f9888ef");

    // Get the page using the GUID you've defined
    var content = ContentService.GetById(guid); // ID of your page

    // Set the value of the property with alias 'superHeroes'.
    content.SetValue("superHeroes", Serializer.Serialize(new[] { "Umbraco", "CodeGarden"}));

    // Save the change
    ContentService.Save(content);
}
```

Although the use of a GUID is preferable, you can also use the numeric ID to get the page:

```csharp
@{
    // Get the page using it's id
    var content = ContentService.GetById(1234);
}
```

If Models Builder is enabled you can get the alias of the desired property without using a magic string:

```csharp
@using Umbraco.Cms.Core.PublishedCache
@inject IPublishedContentTypeCache PublishedContentTypeCache
@{
    // Set the value of the property with alias 'superHeroes'
    content.SetValue(Home.GetModelPropertyType(PublishedContentTypeCache, x => x.SuperHeroes).Alias, Serializer.Serialize(new[] { "Umbraco", "CodeGarden"}));
}
```


# Code Editor

`Schema Alias: Umbraco.CodeEditor`

`UI Alias: Umb.PropertyEditorUi.CodeEditor`

`Returns: String`

The Code Editor property editor provides an interface for entering and editing code snippets. It offers features like syntax highlighting, line numbering, wrapping code and so on.

## Data Type Definition Example

![Code Editor definition example](/files/ECRDJUGVBbAXF63M0TCq)

## Configuration

The Code Editor can be configured with the following settings:

* **Language**: A dropdown to select the syntax highlighting and validation rules for the editor. Supported languages include `C#`, `CSS`, `HTML`, `JavaScript`, `JSON`, `Markdown`, `Razor (CSHTML)`, and `TypeScript`.
* **Height**: Allows you to specify the height of the editor in pixels (for example., 400px). This ensures the editor fits well within your content entry forms.
* **Line Numbers**: A toggle to enable or disable the line number on the left side of the editor.
* **Minimap**: A toggle to enable a high-level, zoomed-out visual overview of the code on the right side of the editor for faster navigation in long files.
* **Word Wrap**: A toggle that determines if long lines of code should wrap to the next line or require horizontal scrolling.

## Content Example

![Content Example](/files/Pqd56hmfEAkCiGaityUk)

## MVC View Example

### Without Models Builder

```csharp
@if (Model.HasValue("codeEditor"))
{
    var codeSnippet = Model.Value<string>("codeEditor");
    <pre><code>@codeSnippet</code></pre>
}
```

### With Modelsbuilder

```csharp
@if (Model != null && !string.IsNullOrEmpty(Model.CodeEditor))
{
    <pre><code>@Model.CodeEditor</code></pre>
}
```

## Add values programmatically

See the example below to see how a value can be added or changed programmatically. To update a value of a property editor you need the [Content Service](https://apidocs.umbraco.com/v18/csharp/api/Umbraco.Cms.Core.Services.ContentService.html).

{% hint style="info" %}
The example below demonstrates how to add values programmatically using a Razor view. However, this is used for illustrative purposes only and is not the recommended method for production environments.
{% endhint %}

```csharp
@using Umbraco.Cms.Core.Services;

@inject IContentService Services;
@{
    // Get access to ContentService
    var contentService = Services;

    // Create a variable for the GUID of your page
    var guid = new Guid("ca4249ed-2b23-4337-b522-63cabe5587d1");

    // Get the page using the GUID you've just defined
    var content = contentService.GetById(guid);

    // Define your code string
    string newCode = "body {\n  background-color: red;\n}";

    // Set the value of the property with alias 'codeEditor'
    content.SetValue("codeEditor", newCode);

    // Save the change
    contentService.Save(content);
}
```

Although the use of a GUID is preferable, you can also use the numeric ID to get the page:

```csharp
@{
    // Get the page using it's id
    var content = contentService.GetById(1234);
}
```


# Collection

`Schema Alias: Umbraco.ListView`

`UI Alias: Umb.PropertyEditorUi.Collection`

`Returns: IEnumerable<IPublishedContent>`

**Collection**/**List View** can be used on Document Types with children, to display those children as a collection in either a grid or a list.

![Collection example](/files/WSUWGMdrTEbDWLq8r4jn)

## Configure Collection

Once Collections are configured, the parent content item displays its child items in a list view format within the content item itself. If Collections are not configured, the child items are displayed directly in the Content Tree, rather than being grouped within the parent content item.

![Enable Collection example](/files/T8oU5fFxsYU1dfDeeMcY)

## Settings

![Collection settings example](/files/FGSQjezD1THsOnNtU9OK)

### Columns Displayed

It is possible to add more columns to the collection, via adding the properties through the picker modal. These properties are based on the Data Types which are used by the Document Type. The properties will listed for selection.

![Collection property picker example](/files/Y5xGa6ShkbLwg5rnYTtH)

Once you have selected a column you want to display, define what its heading label should be and what kind of value it should display. You can also move the headers around, re-ordering how they should look. This is done by the move icon on the left side of the alias.

The template section is where you define what kind of value you want to display. The value of the column is in the `value` variable.

### Layouts

Collection comes with two layouts by default. A list and a grid view. These views can be disabled if you are not interested in any of them.

{% hint style="info" %}
A minimum of one layout needs to be enabled for Collection to work.
{% endhint %}

You can also make your own layout and add it to the settings. For example, if you wanted to change the width or length of the grid, you will be able to do so.

### Order By

Will sort your collection by the selection you choose in the dropdown. By default it selects "Last edited" and you get the following three columns:

* **Last edited** - When the content node was last edited and saved.
* **Name** - Name of the content node(s).
* **Created by** - This is the user who the content node was created by.

You can add more sorting to this collection by adding more datatypes to the columns in the "Columns Displayed" section.

### Order Direction

You can select order of the content nodes displayed, "Ascending \[a-z]" or "Descending \[z-a]". The order is affected by the "Order By" selection.

### Page Size

Defines how many child content nodes you want to see per page. This will limit how many content items you will see in your collection. If you set it to 5, then only 5 content items will be shown in the collection.

### Workspace View icon

{% hint style="info" %}
Support for changing the Workspace View icon has not been implemented yet.
{% endhint %}

Changes the icon in the backoffice of the collection. By default it will look like the image below.

![Collection icon example](/files/dgI6pIyxaqJMItOmmnVr)

### Workspace View name

{% hint style="info" %}
Support for changing the Workspace View name has not been implemented yet.
{% endhint %}

You can change the name of the collection itself. Default if empty: 'Child Items'.

### Show Content Workspace View First

{% hint style="info" %}
Support for setting the Content Workspace View First has not been implemented yet.
{% endhint %}

Enable this to show the Content Workspace View by default instead of the collection's.

## Content Example

### Generic field value

This example shows how to use a generic field from a child item and display its value in a collection.

![Collection content email label template](/files/Rs7oElTukEsjoBZqX8HF)

You can use the [Umbraco Flavored Markdown](/umbraco-cms/model-your-content/property-editors/umbraco-flavored-markdown) syntax to display the label value. Here, the `{=value}` placeholder retrieves the value of the *Email* property and displays it in the collection, as shown in the image below:

![Collection content email value displayed](/files/0Uqn20T1sBRk56LrloZg)

### Content name

First, a Content Picker property needs to be present on the content item. In this example, the `child item` has gotten a Content Picker Data Type with the alias of `contentPicker`.

![Collection content picker](/files/qJV6wpcjCB6FCzDlBjwp)

The child item has a document and the value that should be displayed is the name of the picked value. The next step is to reconfigure the template value in the collection setting.

![Collection content picker](/files/uT8olD9EmEbQUFaA8Ky6)

This will take the value picked up by the content picker.

![Collection content picker with picked value](/files/VbI0135DNvDn2fA8IjOS)

And display it in the collection. Shown in the example below:

![Collection view cards with content picker value](/files/XY6PwrPLK4bL7ajUA7Ub)


# Color Picker

`Schema Alias: Umbraco.ColorPicker`

`UI Alias: Umb.PropertyEditorUi.ColorPicker`

`Returns: String (Hexadecimal)`

`Returns: Umbraco.Cms.Core.PropertyEditors.ValueConverters.ColorPickerValueConverter.PickedColor (When using labels)`

The Color picker allows you to set some predetermined colors that the editor can choose between.

It is possible to add a label to use with the color.

## Data Type Definition Example

![Color Picker Data Type Definition](/files/2eExsBkqnzMDX9UmFNhR)

## Content Example

![Color Picker Content](/files/pqsgNe0Vj3nbuGIuak1L)

## Example with Models Builder

```csharp
@{
     // Model has a property called "Color" which holds a Color Picker editor
    var hexColor = Model.Color;
    // Define the label if you've included it
    String colorLabel = Model.Color.Label;

    if (hexColor != null)
    {
        <div style="background-color: @hexColor">@colorLabel</div>
    }
}
```

## Example without Models Builder

```csharp
@using Umbraco.Cms.Core.PropertyEditors.ValueConverters
@{
    // Model has a property called "Color" which holds a Color Picker editor
    var hexColor = Model.Value("Color");
    // Define the label if you've included it
    var colorLabel = Model.Value<ColorPickerValueConverter.PickedColor>("Color").Label;

    if (hexColor != null)
    {
        <div style="background-color: @hexColor">@colorLabel</div>
    }
}
```

## Add values programmatically

See the example below to see how a value can be added or changed programmatically. To update a value of a property editor you need the [Content Service](https://apidocs.umbraco.com/v18/csharp/api/Umbraco.Cms.Core.Services.ContentService.html).

{% hint style="info" %}
The example below demonstrates how to add values programmatically using a Razor view. However, this is used for illustrative purposes only and is not the recommended method for production environments.
{% endhint %}

### Without labels

```csharp
@using Umbraco.Cms.Core.Services
@inject IContentService ContentService
@{
    // Create a variable for the GUID of the page you want to update
    var guid = Guid.Parse("32e60db4-1283-4caa-9645-f2153f9888ef");

    // Get the page using the GUID you've defined
    var content = ContentService.GetById(guid); // ID of your page

    // Set the value of the property with alias 'color'. 
    // The value set here, needs to be one of the colors on the Color Picker
    content.SetValue("color", "38761d");

    // Save the change
    ContentService.Save(content);
}
```

### With labels

```csharp
@using Umbraco.Cms.Core.Services
@inject IContentService ContentService
@{
    // Create a variable for the GUID of the page you want to update
    var guid = Guid.Parse("32e60db4-1283-4caa-9645-f2153f9888ef");

    // Get the page using the GUID you've defined
    var content = ContentService.GetById(guid); // ID of your page

    // Set the value of the property with alias 'color'. 
    // The value set here, needs to be one of the colors on the Color Picker
    content.SetValue("color", "{'value':'000000', 'label':'Black', 'sortOrder':1, 'id':'1'}");

    // Save the change
    ContentService.Save(content);
}
```

Although the use of a GUID is preferable, you can also use the numeric ID to get the page:

```csharp
@{
    // Get the page using it's id
    var content = ContentService.GetById(1234); 
}
```

If Models Builder is enabled you can get the alias of the desired property without using a magic string:

```csharp
@using Umbraco.Cms.Core.PublishedCache
@inject IPublishedContentTypeCache PublishedContentTypeCache
@{
    // Set the value of the property with alias 'color'
    content.SetValue(Home.GetModelPropertyType(PublishedContentTypeCache, x => x.Color).Alias, "38761d");
}
```


# Content Picker

`Schema Alias: Umbraco.ContentPicker`

`UI Alias: Umb.PropertyEditorUi.DocumentPicker`

`Returns: IEnumerable<IPublishedContent>`

The Content Picker enables choosing the type of content tree to display and which specific part to render. It also allows you to set a dynamic root node for the content based on the current document using the Content Picker.

{% hint style="info" %}
The Content Picker was formerly known as the **Multinode Treepicker** in version 13 and below.

The renaming is purely a client-side UI change, meaning the property editor still uses the `Umbraco.MultiNodeTreePicker` schema alias.

The change was made as the word **Content** in the backoffice acts as an umbrella term covering Documents, Media, and Members.

**Are you looking for the original Content Picker?**

The Content Picker from version 13 and below has been renamed [Document Picker](/umbraco-cms/model-your-content/property-editors/built-in-umbraco-property-editors/document-picker).
{% endhint %}

## Data Type Definition Example

![Content Picker Data Type Settings](/files/RnpAO7n9SkYgnDs81Msl)

### Minimum/maximum number of items

Define a limit on the number of items allowed to be selected.

### Ignore user start nodes

Checking this field allows users to choose nodes they normally cannot access.

### Node Type

This option allows for configuring what type of content is available when using the Data Type. The available types of content are Content, Members, or Media items.

When selecting Content from the dropdown, the option to specify a root node, also called the **origin**, becomes available.

<figure><img src="/files/zMzO7UMUxtKL7gulIlwX" alt=""><figcaption><p>The option to specify a root node also called the "origin" becomes available when Content is selected as the Node Type.</p></figcaption></figure>

When picking the **origin** there are several different options available:

<figure><img src="/files/j7btBBrzubbBV72HcMMC" alt=""><figcaption><p>The available options for setting a root node (origin) for the Content Picker.</p></figcaption></figure>

The following options are available when picking the origin:

* **Content Root**: The root of the content tree.
* **Root**: The root is the first level item of the sub-tree of the current node.
* **Parent**: The parent is the nearest ancestor of the current node.
* **Current**: The current node.
  * A picker that uses the current node, cannot pick anything when the current node is created, as it will not have any children.
* **Site**: The nearest ancestor of the current node with a domain assigned.
* **Specific node**: A specific node selected from the existing content.

When an origin has been specified, it becomes possible to continue to build a *Dynamic Root* by adding additional query steps.

Navigate the content tree relative to the specified origin to execute multiple query steps and find the root node needed.

![The default options for executing additional steps to locate the Dynamic Root.](/files/Q0F4wOrssNorj5MVZJlh)

The following options are available:

* **Nearest Ancestor or Self:** Find the nearest ancestor or current item that fits with one of the configured Document Types.
* **Furthest Ancestor or Self:** Find the furthest ancestor or current item that fits with one of the configured Document Types.
* **Nearest Descendant or Self:** Find the nearest descendant or current item that fits with one of the configured Document Types.
* **Furthest Descendant or Self:** Find the furthest descendant or current item that fits with one of the configured Document Types.

The options above are all based on navigating the document hierarchy by locating ancestors and descendants. It is possible to execute **custom steps** to build even more complex queries. Once a custom query is available it will be added to the bottom of the *Append steps to query* dialog. Learn more about [adding custom query steps in the section below](#adding-a-custom-query-step).

Each query step takes the output from the origin or the previous step as input. It is only ever the result of the last query step that is passed to the next step.

![Query steps appended to a Content Picker with the type Content.](/files/UTvwjVMV4x6ImqjddzT0)

#### Adding a custom query step

Custom query steps can be used to solve specific use cases, such as traversing sibling documents or matching property values. Before the custom query steps can be selected in the Data Type settings, they must be defined via code.

When implementing a query step it requires a collection of origins and information about the query step. The collection is taken from where the name specified in the UI can be found.

{% hint style="warning" %}
**Specifying the origin is required** for the custom query step to become available.

Read the [Node Type section](#node-type) above to learn more about this.
{% endhint %}

You can inject dependencies into the constructor. These dependencies could be custom repositories or the `IVariationContextAccessor`, if you want to use the current culture.

The `ExecuteAsync` method receives a set of content keys from the last executed query step or the origin. It has to return a new set of content keys.

```csharp
public class MyCustomDynamicRootQueryStep : IDynamicRootQueryStep
{
    private readonly IMyCustomRepository _myCustomRepository;

    public MyCustomDynamicRootQueryStep(IMyCustomRepository myCustomRepository)
    {
        _myCustomRepository = myCustomRepository;
    }

    // The string below is what you specify in the UI to execute this custom query step.
    public virtual string SupportedDirectionAlias { get; set; } = "MyCustomStep";

    public async Task<Attempt<ICollection<Guid>>> ExecuteAsync(ICollection<Guid> origins, DynamicRootQueryStep filter)
    {
        if (filter.Alias != SupportedDirectionAlias)
        {
            return Attempt<ICollection<Guid>>.Fail();
        }

        if (origins.Any() is false)
        {
            return Attempt<ICollection<Guid>>.Succeed(Array.Empty<Guid>());
        }

        // Replace the following with your custom logic
        var result = await _myCustomRepository.GetWhateverIWantAsync(origins);

        return Attempt<ICollection<Guid>>.Succeed(result);
    }
}
```

To register the custom query step, append it to the existing query steps, `DynamicRootSteps()`. This is done from a composer as shown below.

```csharp
public class CustomQueryStepComposer : IComposer
{
    public void Compose(IUmbracoBuilder builder)
    {
        builder.DynamicRootSteps().Append<MyCustomDynamicRootQueryStep>();
    }
}
```

Finally, register the custom query step on the client side and provide a brief description.

You can do this in an `umbraco-package.json` file, as shown below:

```json
{
  "$schema": "../../umbraco-package-schema.json",
  "name": "My.Test.Extension",
  "version": "0.1.0",
  "extensions": [
    {
      "type": "dynamicRootQueryStep",
      "alias": "Umb.DynamicRootQueryStep.MyCustomStep",
      "name": "Dynamic Root Query Step: My Custom Step",
      "meta": {
        "queryStepAlias": "MyCustomStep",
        "label": "My Custom Step",
        "description": "My custom step description.",
        "icon": "icon-coffee"
      },
      "weight": 0
    }
  ]
}
```

### Allow items of type

Choose which types of content should be available to pick using the Content Picker.

This is done by selecting one or more Document Types.

## Query Example

Consider the following tree structure where the Document Type alias is presented in square brackets.

* Codegarden
  * 2023 \[`year`]
    * Talks \[`talks`]
      * ...
      * Umbraco anno MMXXIII \[`talk`]
    * Stages \[`stages`]
      * Social Space \[`stage`]
      * No 10 \[`stage`]
      * No 16 \[`stage`]
      * The Theatre \[`stage`]
  * 2022 \[`year`]
    * Talks \[`talks`]
      * ...
    * Stages \[`stages`]
      * Main Stage \[`stage`]
      * The Barn \[`stage`]
      * The Theatre \[`stage`]

Consider configuring a Content Picker on the `talk` Document Type to select a `stage` for the `talk`. Here, you want to display only the stages for the actual year. To do this, you need to set the parent as the origin.

For instance, if you are on the `Umbraco anno MMXXIII` node, the collection of content keys passed into the first query step will only contain the `Talks` content node.

* First, query for the nearest ancestors of the type `year`. This will return `2023`.
* Second, query for the nearest descendants of the type `stages`.

When opening the picker on the `Umbraco anno MMXXIII` node, it will now show the children of the node on the path `Codegarden > 2023 > Stages`.

## MVC View Example

### Without Models Builder

```csharp
@{
    var typedContentPicker = Model.Value<IEnumerable<IPublishedContent>>("featuredArticles");
    if (typedContentPicker != null) {
        foreach (var item in typedContentPicker)
        {
            <p>@item.Name</p>
        }
}
```

### With Models Builder

```csharp
@{
    var typedContentPicker = Model.FeaturedArticles;
    foreach (var item in typedContentPicker)
    {
        <p>@item.Name</p>
    }
}
```

## Add values programmatically

See the example below to see how a value can be added or changed programmatically. To update the value of a property editor you need the [Content Service](https://apidocs.umbraco.com/v18/csharp/api/Umbraco.Cms.Core.Services.ContentService.html).

{% hint style="info" %}
The example below demonstrates how to add values programmatically using a Razor view. However, this is used for illustrative purposes only and is not the recommended method for production environments.
{% endhint %}

```csharp
@using Umbraco.Cms.Core
@using Umbraco.Cms.Core.Services
@inject IContentService ContentService
@{
    // Create a variable for the GUID of the page you want to update
    var guid = Guid.Parse("32e60db4-1283-4caa-9645-f2153f9888ef");

    // Get the page using the GUID you've defined
    var content = ContentService.GetById(guid); // ID of your page

    // Get the pages you want to assign to the Content Picker
    var page = Umbraco.Content("665d7368-e43e-4a83-b1d4-43853860dc45");
    var anotherPage = Umbraco.Content("1f8cabd5-2b06-4ca1-9ed5-fbf14d300d59");

    // Create Udi's of the pages
    var pageUdi = Udi.Create(Constants.UdiEntityType.Document, page.Key);
    var anotherPageUdi = Udi.Create(Constants.UdiEntityType.Document, anotherPage.Key);

    // Create a list of the page udi's
    var udis = new List<string>{pageUdi.ToString(), anotherPageUdi.ToString()};

    // Set the value of the property with alias 'featuredArticles'.
    content.SetValue("featuredArticles", string.Join(",", udis));

    // Save the change
    ContentService.Save(content);
}
```

Although the use of a GUID is preferable, you can also use the numeric ID to get the page:

```csharp
@{
    // Get the page using it's id
    var content = ContentService.GetById(1234);
}
```

If Models Builder is enabled you can get the alias of the desired property without using a magic string:

```csharp
@using Umbraco.Cms.Core.PublishedCache
@inject IPublishedContentTypeCache PublishedContentTypeCache
@{
    // Set the value of the property with alias 'featuredArticles'
    content.SetValue(Home.GetModelPropertyType(PublishedContentTypeCache, x => x.FeaturedArticles).Alias, string.Join(",", udis));
}
```


# Date Time Editors

The Date Time property editors provide interfaces for selecting dates, times, and time zones. Each editor is designed for specific use cases, from basic date selection to comprehensive date/time handling with time zone support.

{% hint style="info" %}
These property editors replace the legacy [`Date Time`](/umbraco-cms/model-your-content/property-editors/built-in-umbraco-property-editors/date-time) property editor. They offer more focused functionality and specific return types (such as `DateOnly`, `TimeOnly`, `DateTime`, or `DateTimeOffset`). You can switch from the legacy Date Time editor by changing your properties to use the new editors.
{% endhint %}

Umbraco CMS currently ships with four Date Time editors:

| Editor                                                                                                                                                     | Purpose                                   | Use Cases                                                                                                                                  | Return Type      | Preview                                                         |
| ---------------------------------------------------------------------------------------------------------------------------------------------------------- | ----------------------------------------- | ------------------------------------------------------------------------------------------------------------------------------------------ | ---------------- | --------------------------------------------------------------- |
| [Date Only](/umbraco-cms/model-your-content/property-editors/built-in-umbraco-property-editors/date-time-editor/date-only)                                 | Date selection                            | Birthdays, deadlines, event dates                                                                                                          | `DateOnly`       | ![Date Only editor](/files/Q2Mlk5kxcI8LutlReV3I)                |
| [Time Only](/umbraco-cms/model-your-content/property-editors/built-in-umbraco-property-editors/date-time-editor/time-only)                                 | Time selection                            | Business hours, schedules, time-based events                                                                                               | `TimeOnly`       | ![Time Only editor](/files/7KhX7yfq01UDR52K8ZEg)                |
| [Date Time (with Time Zone)](/umbraco-cms/model-your-content/property-editors/built-in-umbraco-property-editors/date-time-editor/date-time-with-time-zone) | Full date, time, and time zone support    | International apps, timezone-aware scheduling                                                                                              | `DateTimeOffset` | ![Date Time with Time Zone editor](/files/cKEQqWNMQBRDWpzS4hNM) |
| [Date Time (Unspecified)](/umbraco-cms/model-your-content/property-editors/built-in-umbraco-property-editors/date-time-editor/date-time-unspecified)       | Date and time without a defined time zone | Local events, compatibility with [Date Time](/umbraco-cms/model-your-content/property-editors/built-in-umbraco-property-editors/date-time) | `DateTime`       | ![Date Time Unspecified editor](/files/t6vFR3rkEiTijU3oyyZS)    |


# Date Only

`Schema Alias: Umbraco.DateOnly`

`UI Alias: Umb.PropertyEditorUi.DateOnlyPicker`

`Returns: DateOnly?`

The Date Only property editor provides an interface for selecting dates without including time or time zone information. It focuses purely on date selection and returns a `DateOnly` value.

## Configuration

You can configure this property editor in the same way as any standard property editor, using the *Data Types* admin interface.

To set up a property using this editor, create a new *Data Type* and select **Date Only** from the list of available property editors.

This editor has no configuration options.

## Editing experience

### Adding or editing a value

You will be presented with a date input.

![Date Only property editor interface](/files/7nciZbq327vUOpbS5mM9)

## Rendering

The value returned will have the type `DateOnly?`.

### Display the value

With Models Builder:

```csharp
@Model.EventDate
```

Without Models Builder:

```csharp
@Model.Value<DateOnly?>("eventDate")
```

## Add values programmatically

This property editor stores values as a JSON object. The object contains the date as an ISO 8601 string with midnight time and UTC offset.

### Storage format

The property editor stores values in this JSON format:

```json
{
    "date": "2025-01-01T00:00:00+00:00"
}
```

The property editor handles date-only values. Time is set to 00:00:00 and offset to +00:00 for storage consistency. These time components are ignored in the Date Only context.

1. Create a C# model that matches the JSON schema.

   ```csharp
   using System.Text.Json.Serialization;

   namespace UmbracoProject;

   public class DateOnlyValue
   {
       /// <summary>
       /// The date value, represented as a <see cref="DateTimeOffset"/> for storage compatibility.
       /// </summary>
       [JsonPropertyName("date")]
       public DateTimeOffset Date { get; init; }
   }
   ```
2. Convert your existing date value to `DateTimeOffset` for storage.

   If you have a `DateOnly`:

   ```csharp
   DateOnly dateOnly = DateOnly.FromDateTime(DateTime.Today); // Your existing DateOnly value
   DateTimeOffset dateTimeOffset = dateOnly.ToDateTime(TimeOnly.MinValue);
   ```

   If you have a `DateTime`:

   ```csharp
   DateTime dateTime = DateTime.Today; // Your existing DateTime value
   DateOnly dateOnly = DateOnly.FromDateTime(dateTime);
   DateTimeOffset dateTimeOffset = dateOnly.ToDateTime(TimeOnly.MinValue);
   ```
3. Create an instance of the class with the `DateTimeOffset` value.

   ```csharp
   DateOnlyValue value = new DateOnlyValue
   {
       Date = dateTimeOffset
   };
   ```
4. Inject the `IJsonSerializer` and use it to serialize the object.

   ```csharp
   string jsonValue = _jsonSerializer.Serialize(value);
   ```
5. Inject the `IContentService` to retrieve and update the value of a property of the desired content item.

   ```csharp
   IContent content = _contentService.GetById(contentKey) ?? throw new Exception("Content not found");

   // Set the value of the property with alias 'eventDate'. 
   content.SetValue("eventDate", jsonValue);

   // Save the change
   _contentService.Save(content);
   ```

### Getting values programmatically

For an example on how to work with `DateOnly` property using `IContentService` see the [Getting date values programmatically](/umbraco-cms/extend-your-project/server-side-extensions/management/using-services/contentservice#getting-date-values-programmatically) article.


# Time Only

`Schema Alias: Umbraco.TimeOnly`

`UI Alias: Umb.PropertyEditorUi.TimeOnlyPicker`

`Returns: TimeOnly?`

The Time Only property editor provides an interface for selecting times. It excludes date and time zone information, and returns strongly-typed `TimeOnly` values.

## Configuration

You can configure this property editor in the same way as any standard property editor, using the *Data Types* admin interface.

To set up a property using this editor, create a new *Data Type* and select **Time Only** from the list of available property editors.

You will see the configuration options as shown below.

![Time Only property editor configuration](/files/b1xemf7qaQUNToyFDHu0)

* **Time format** - Specifies the level of precision for time values shown and stored by the editor.

### Time format

* **HH:mm** - Displays hours and minutes (e.g., `14:30`).\
  Suitable for most general use cases.\
  ![Time Only property editor showing time format in HH:mm format (hours and minutes only)](/files/7KhX7yfq01UDR52K8ZEg)
* **HH**:flag\_mm:**ss** - Displays hours, minutes, and seconds (e.g., `14:30:45`).\
  Use this when you need more precise timing.\
  ![Time Only property editor showing time format in HH:mm:ss format (hours, minutes, and seconds)](/files/4FVu3ex1mn6XWPL0kxPN)

## Editing experience

### Adding or editing a value

You will be presented with a time input. Unlike date-time editors, this editor focuses only on the time component.

![Time Only property editor interface](/files/QbjP3Lxi2BCoICJrSi9p)

## Rendering

The value returned will have the type `TimeOnly?`.

### Display the value

With Models Builder:

```csharp
@Model.StartHours
```

Without Models Builder:

```csharp
@Model.Value<TimeOnly?>("startHours")
```

## Add values programmatically

This property editor stores values as a JSON object. The object contains the time as an ISO 8601 string with a default date and UTC offset.

### Storage format

The property editor stores values in this JSON format:

```json
{
    "date": "0001-01-01T14:30:00+00:00"
}
```

The property editor handles time-only values. Date is set to a default value (0001-01-01) and offset to +00:00 for storage consistency. The date component is ignored in the Time Only context.

1. Create a C# model that matches the JSON schema.

   ```csharp
   using System.Text.Json.Serialization;

   namespace UmbracoProject;

   public class TimeOnlyValue
   {
       /// <summary>
       /// The time value, represented as a <see cref="DateTimeOffset"/> for storage compatibility.
       /// </summary>
       [JsonPropertyName("date")]
       public DateTimeOffset Date { get; init; }
   }
   ```
2. Convert your existing time value to `DateTimeOffset` for storage.

   If you have a `TimeOnly`:

   ```csharp
   TimeOnly timeOnly = TimeOnly.FromDateTime(DateTime.Now); // Your existing TimeOnly value
   DateTimeOffset dateTimeOffset = new DateTimeOffset(DateOnly.MinValue, timeOnly, TimeSpan.Zero);
   ```

   If you have a `DateTime`:

   ```csharp
   DateTime dateTime = DateTime.Now; // Your existing DateTime value
   TimeOnly timeOnly = TimeOnly.FromDateTime(dateTime);
   DateTimeOffset dateTimeOffset = new DateTimeOffset(DateOnly.MinValue, timeOnly, TimeSpan.Zero);
   ```
3. Create an instance of the class with the `DateTimeOffset` value.

   ```csharp
   TimeOnlyValue value = new TimeOnlyValue
   {
       Date = dateTimeOffset
   };
   ```
4. Inject the `IJsonSerializer` and use it to serialize the object.

   ```csharp
   string jsonValue = _jsonSerializer.Serialize(value);
   ```
5. Inject the `IContentService` to retrieve and update the value of a property of the desired content item.

   ```csharp
   IContent content = _contentService.GetById(contentKey) ?? throw new Exception("Content not found");

   // Set the value of the property with alias 'startHours'. 
   content.SetValue("startHours", jsonValue);

   // Save the change
   _contentService.Save(content);
   ```


# Date Time (with Time Zone)

`Schema Alias: Umbraco.DateTimeWithTimeZone`

`UI Alias: Umb.PropertyEditorUi.DateTimeWithTimeZonePicker`

`Returns: DateTimeOffset?`

The Date Time with Time Zone property editor provides a comprehensive interface for selecting dates, times, and time zones. It stores values as ISO 8601 date/time strings with time zone information. This makes it ideal for applications that need accurate date handling across different time zones.

## Configuration

You can configure this property editor in the same way as any standard property editor, using the *Data Types* admin interface.

To set up a property using this editor, create a new *Data Type*. Select **Date Time (with time zone)** from the list of available property editors.

You will see the configuration options as shown below.

![Date Time with Time Zone property editor configuration](/files/QIGoRF9JDEp32SbilLXD)

* **Time format** - Specifies the level of precision for time values shown and stored by the editor.
* **Time zones** - Controls how time zones are available in the property editor.

### Time format

* **HH:mm** - Displays hours and minutes (e.g., `14:30`).\
  Suitable for most general use cases.\
  ![Date Time with Time Zone property editor showing time format in HH:mm format (hours and minutes only)](/files/t6vFR3rkEiTijU3oyyZS)
* **HH**:flag\_mm:**ss** - Displays hours, minutes, and seconds (e.g., `14:30:45`).\
  Use this when you need more precise timing.\
  ![Date Time with Time Zone property editor showing time format in HH:mm:ss format (hours, minutes, and seconds)](/files/1o0B6UcjQRRGHyc5xXFh)

### Time zones

* **All** - Displays the full list of [Internet Assigned Numbers Authority (IANA)](https://www.iana.org/time-zones) time zones (for example, `America/New_York`, `Europe/Stockholm`).
* **Local** - Displays only the local time zone of the user's browser/computer. Useful for simplifying the UI when time entries should always be based on the user’s local context.
* **Custom** - Allows you to define a list of time zones. When you select this option, a dropdown appears. You can search and select from the full IANA time zone list. Add multiple zones to restrict user selection to only the zones you specify.
  * Example:\
    Selecting the following time zones:
    * `Coordinated Universal Time (UTC)`
    * `Europe/Copenhagen`\
      Will result in the following editing experience:\
      ![Date Time with Time Zone property editor showing custom time zone selection with UTC and Europe/Copenhagen options](/files/QhQZmcF2KVvl9Ub4MAt7)

The selected time zone affects how the date/time is displayed and stored.\
When you select a time zone, the value will be saved with the corresponding offset (e.g., `2025-01-01T14:30:00+01:00`).\
Daylight saving time is also taken into account.

## Editing experience

### Adding or editing a value

You will be presented with date, time, and time zone inputs. The time zone input allows typing, which filters the list of presented time zones.

![Date Time with Time Zone property editor showing time zone dropdown with filtering functionality as user types](/files/b05ZdUeuS1fYQeXtekjV)

If your browser time zone appears in the list and no date is stored yet, it will be pre-selected by default.

When you select a time zone different from your browser's local time zone, the editor displays a helpful conversion message. This shows what the selected date and time would be equivalent to in your local time zone, making it easier to understand the time difference.

If only one time zone is available, you will see a label with the time zone name instead.

![Date Time with Time Zone property editor displaying a single time zone as a static label instead of dropdown](/files/Cv2iUU9ytnWlIrKy9gCD)

## Rendering

The value returned will have the type `DateTimeOffset?`. This allows you to work with the date/time value while preserving time zone information.

### Display the value

With Models Builder:

```csharp
@Model.EventDateTime.Value
```

Without Models Builder:

```csharp
@Model.Value<DateTimeOffset?>("eventDateTime")
```

### Value conversions

Convert to local time:

```csharp
DateTimeOffset? localTime = Model.EventDateTime?.ToLocalTime();
```

Convert to UTC time:

```csharp
DateTimeOffset? utcTime = Model.EventDateTime?.ToUniversalTime();
```

Convert to DateTime:

```csharp
DateTime? dateTime = Model.EventDateTime?.DateTime;
DateTime? utcDateTime = Model.EventDateTime?.UtcDateTime;
```

## Add values programmatically

This property editor stores values as a JSON object. The object contains both the date (as an ISO 8601 string) and the selected [IANA](https://www.iana.org/time-zones) time zone identifier.

### Storage format

The property editor stores values in this JSON format:

```json
{
    "date": "2025-01-01T00:01:00+01:00",
    "timeZone": "Europe/Copenhagen"
}
```

1. Create a C# model that matches the JSON schema.

   ```csharp
   using System.Text.Json.Serialization;

   namespace UmbracoProject;

   public class DateTimeWithTimeZone
   {
       /// <summary>
       /// The date and time value, represented as a <see cref="DateTimeOffset"/>.
       /// </summary>
       [JsonPropertyName("date")]
       public DateTimeOffset Date { get; init; }

       /// <summary>
       /// The identifier of the time zone to pre-select in the editor. E.g., "Europe/Copenhagen".
       /// </summary>
       [JsonPropertyName("timeZone")]
       public string TimeZone { get; init; }
   }
   ```
2. Create an instance of the created class with the desired values.

   ```csharp
   var value = new DateTimeWithTimeZone
   {
       Date = DateTimeOffset.Now, // The date and time value to store.
       TimeZone = "Europe/Copenhagen" // The time zone to pre-select in the editor.
   };
   ```
3. Inject the `IJsonSerializer` and use it to serialize the object.

   ```csharp
   var jsonValue = _jsonSerializer.Serialize(value);
   ```
4. Inject the `IContentService` to retrieve and update the value of a property of the desired content item.

   ```csharp
   IContent content = _contentService.GetById(contentKey) ?? throw new Exception("Content not found");

   // Set the value of the property with alias 'eventDateTime'. 
   content.SetValue("eventDateTime", jsonValue);

   // Save the change
   _contentService.Save(content);
   ```

### Getting values programmatically

For an example on how to work with a date property using `IContentService` see the [Getting date values programmatically](/umbraco-cms/extend-your-project/server-side-extensions/management/using-services/contentservice#getting-date-values-programmatically) article.


# Date Time (Unspecified)

`Schema Alias: Umbraco.DateTimeUnspecified`

`UI Alias: Umb.PropertyEditorUi.DateTimePicker`

`Returns: DateTime?`

The Date Time (Unspecified) property editor provides an interface for selecting dates and times without including time zone information.

## Configuration

You can configure this property editor in the same way as any standard property editor, using the *Data Types* admin interface.

To set up a property using this editor, create a new *Data Type* and select **Date Time (Unspecified)** from the list of available property editors.

You will see the configuration options as shown below.

![Date Time Unspecified property editor configuration](/files/gpq4XNXSdF8kjOw2Vy8V)

* **Time format** - Specifies the level of precision for time values shown and stored by the editor.

### Time format

* **HH:mm** - Displays hours and minutes (e.g., `14:30`).\
  Suitable for most general use cases.\
  ![Date Time Unspecified property editor showing time format in HH:mm format (hours and minutes only)](/files/t6vFR3rkEiTijU3oyyZS)
* **HH**:flag\_mm:**ss** - Displays hours, minutes, and seconds (e.g., `14:30:45`).\
  Use this when you need more precise timing.\
  ![Date Time Unspecified property editor showing time format in HH:mm:ss format (hours, minutes, and seconds)](/files/1o0B6UcjQRRGHyc5xXFh)

## Editing experience

### Adding or editing a value

You will be presented with a date and time input. This editor focuses only on the date and time components, unlike the time zone version.

![Date Time Unspecified property editor interface](/files/6wUsvuuh87G6yrSees13)

## Rendering

The value returned will have the type `DateTime?`.

### Display the value

With Models Builder:

```csharp
@Model.EventDateTime.Value
```

Without Models Builder:

```csharp
@Model.Value<DateTime?>("eventDateTime")
```

## Add values programmatically

This property editor stores values as a JSON object. The object contains the date as an ISO 8601 string.

### Storage format

The property editor stores values in this JSON format:

```json
{
    "date": "2025-01-01T00:00:00+00:00"
}
```

The property editor handles unspecified date and time values without time zone information. The value is stored with offset +00:00 for consistency. The offset is ignored unless you replace this editor with the Date Time (with time zone) version.

1. Create a C# model that matches the JSON schema.

   ```csharp
   using System.Text.Json.Serialization;

   namespace UmbracoProject;

   public class DateTimeUnspecified
   {
       /// <summary>
       /// The date and time value, represented as a <see cref="DateTimeOffset"/> for storage compatibility.
       /// </summary>
       [JsonPropertyName("date")]
       public DateTimeOffset Date { get; init; }
   }
   ```
2. Convert your existing DateTime value to `DateTimeOffset` for storage.

   ```csharp
   DateTime dateTime = DateTime.Now; // Your existing DateTime value
   DateTimeOffset dateTimeOffset = dateTime; // Explicit conversion
   ```
3. Create an instance of the class with the `DateTimeOffset` value.

   ```csharp
   var value = new DateTimeUnspecified
   {
       Date = dateTimeOffset
   };
   ```
4. Inject the `IJsonSerializer` and use it to serialize the object.

   ```csharp
   string jsonValue = _jsonSerializer.Serialize(value);
   ```
5. Inject the `IContentService` to retrieve and update the value of a property of the desired content item.

   ```csharp
   IContent content = _contentService.GetById(contentKey) ?? throw new Exception("Content not found");

   // Set the value of the property with alias 'eventDateTime'. 
   content.SetValue("eventDateTime", jsonValue);

   // Save the change
   _contentService.Save(content);
   ```

### Getting values programmatically

For an example on how to work with a date property using `IContentService` see the [Getting date values programmatically](/umbraco-cms/extend-your-project/server-side-extensions/management/using-services/contentservice#getting-date-values-programmatically) article.


# Date Picker

`Schema Alias: Umbraco.DateTime`

`UI Alias: Umb.PropertyEditorUi.DatePicker`

`Returns: DateTime`

Displays a calendar UI for selecting dates which are saved as a DateTime value.

{% hint style="info" %}
New [Date Time property editors](/umbraco-cms/model-your-content/property-editors/built-in-umbraco-property-editors/date-time-editor) are available. They offer more focused functionality and time zone support. These editors will eventually replace the current Date Time property editor, so consider using them for new implementations.
{% endhint %}

## Data Type Definition Example

![Data Type Definiton](/files/gpJYhgKbam0BlrnXlXPo)

There is one setting available for manipulating the DateTime property.

The setting involves defining the format. The default date format in the Umbraco backoffice is `YYYY-MM-DD HH:mm:ss`, but you can change it to a different format. See [MomentJS.com](https://momentjs.com/) for the supported formats.

## Content Example

![Content Example](/files/1p8hRVbiWtAUls4k9mdI)

## MVC View Example - displays a datetime

### With Models Builder

```csharp
@Model.DatePicker
```

### Without Models Builder

```csharp
@Model.Value("datePicker")
```

## Add values programmatically

See the example below to see how a value can be added or changed programmatically. To update a value of a property editor you need the [Content Service](https://apidocs.umbraco.com/v18/csharp/api/Umbraco.Cms.Core.Services.ContentService.html).

{% hint style="info" %}
The example below demonstrates how to add values programmatically using a Razor view. However, this is used for illustrative purposes only and is not the recommended method for production environments.
{% endhint %}

```csharp
@using Umbraco.Cms.Core.Services
@inject IContentService ContentService
@{
    // Create a variable for the GUID of the page you want to update
    var guid = new Guid("32e60db4-1283-4caa-9645-f2153f9888ef");

    // Get the page using the GUID you've defined
    var content = ContentService.GetById(guid); // ID of your page

    // Set the value of the property with alias 'datePicker'
    content.SetValue("datePicker", DateTime.Now);

    // Save the change
    ContentService.Save(content);
}
```

Although the use of a GUID is preferable, you can also use the numeric ID to get the page:

```csharp
@{
    // Get the page using it's id
    var content = ContentService.GetById(1234); 
}
```

If Models Builder is enabled you can get the alias of the desired property without using a magic string:

```csharp
@using Umbraco.Cms.Core.PublishedCache
@inject IPublishedContentTypeCache PublishedContentTypeCache
@{

    // Set the value of the property with alias 'datePicker'
    content.SetValue(Home.GetModelPropertyType(PublishedContentTypeCache, x => x.DatePicker).Alias, DateTime.Now);
}
```


# Decimal

`Schema Alias: Umbraco.Decimal`

`UI Alias: Umb.PropertyEditorUi.Decimal`

`Returns: decimal`

## Data Type Definition Example

![Decimal Content Example](/files/TvV4GdCSvwyv1JaqwVOU)

In the example above the possible values for the input field would be \[8, 8.5, 9, 9.5, 10]

*All other values will be removed in the content editor when saving or publishing.*

If the value of **Step Size** is not set then all decimal values between 8 and 10 is possible to input in the content editor.

## Content Example

![Content Example](/files/mvjsKb2y3f5OH7KMTnuT)

## MVC View Example

### With Models Builder

```csharp
@Model.MyDecimal
```

### Without Models Builder

```csharp
@Model.Value("MyDecimal")
```

## Add values programmatically

See the example below to see how a value can be added or changed programmatically. To update a value of a property editor you need the [Content Service](https://apidocs.umbraco.com/v18/csharp/api/Umbraco.Cms.Core.Services.ContentService.html).

{% hint style="info" %}
The example below demonstrates how to add values programmatically using a Razor view. However, this is used for illustrative purposes only and is not the recommended method for production environments.
{% endhint %}

```csharp
@using Umbraco.Cms.Core.Services
@inject IContentService ContentService
@{
    // Create a variable for the GUID of the page you want to update
    var guid = Guid.Parse("32e60db4-1283-4caa-9645-f2153f9888ef");

    // Get the page using the GUID you've defined
    var content = ContentService.GetById(guid); // ID of your page

    // Set the value of the property with alias 'myDecimal'. 
    content.SetValue("myDecimal", 3);

    // Save the change
    ContentService.Save(content);
}
```

Although the use of a GUID is preferable, you can also use the numeric ID to get the page:

```csharp
@{
    // Get the page using it's id
    var content = ContentService.GetById(1234); 
}
```

If Models Builder is enabled you can get the alias of the desired property without using a magic string:

```csharp
@using Umbraco.Cms.Core.PublishedCache
@inject IPublishedContentTypeCache PublishedContentTypeCache
@{
    // Set the value of the property with alias 'myDecimal'
    content.SetValue(Home.GetModelPropertyType(PublishedContentTypeCache, x => x.MyDecimal).Alias, 3);
}
```


# Document Picker

`Schema Alias: Umbraco.ContentPicker`

`UI Alias: Umb.PropertyEditorUi.DocumentPicker`

`Returns: IPublishedContent`

The Document Picker opens a panel to pick a specific page from the content structure. The value saved is the selected nodes [UDI](/umbraco-cms/develop-with-umbraco/templating-and-rendering/querying/udi-identifiers).

{% hint style="info" %}
The Document Picker was formerly known as the **Content Picker** in version 13 and below.

The renaming is purely a client-side UI change, meaning the property editor still uses the `Umbraco.ContentPicker` schema alias.

The change was made as the word **Content** in the backoffice acts as an umbrella term covering the terms Document, Media, and Member.
{% endhint %}

## Data Type Definition Example

![Document Picker Data Type Definition](/files/upXOvgtIfDze0bul1MrH)

## Document Picker Example

![Document Picker Content](/files/h1zGm34TYeQYqk4hXk0o)

## MVC View Example

### Without Models Builder

```csharp
@{
    IPublishedContent typedContentPicker = Model.Value<IPublishedContent>("featurePicker");
    if (typedContentPicker != null)
    {
        <p>@typedContentPicker.Name</p>
    }
}
```

### With Models Builder

```csharp
@{
    IPublishedContent typedContentPicker = Model.FeaturePicker;
    if (typedContentPicker != null)
    {
        <p>@typedContentPicker.Name</p>
    }
}
```

## Add values programmatically

See the example below to see how a value can be added or changed programmatically. To update a value of a property editor you need the [Content Service](https://apidocs.umbraco.com/v18/csharp/api/Umbraco.Cms.Core.Services.ContentService.html).

{% hint style="info" %}
The example below demonstrates how to add values programmatically using a Razor view. However, this is used for illustrative purposes only and is not the recommended method for production environments.
{% endhint %}

```csharp
@using Umbraco.Cms.Core
@using Umbraco.Cms.Core.Services
@inject IContentService ContentService
@{
    // Create a variable for the GUID of the page you want to update
    var guid = Guid.Parse("32e60db4-1283-4caa-9645-f2153f9888ef");

    // Get the page using the GUID you've defined
    var content = ContentService.GetById(guid); // ID of your page

    // Get the page you want to assign to the document picker
    var page = Umbraco.Content("665d7368-e43e-4a83-b1d4-43853860dc45");

    // Create an Udi of the page
    var udi = Udi.Create(Constants.UdiEntityType.Document, page.Key);

    // Set the value of the property with alias 'featurePicker'.
    content.SetValue("featurePicker", udi.ToString());

    // Save the change
    ContentService.Save(content);
}
```

Although the use of a GUID is preferable, you can also use the numeric ID to get the page:

```csharp
@{
    // Get the page using it's id
    var content = ContentService.GetById(1234);
}
```

If Models Builder is enabled you can get the alias of the desired property without using a magic string:

```csharp
@using Umbraco.Cms.Core.PublishedCache
@inject IPublishedContentTypeCache PublishedContentTypeCache
@{
    // Set the value of the property with alias 'featurePicker'
    content.SetValue(Home.GetModelPropertyType(PublishedContentTypeCache, x => x.FeaturePicker).Alias, udi.ToString());
}
```


# Dropdown

`Schema Alias: Umbraco.DropDown.Flexible`

`UI Alias: Umb.PropertyEditorUi.Dropdown`

`Returns: String` or `IEnumerable<string>`

Displays a list of preset values. Either a single value or multiple values (formatted as a collection of strings) can be returned.

## Settings

### Enable multiple choice

If enabled, editors will be able to select multiple values from the dropdown otherwise only a single value can be selected.

### Add options

Options are the values which are shown in the dropdown list. You can add, edit, or remove values here.

{% hint style="info" %}
You can use dictionary items to translate the options in a Dropdown property editor in a multilingual setup. For more details, see the [Creating a Multilingual Site](/umbraco-cms/develop-with-umbraco/tutorials/multilanguage-setup#translating-multi-value-property-editors) article.
{% endhint %}

## Data Type Definition Example

![Dropdown-data-type](/files/zFDf0kHAr8moRZ12cs5J)

## Content Example

### Single Value

![Single dropdown content example](/files/7hPklO5CGfyH45FtJyVM)

### Multiple Values

![Multiple dropdown content example](/files/kn4g7uDE8xMISJ8Qq1rr)

## MVC View Example

### Single item - without Models Builder

```csharp
@if (Model.HasValue("category"))
{
    <p>@(Model.Value<string>("category"))</p>
}
```

### Multiple items - without Models Builder

```csharp
@if (Model.HasValue("categories"))
{
    var categories = Model.Value<IEnumerable<string>>("categories");
    <ul>
        @foreach (var category in categories)
        {
            <li>@category</li>
        }
    </ul>
}
```

### Single item - with Models Builder

```csharp
@if (!Model.HasValue(Model.Category))
{
   <p>@Model.Category</p>
}
```

### Multiple items - with Models Builder

```csharp
@if (Model.Categories.Any())
{
    <ul>
        @foreach (var category in Model.Categories)
        {
            <li>@category</li>
        }
    </ul>
}
```

## Add values programmatically

See the example below to see how a value can be added or changed programmatically. To update a value of a property editor you need the [Content Service](https://apidocs.umbraco.com/v18/csharp/api/Umbraco.Cms.Core.Services.ContentService.html).

{% hint style="info" %}
The example below demonstrates how to add values programmatically using a Razor view. However, this is used for illustrative purposes only and is not the recommended method for production environments.
{% endhint %}

```csharp
@using Umbraco.Cms.Core.Serialization
@using Umbraco.Cms.Core.Services
@inject IContentService ContentService
@inject IJsonSerializer Serializer
@{
    // Create a variable for the GUID of the page you want to update
    var guid = Guid.Parse("32e60db4-1283-4caa-9645-f2153f9888ef");

    // Get the page using the GUID you've defined
    var content = ContentService.GetById(guid); // ID of your page

    // Set the value of the property with alias 'categories'. 
    content.SetValue("categories", Serializer.Serialize(new[] { "News" }));

    // Save the change
    ContentService.Save(content);
}
```

Although the use of a GUID is preferable, you can also use the numeric ID to get the page:

```csharp
@{
    // Get the page using it's id
    var content = ContentService.GetById(1234); 
}
```

If Models Builder is enabled you can get the alias of the desired property without using a magic string:

```csharp
@using Umbraco.Cms.Core.PublishedCache
@inject IPublishedContentTypeCache PublishedContentTypeCache
@{
    // Set the value of the property with alias 'categories'
    content.SetValue(Home.GetModelPropertyType(PublishedContentTypeCache, x => x.Categories).Alias, Serializer.Serialize(new[] { "News" }));
}
```


---

[Next Page](/llms-full.txt/1)